Wednesday June 27, 2007
Wednesday June 27, 2007
An Old Favorite Is Reborn...
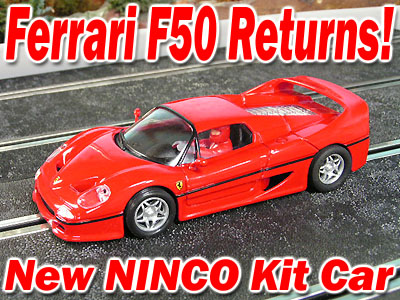
It seems like yesterday when I acquired my first NINCO Ferrari F50 slot car. In truth it was 2001 and I purchased it because it would be a good running mate to go with the NINCO McLaren F1 GTR. I was right too as this car had very good balance and control and I enjoyed it very much. Sadly, not many of them were produced and I ended up with only one. Fast forward to 2007 and here is the Ferrari once more, and in kit form as a bonus.
Not everyone appreciates these new kits that seem to be coming more and more in our hobby, but I do. Given that we do perform various levels of tuning to our slot cars, having them in kit form just saves us a little time. Our box arrived safe and sound from MRC and it was time to assemble this famous Ferrari and see what she could on the track.
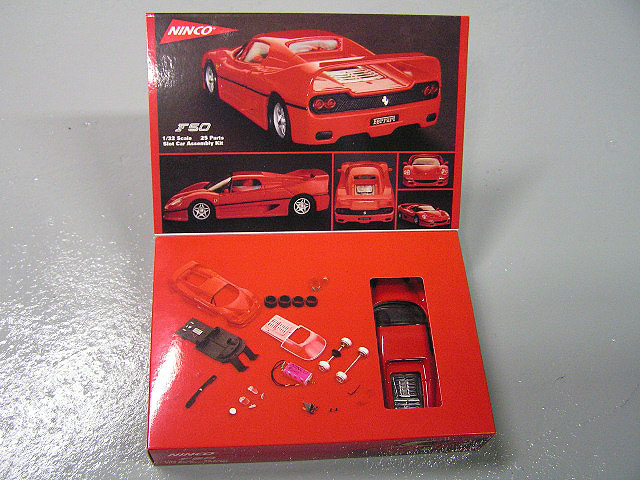
Inside the box you will find all the parts you need to assemble your slot car. I really like the box that the small parts comes in as it can be used to store other items you might need while at your local track. Plenty of different gears, wheels and tires along with braid, wire and even a small oil bottle will fit in here nicely.

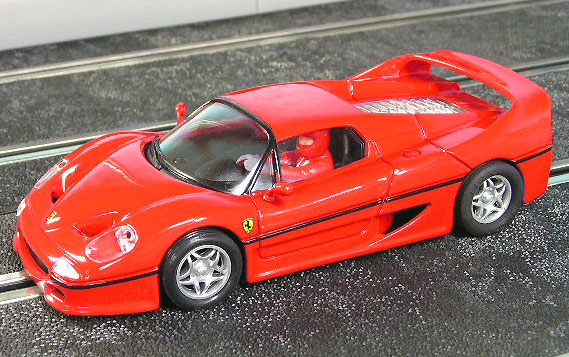
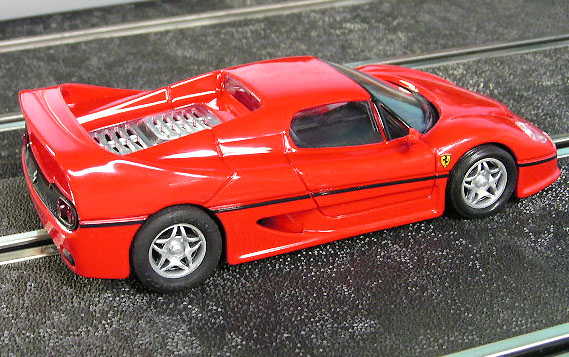
Right out of the box I had to stop and admire the body work on this car. It caught me by surprise as the overall finish is simply beautiful. The clear coat that seals this famous red was as perfect as you could ask for with no signs of fading or runs. This finish just makes the model for me and most of you will appreciate it.
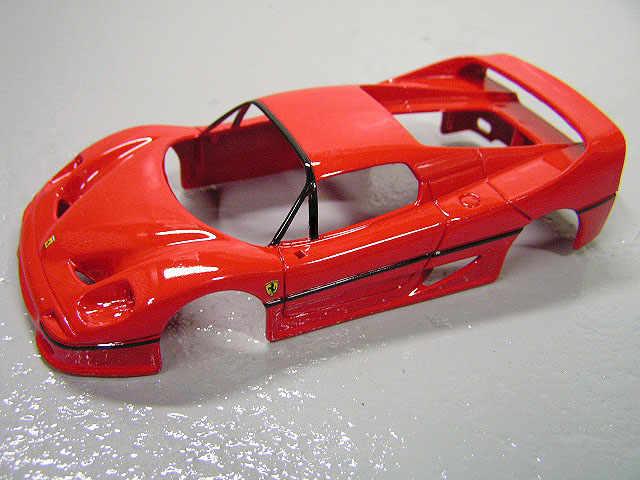
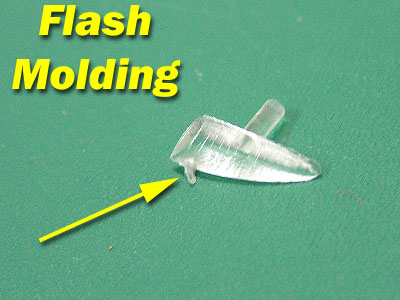
I did notice some weak areas in the black trim around the windshield, but overall nothing too offensive. Yet, it could be a lot better and some of you will want to clean it up. Since it is black, I decided to grab my trusty Testors black paint marker and touch these areas up and allow it to dry while I began the chassis assembly. I also noticed some flash molding in the rear engine bay and I used an exacto knife to gently trim it away.
Assembly: Steps 1 - 4
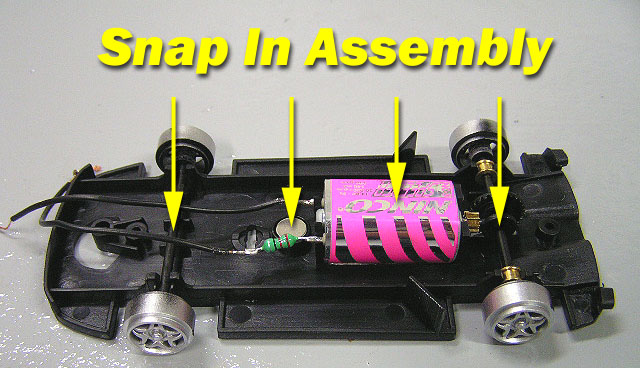
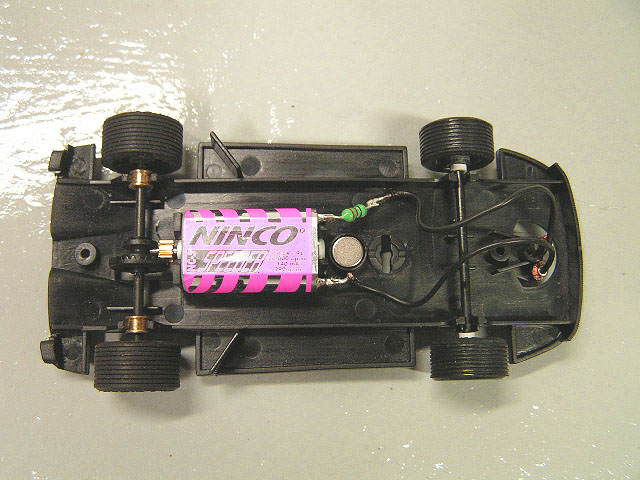
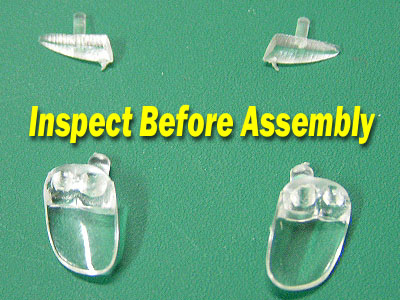
The instructions in the kit are about as easy to follow as it can get. Steps 1 through 4 are the installation of the button magnet, NC-5 Speeder motor (pinion gear is pre-installed), and both front and rear axles. During these steps I took the time to inspect the wheels for fit and for excess flash molding. One item that immediately stood out was the large amount of excess side to side free-play in the front axle. This issue has been greatly improved over the years with other NINCO releases, but here it appears this chassis is identical to the version made over 10 years ago.
You could just use any washers that you have lying around that will fit the axle diameter but you will need a few to get the job done. I chose instead to make my own shims using Evergreen Styrene tubing part# 225 5/32" size.
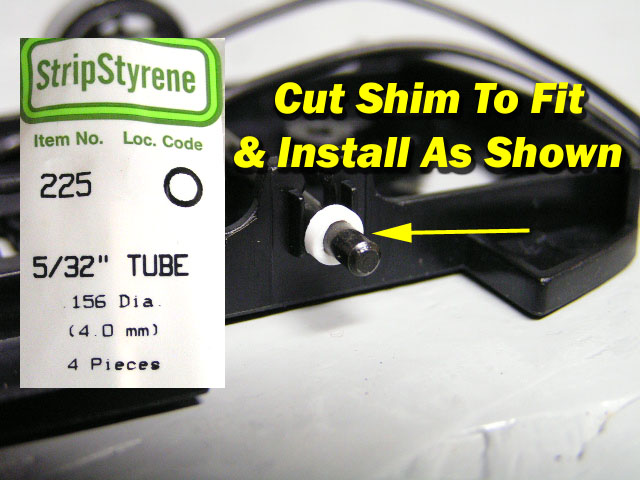
I measured the thickness the best I could with a small ruler and then just cut a pair to see how they fit. They fit perfectly and this cured the problem. The thickness ended up being 0.55" which gave the axle a free spin with no friction.
Beginners Note #1: If you are just starting out in this great hobby, there are going to be some tools and materials you will find very useful. When you are at your local hobby store, ask for Evergreen or Plastruct tubing and they will point you in the right direction. This tubing is used for several uses such as the one we just showed you. It can also be used to repair cracked wheels and some body mounting posts among other things. The tubing is not very expensive and the amount of items you can repair/adjust with it certainly make it a worth while investment.
Assembly: Steps 5 - 7
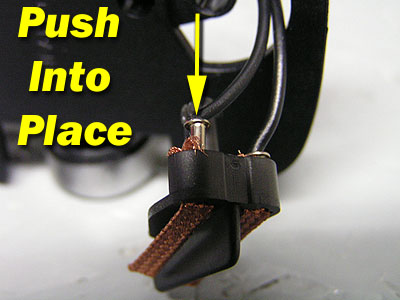
Up next we have the tires and front guide installation. This is easy enough to accomplish as the instructions show you clearly that the larger sized tires are mounted on the rear. It then shows you how to press in the 2 lead wires into the guide which already has the braid installed. As we covered in the first NINCO Ferrari 360 kit this might be easier to accomplish with the aid of small needle nose pliers, but you can do it by hand as well.
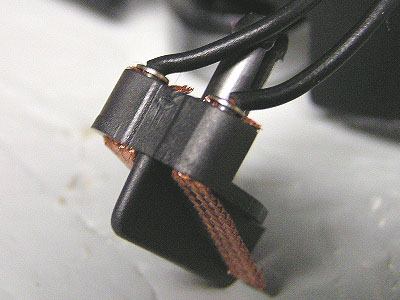
Installation Step Change: Wheel Maintenance
Although the instructions say to mount the tires before the guide, we swapped these steps. We did this so that after the guide was installed we could lightly sand the inner wheel ribs before tire installation. We did this by using a simple 9 volt battery held to the braids ends for power. You can read about this technique here as it works for most all brands of slot cars.
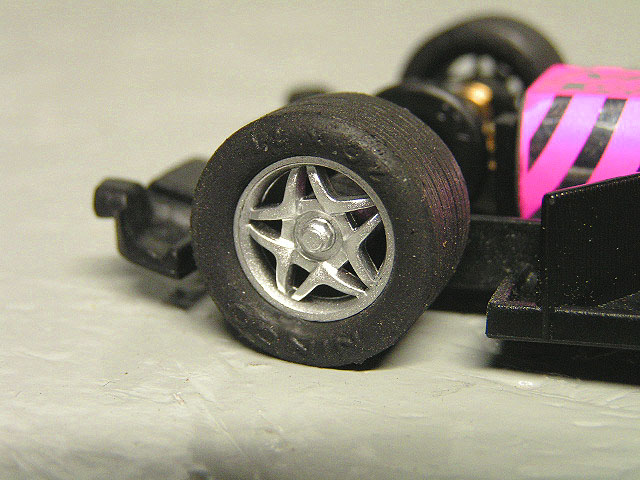
Once this was finished we installed the tires and made sure they were fully seated. You can do this easily enough by hand by just pressing on the tires to make sure they have fully seated around the inner wheel rib.
We now have a chassis that is ready to go. Go ahead and test your car to make sure everything is mounted correctly and securely. You can also go ahead and sand the tires if you so desire to get them as round and true as possible.
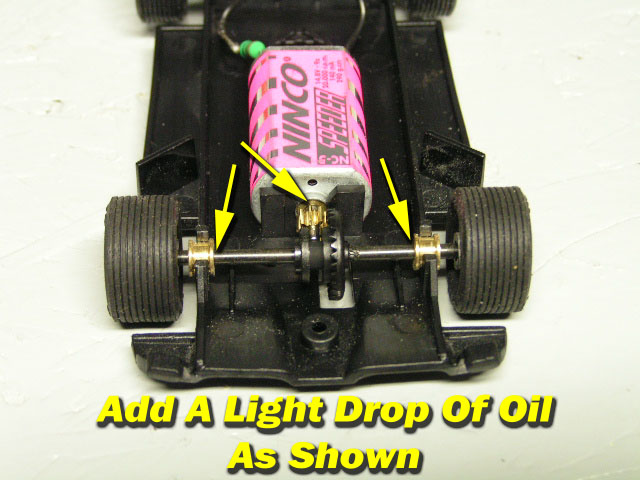
It is also a good idea to add a light drop of oil on the rear bushings and on the motor shaft and a very light amount on the gear teeth. Once you complete this we can move on to the body assembly.
Assembly: Steps
8 - 13
(Adhesive Needed - Testors Brand #3512
Standard Model Glue & Standard Hot Glue)
Testors Adhesive Link
Hot Glue
Gun Link
Beginners Note #2: As we mentioned in note #1, some tools will be very useful in this hobby. A small, inexpensive hot glue gun is perhaps one of the most important tools you can have on your work bench. The vast applications that they can help you with make hot glue one of your best friends. They can be found by clicking the link above or most often your local hobby supply store.
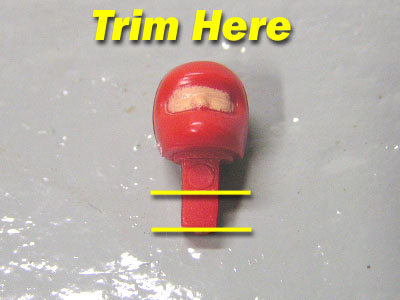
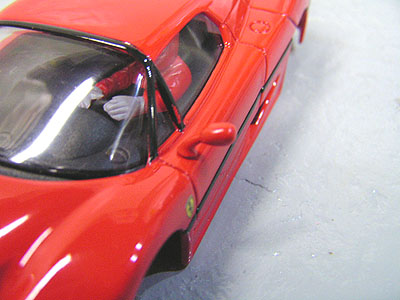
Up next we begin on the interior of the car. First is the quick assembly of our driver which will need a slight modification. The directions say to trim away 2mm of the "neck" so that when you insert the head into the body that it is flush with the bottom.
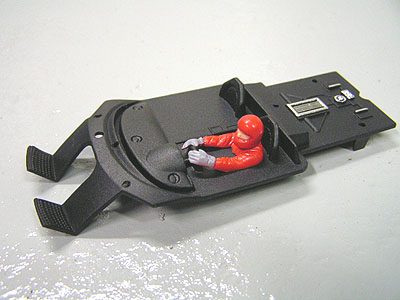
This is done easily enough, and after it is assembled add a light drop of glue from the underneath to keep our driver secure. Then mount the driver in the interior and again use glue to hold him in place.
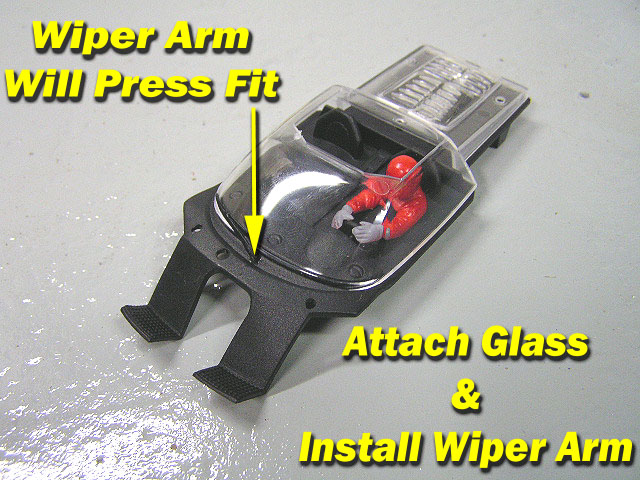
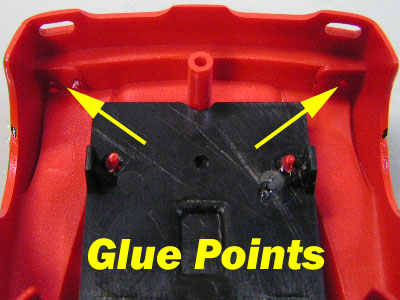
Now it is time to assemble the windshield and windshield wiper. It is this step the instructions tell you to mount the glass using adhesive but I strongly suggest you do NOT use glue here. The glass will rest in place while you mount the wiper arm. The wiper arm is a press fit and will hold the glass well enough for flipping it over and installing it.
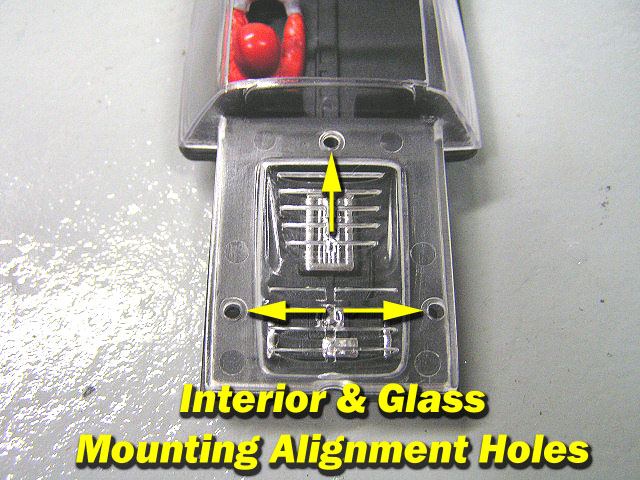
You can use glue AFTER you have mounted the interior into the body. The reason I advise on skipping this glue step is that there are 3 mounting posts inside the body that have to slide through both the glass and interior tray.
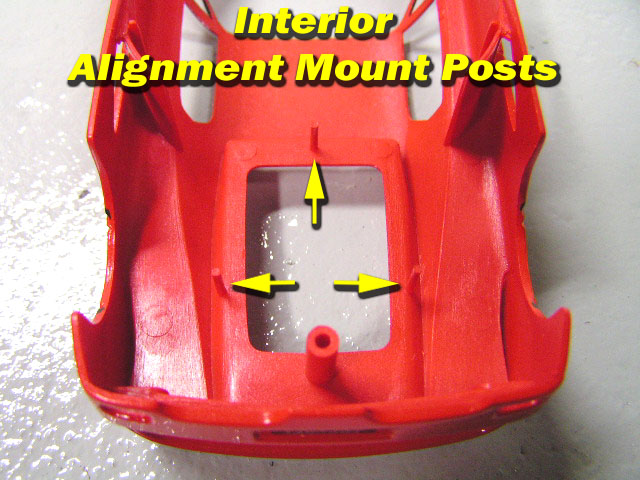
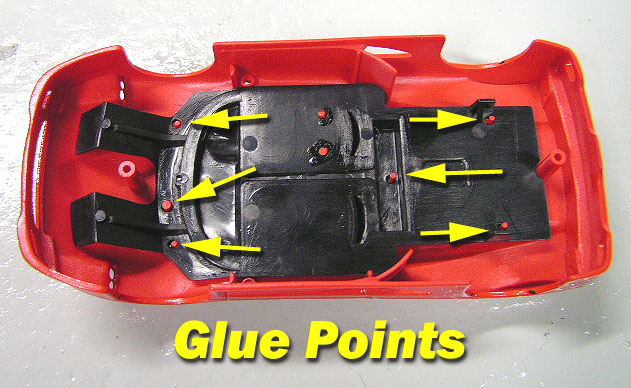
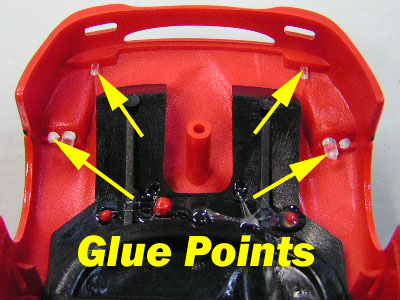
If you glue this glass assembly out of alignment, you will not be able to mount the interior properly. Once you have mounted it in place, instead of standard model glue try using a drop of hot glue in the areas shown in the photo. This will keep everything very secure and just makes assembly even easier.
Final Assembly: Steps 14 - 17
We are almost completed, just a few more small details and we can start racing. We start with the front head light assemblies, but before we mount them, inspect each piece for excess flash molding. This can sometimes not only look offensive, it can prevent the parts from fitting together as they should. You can use an Exacto knife and carefully trim this away and your are ready to install. You can also use other items such as nail files/Emory boards or even fine grit sand paper to accomplish this.
Simply press fit the lights into place and make sure they are mounted as flush and even as possible. Once you have done this, flip the car over and used adhesive from the inside to secure them to the body.

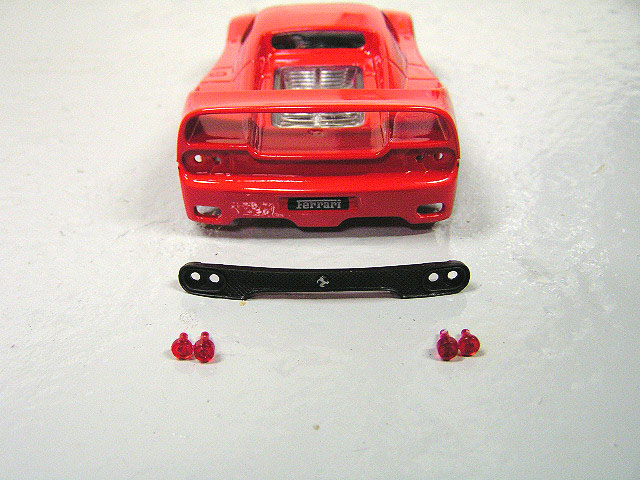
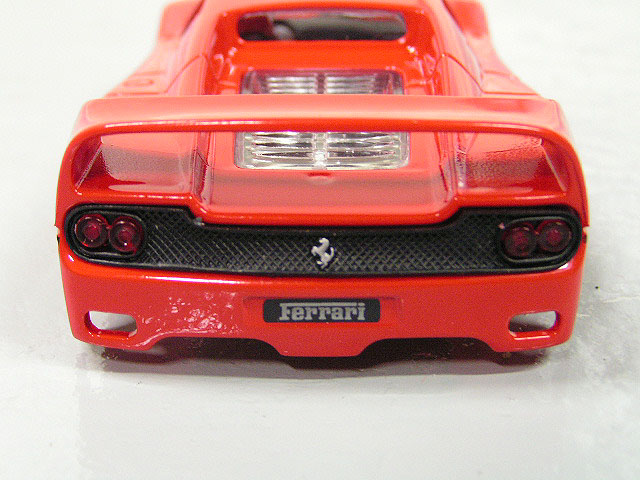
Next we move on to the rear light assemblies. again, check for slight amounts of flash molding and remove any found. Next, slip the rear grill assembly into place and then the light fixtures to secure it. Since the fit is not very snug, place your fingers over the light assemblies to hold them in place and flip the car over to secure them with adhesive.
Finally we have the side mirrors. Although it say to use adhesive, there really is no need for any. These mirrors are a very tight fit, in fact take extra care installing them as quite a bit of elbow grease will be needed to get them seated firmly so be careful not to break them. You might even need to take a small nail file and clean the ends of the mirrors a little to remove some of the paint to get them to fit better in the mount holes.
Beginners Note #2: If you are just learning to drive a slot car or perhaps you are teaching younger children, you might want to wait to install these mirrors. Leaving them off will just preserve then as they will not take much abuse before breaking. Keep them in your new tool case and you can always install them later on for display purposes or after your skills, as well as others improve.
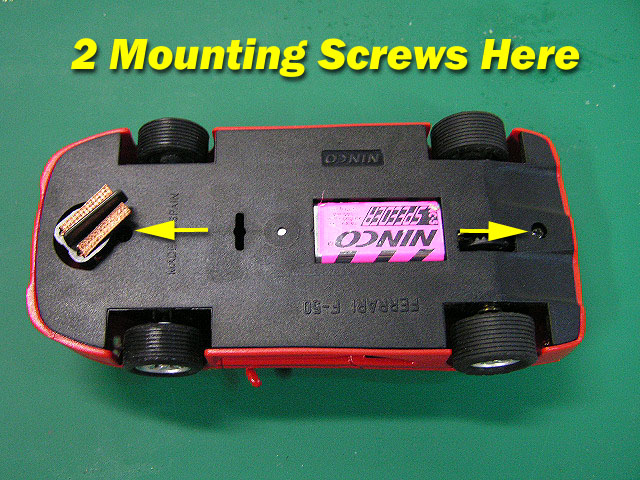
Final Step! Place the chassis over the body and secure it using the 2 cross tip screws provided. Do not over tighten, just snug them in place.
We are now ready to race our new Ferrari! Let's head to the track for our testing to see how this hot rod performs.
Testing this car was a whole lot of fun as you might expect. Gear mesh was smoother than I expected and will only get better with some break-in time. With our tires lightly sanded and clean we posted lap time averages in the 4.3 second range which made it about as close a match to the recent F1 GTR as you could ask for. The NC-5 Speeder motor gives you more than enough power with good acceleration and crisp braking. In fact this model runs well with the first Ferrari 360 GTC kit NINCO has released that is in angle-winder form.
Racing this F50 just brought back good memories for me and I could not be more pleased with this choice by NINCO. They have made some very nice models over the years and this slot car has always been a popular favorite among many enthusiasts for very good reasons. It has a great balance of scale detail and performance, plus it provides close racing with other models in the NINCO line that allows you a more diverse field of models. This car is not only fun to build, but fun to race and that makes it a model you should look closely at. After all, fun is what our hobby is all about.
-Harry
As always feel free to contact me about this article or just the hobby in general at harry@homeracingworld.com, or better yet drop into our Message Forum and share your thoughts with other enthusiasts!
Thanks Go To MRC For Providing Us With This Kit!