Saturday November 18, 2006
Saturday November 18, 2006
DIY With NINCO
Ferrari 360 GTC
A Surprise Awaits You...
 It
seems that this year is filled with all kinds of new releases that caters to
many different tastes in our hobby. There are many people out there that simply
enjoy the fun of a brand new ready to run slot car right out of the box. There
are those that also enjoy the modeling aspect where they build their own car
from scratch, or perhaps just repaint an existing model. This new slot car
assembly kit from NINCO appears to try and mix the best of both worlds and I was
eager to get my hands on one.
It
seems that this year is filled with all kinds of new releases that caters to
many different tastes in our hobby. There are many people out there that simply
enjoy the fun of a brand new ready to run slot car right out of the box. There
are those that also enjoy the modeling aspect where they build their own car
from scratch, or perhaps just repaint an existing model. This new slot car
assembly kit from NINCO appears to try and mix the best of both worlds and I was
eager to get my hands on one.
There is nothing like designing and building your own race car. The pride and satisfaction you have from watching your model perform well on the track is priceless. I have done my share of it in the past and I look forward to each and every project. Sometimes though, it is nice to have things simplified and here is where a kit like this comes into play.
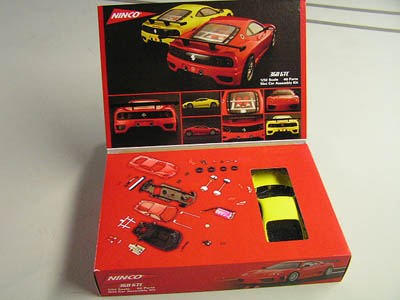
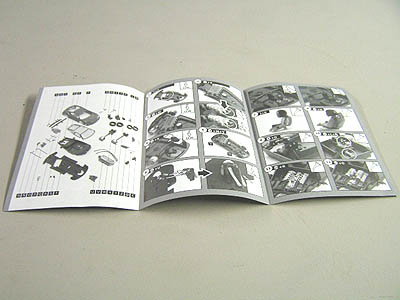
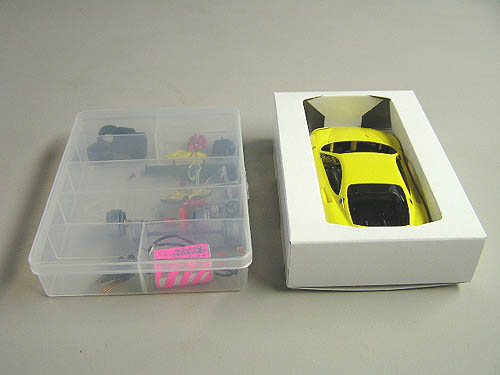
This Ferrari kit allows you to get your feet wet in the art of model building without making things too complicated. Upon opening this box you see all your parts neatly packaged in a small plastic case with the body, chassis, interior, and glass held in a cardboard sleeve. Also included is a small instruction booklet that visually tells you how to assemble this slot car.
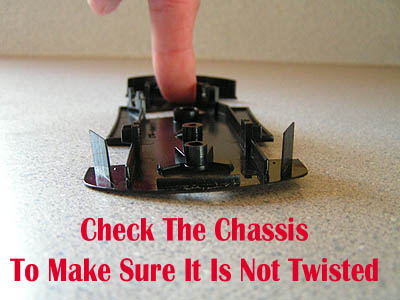
Before Assembly Inspection - Preparation
One thing you will want to do before assembly is to inspect your model components. One of the most important parts is the chassis itself. Place the chassis on a very flat surface such as the kitchen counter and look at it closely. On this chassis lightly press down on the rear of the chassis right behind where the motor is placed. You might discover that the chassis is slightly warped which is certainly not good on your slot car. Among other factors, the temperature changes these kits go through from the factory to the hobby store shelf can sometimes be very dramatic. Without having the model assembled to help hold its shape, they can and will warp.
On some models there are 4 mounting posts: 2 in front and 2 in the rear. On these models, simply assembling the body and chassis sometimes can flatten out a slightly tweaked chassis. This model from NINCO has only 2 mounting posts that hold the chassis and body together, one in front and one in the rear. In this case simply mounting them together will usually still leave you with a slightly warped chassis depending on badly it was to begin with.
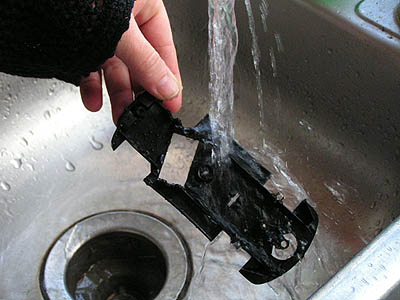
Our chassis had a very distinct warp. Enough that I had to try and flatten it out so that the finished model would function as intended. Luckily there is a very quick and easy way to fix it. All you will need is a flat surface and a heavy object that will cover the chassis. I like to use a large book for this process. Depending on the temperature from your hot water tap, you can simply hold the chassis under the full hot tap water for about 30 seconds.
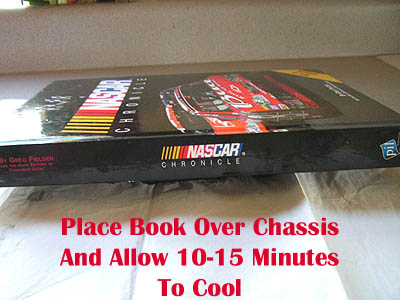
Then quickly place it on your flat surface and place the book on top of it. Allow the book to sit there for around 10 to 15 minutes. This will be enough time for the chassis to cool. Remove the book and inspect your chassis. Odds are you have flattened it out quite a bit and it is now ready for use. If not, just repeat the process again. Ours was fixed with the first try and we could now begin assembly.
You do not need any special tools for this model.
You will need a small cross tip screwdriver, some sandpaper and if you have one, a small needle-nose pliers.
You will also need a small amount of glue, so make sure you have some on hand.
ASSEMBLY
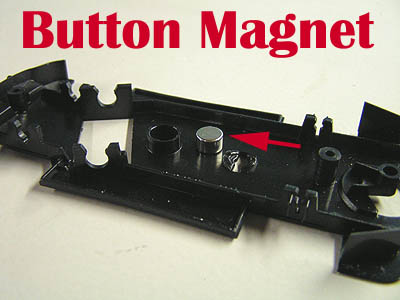
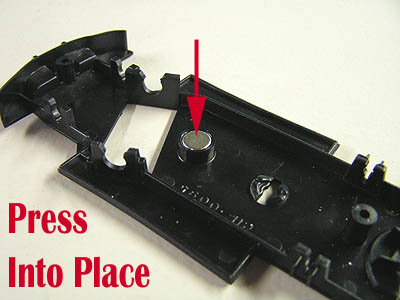
The first 2 steps are the magnet installation followed by the motor. The instructions are very clear and easy to follow so you should have no trouble. With the magnet, you will find that a good amount of force will be needed on your part to seat it all the way into the chassis.
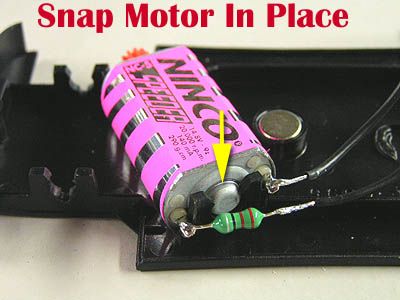
Next we have the motor installation. The instructions have a highlight below to show you how to correctly mount it without crossing the wires. Just make sure the ends of the wires near the motor are not touching one another and snap the motor in place. I am pleased that NINCO has already installed the pinion. This allows beginners who have not acquired any special tools a much easier build and I have to commend them on this approach.

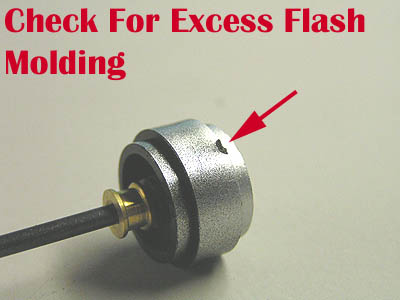
Next we have the axles, wheels and tires. One thing you might want to do is check the inner ribs of the wheel for excess flash molding. This is commonly found on many plastic wheels today and can sometimes prevent the tire from sitting on the wheel correctly, causing it to be slightly out of round. You can remove this easily with anything from a nail file/Emory board or even a very fine grit sandpaper. Most of you have built a plastic model kit before and you can remember how trimming and removing this flash molding helps parts fit together properly.
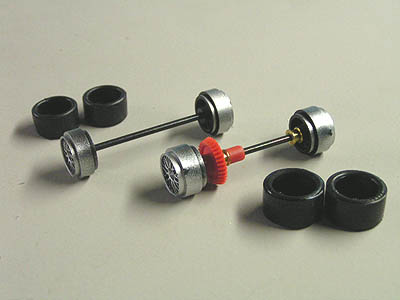
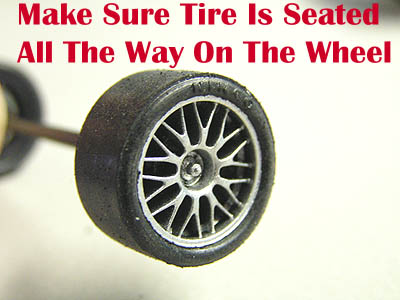
The instructions show to mount the axles in place before installing the tires. I swapped this step as I find installing the tires on the wheels easier when they are away from the chassis. You can of course do this however you prefer. The tires are clearly different sizes so mount the smaller tires on the front axle and the larger ones on the rear axle where the gear and brass axle bushings are. Mount the tires on the wheels by stretching them slightly and pulling them over the wheel. Once installed, roll the tire and wheel assembly with your fingers to make sure the tire is seated properly.
Now you can simply snap the axles into place. Again, you will need to use a little force but you will soon hear a click telling you they are mounted. Just make sure to line up the bushings correctly in the rear and all will go smoothly.
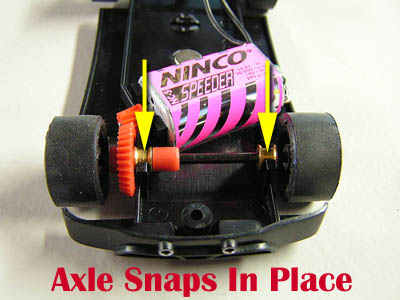
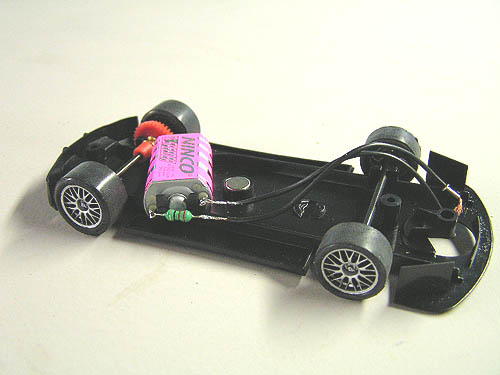
It is starting to look like a slot car now.
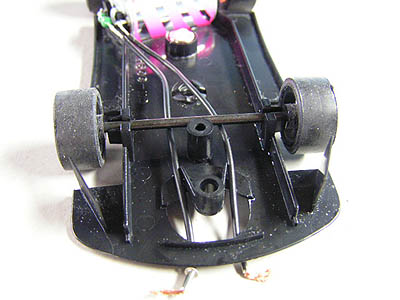
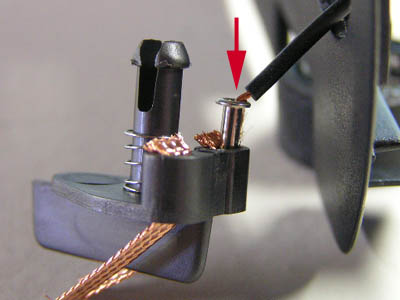
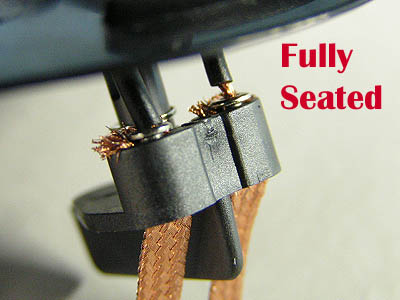
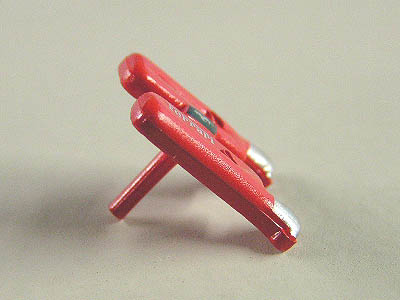
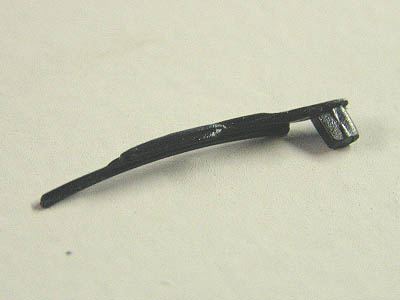
It is now time to attach the guide to the chassis and connect the wires from the motor. First, run the wires as shown in the photo underneath the axle. Next it is time to place the guide wire cap as shown and press it into place. This is where a small needle nose pliers might come in handy for those of you with big fingers like myself. However, with just a little pressure it will seat firmly without the pliers.
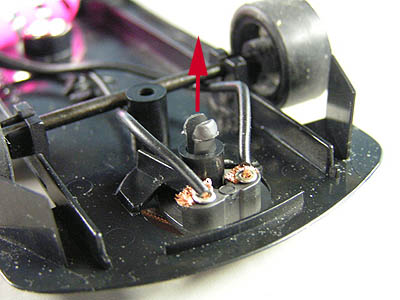
Once the wires are in place you can now install the guide into the chassis. Simply push the flared end of the guide into the hole as shown until the edges snap through. That is all there is to it and now you can finally test run your chassis to make sure all is well before we begin body assembly.
Body Assembly
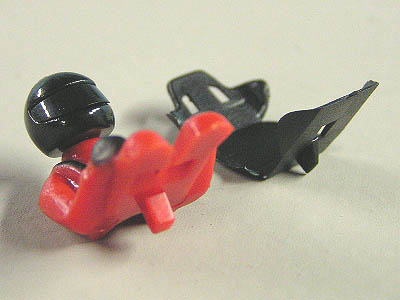
We will start with the interior tray with our driver, the driver seat, steering wheel and fire extinguisher. First mount the head of the driver to the body. This is pretty obvious and I am sure you can figure that out. No need for glue here as it is a very snug press in fit. Next it is time to mount the driver to the seat. The tabs are pretty clear so you should have no trouble.
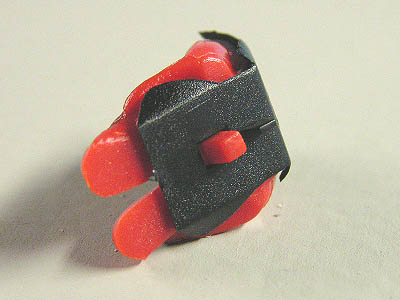
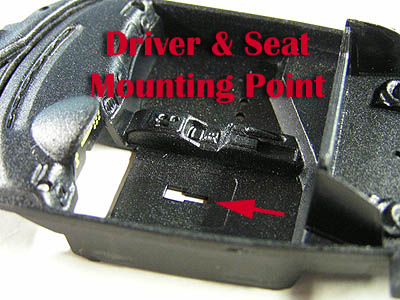
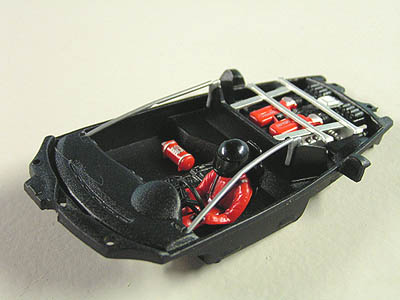
Apply some adhesive on the seat where the driver will sit and mount the driver. Allow the proper drying time and them mount the seat with driver to the chassis in the area shown in the photo and your instruction sheet. Again, you will need a slight amount of adhesive here so allow it to dry.

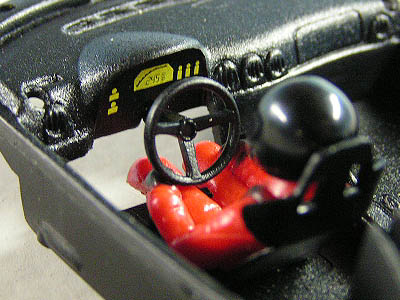
Next is the steering wheel. There is a small notched area there on the dashboard that is very easy to see. Just turn the interior over and make sure the steering wheel shaft is fully seated. Then apply some adhesive and double check that your wheel is where you want it to be.
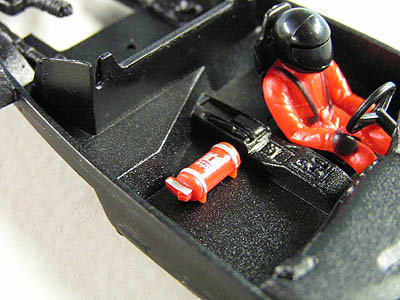
Finally you will install the fire bottle. Insert the 2 round tabs and place in the chassis as shown. Now time for some engine work!
Our first step is to mount the engine lower detail assembly into the chassis. To do this, start by coming from the front and slide it back into place as shown. The instructions say to add adhesive, but you can skip that if you want and wait to add the top detail assembly. I say this as the long shaft for this part is where you can add the adhesive and it will hold the completed assembly firmly. I share this with you as I have seen some in the past add too much adhesive in areas like this and end up covering the mounting hole for the next part.
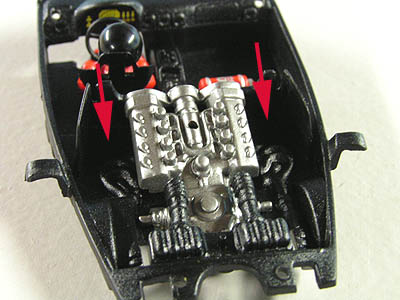

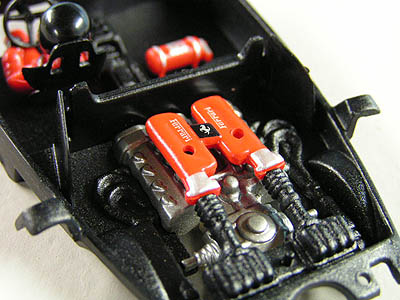
Now you add some adhesive to your top assembly and thread it through the engine. This is all very easy and these parts fit together very well. I liked the small touches of the Ferrari logo and printing here. Guess what? We are half way there!
Moving on it is time to mount the rear engine top bracket. You will see 2 shafts that are placed inside the top engine assembly and the lower tab. Apply your adhesive and simply slide into place. The center bar should be flush mounted across this top area.
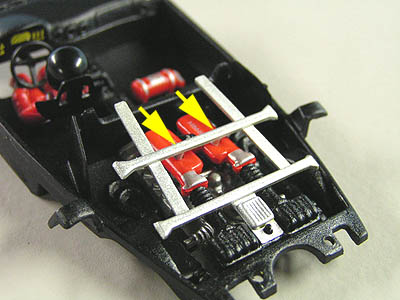
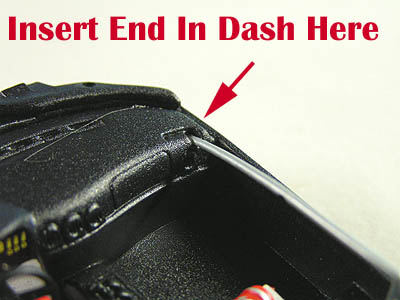
Next we have 2 side roll bars. These bars are identical so do not worry about which side goes where. You can see a notched larger end and a smooth end. Take the smooth end and insert into the holes in the dashboard.
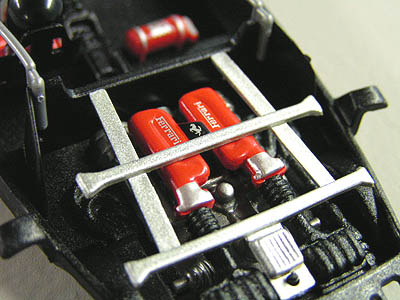
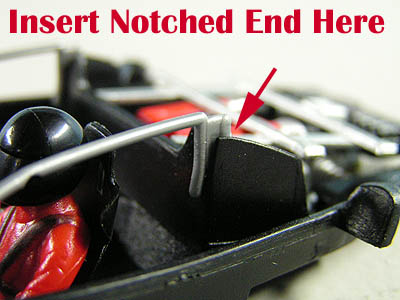
Now bend the bar slightly and press it into the rear mount as shown. You can see these bars have a slight notch in them in the center. This allows the bar to bend at the right point. These are designed to bend slightly so do not worry about breaking them or installing them wrong.
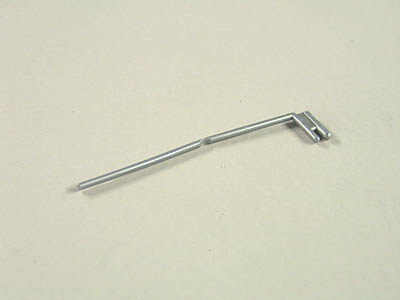
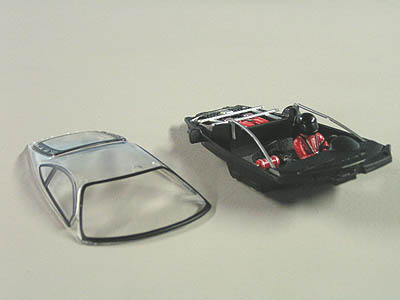
Time to get this interior under glass. Simply place the window assembly on top of the interior tray - do NOT glue. Next, install the windshield wiper. There is only one way to mount it so I am sure you will have no problem. Add a light drop of adhesive on the wiper mount shaft and press into place.

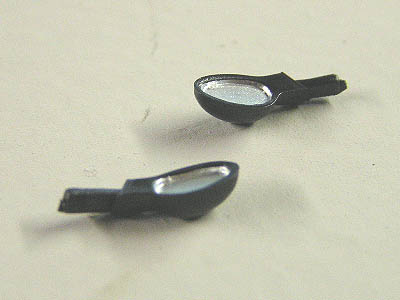
Nest it is time for the mirrors and here you have the option of skipping the glue. I say this as many racers sometimes remove these fragile side mirrors before any heavy racing. This helps keep them from getting broken and/or lost. These press into place very snugly so they won't fall off that easily.

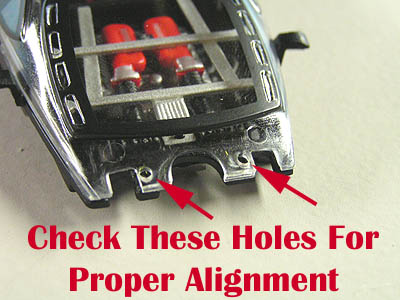
Now it is time to mount the full interior onto the chassis. Here is where things can get a little tricky. Make sure the rear of the glass is lined up with the holes in the interior tray before trying to install it. This is important as the mounting shafts on the body must go through both the glass and interior pan to mount correctly.

Once the interior pan is fully seated you can now add some adhesive to each of the 4 posts. Be careful here as you do not need a large amount of adhesive. You also do not want to use any type of Super Glue here as it might create a haze effect on the interior glass. I used hot glue on mine and it holds it very well.
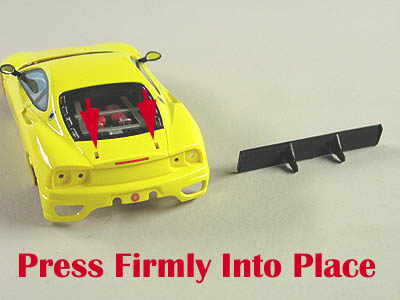
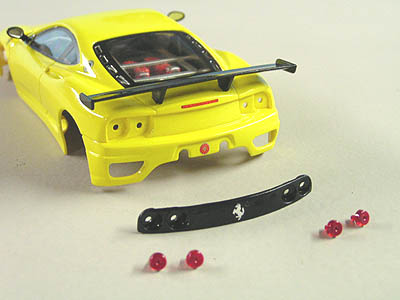
Now it is time for your rear spoiler and again you can skip adding adhesive here as well. This spoiler will fit very snugly into place and will hold up to average racing without falling off. Sometimes, falling off is a good thing too. If you added adhesive, in a harder crash you have an increased chance of breaking the spoiler mounts. I did not add adhesive for this reason, but you can do so if you wish.
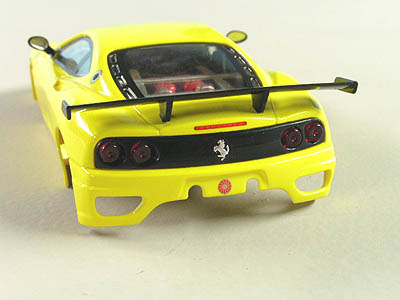
Next up is the rear light assembly. You will see in your box of parts a wide black panel that has the Ferrari logo on it. This is mounted first and then the rear lenses follow. The lenses are all the same so no need to worry about doing this wrong. I added adhesive to the back part of my lenses with hot glue to hold the entire assembly in place and it was to time to move on.
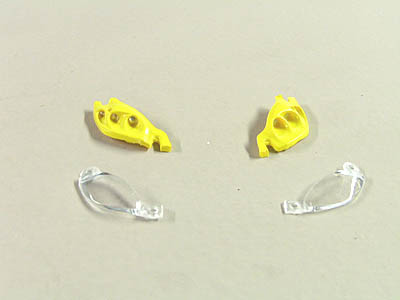
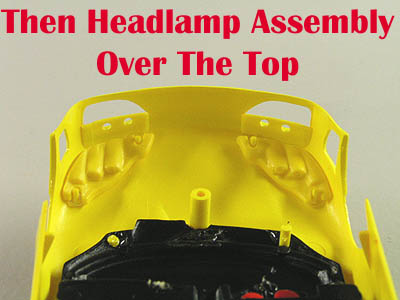
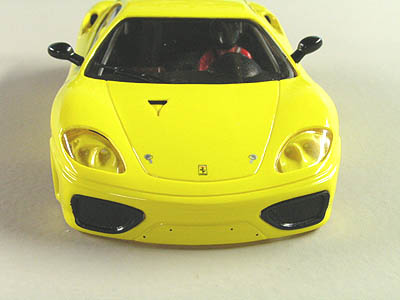
The front head light assembly is made up of 4 pieces. The outer lenses and the head lamp assembly. Install the lenses first by simply matching it up to the body. Once these are installed, then place the head lamps over it and secure with adhesive. Again, try using hot glue here so as not to damage the lenses.
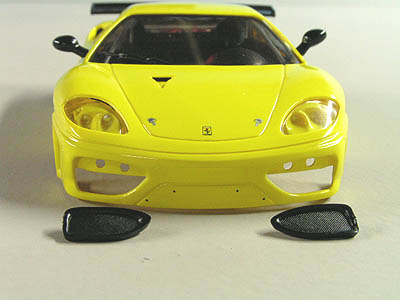
Our final body parts are 2 black front grills which are mounted as shown. Just snap these into place and secure with adhesive.
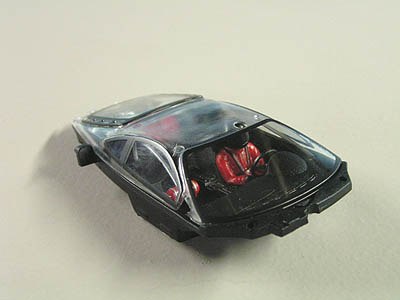
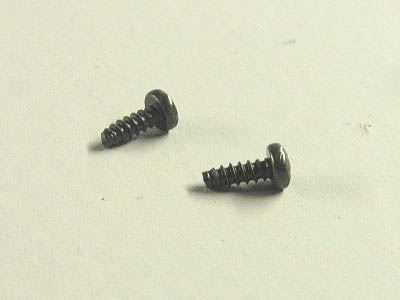
Now it is time to mount our body on the chassis. Place the body on the chassis and take the 2 screws provided to secure it in place. You are now the proud owner of a new Ferrari and you can now fire her up and hit the track!

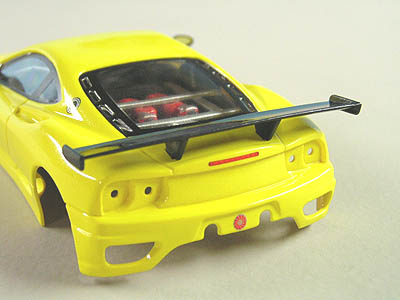
Sit back and admire your work. You have built a very nicely done Ferrari 360 GTC ready for you to enjoy.
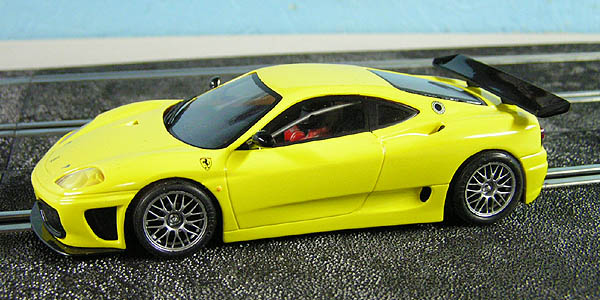
And here is the surprise: This car is a great performer! I took this car straight to the track and had it easily in the 4.4 second ranges. This had it very close to the Super GT series cars such as the NISSAN, Mosler, Supra and NSX. Although this version of the Ferrari isn't listed in this series it certainly will work on my home track. Hopefully we will see race liveries of this model soon. I sanded on the tires and made sure they were clean and headed back. After about 25 laps to get my rhythm, I was right in the 4.2 second range and ready to do battle.
I must admit that I did not see this one coming. A great model that I otherwise would have passed on simply due to the fact it is in street trim.
I have to commend NINCO for releasing this model and for how they did it. They made it very simple with easy to follow instructions and presented a kit that allows the beginner a great opportunity to learn how these scale slot cars are built. I think that a kit like this would be a great addition for veteran enthusiasts as well given the performance level it can attain. Christmas is slowly (maybe not so slow?) coming our way and this would be a great stocking stuffer for any would-be slot car racer.
- Harry
As always feel free to contact me about this article or just the hobby in general at harry@homeracingworld.com, or better yet drop into our Message Forum and share your thoughts with other enthusiasts!
Thanks Go To MRC For Providing Us With This Kit!