
Tuesday October 23, 2007
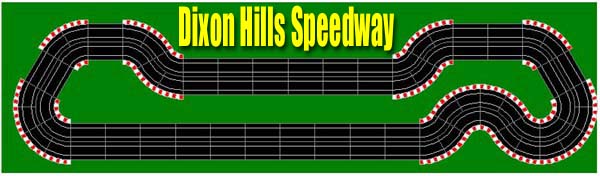
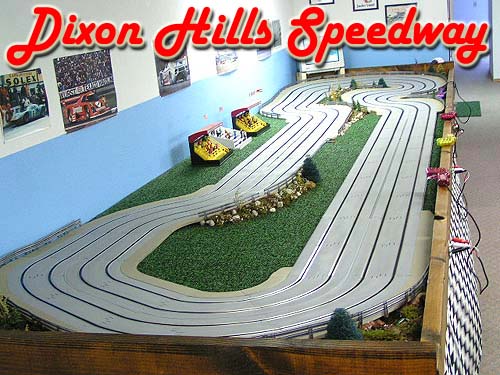
Dixon Hills Speedway
This article is one that I have looked forward to doing for a long time. Track building is some of the most fun that we have in this hobby, which is a good thing considering the amount of layouts we have had in the past. However, this layout is quite different as we decided to take a little more time with it and make it exactly the type of road course that we wanted. Our 4 lane Artin oval is a great deal of fun and my own personal pride and joy, but we also wanted this road course so that we could better enjoy some of the classic Le Mans, Trans-Am and other series of models we have collected over the years.
First and foremost the track of choice was very clear: Artin. Even if I wasn’t a dealer for Artin I would have chosen it as I feel the track itself is the best you can buy in our scale. Secondly, this layout was going to be designed for non-magnet as well as magnet racing and I wanted to have sections of it banked slightly to not only increase realism but to also improve operation of the models. Banking and elevating hard plastic track while keeping a smooth track connection is just simply easier to accomplish...so Artin was the clear choice.
You only need 2 of the Artin 4 lane sets to build this track as shown. You also utilize most of the track with only a few pieces left over. Check your local dealer for current prices on these sets.
You might hear from other sources that Artin track is too limited on design features due to the lack of specialty track. I purposely designed this layout to show that you CAN build a fun, challenging layout in a smaller space using only the 3 different sizes of track that come standard in the sets. I didn't need 1/3 or 1/4 straights...nor did I use the recently available 30 degree half R-1 or new outer-outer R-3 turns.
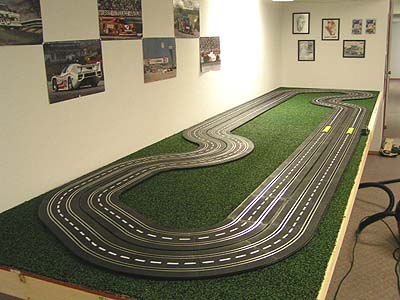
As we came up with our design, simplicity was still the golden rule. There would be no cross-overs, chicanes or overpasses. Some people try to squeeze in as many running feet as possible in a given space and it usually ends up looking like a bowl of spaghetti that someone spilled on the table. We enjoy longer sections of straights that allow you to let the models open up a bit and for us to actually drive the car from one section to the other instead of just constantly negotiating turns.
The lane lengths are not perfectly even, then again...I rarely meet 4 drivers that are perfectly identical. Although the inside lane is shorter, that does not make it the fastest lane on the track. The R-1 turns force you to really slow down to negotiate them and allows the lanes with broader corners on the outside to carry more speed through them. In testing this track with many different drivers, you would be surprised just how even this track can be.
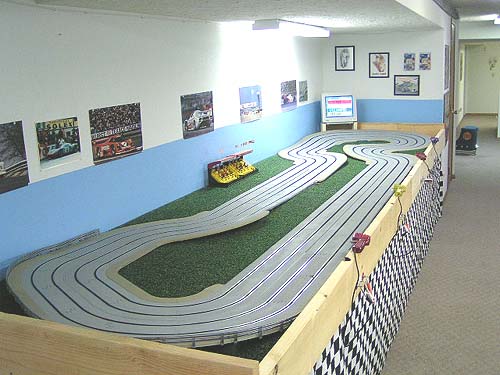
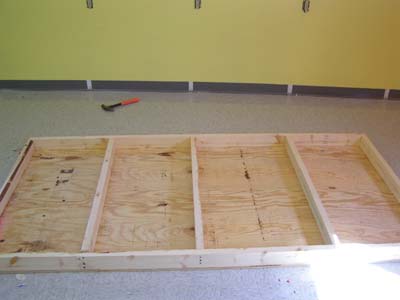
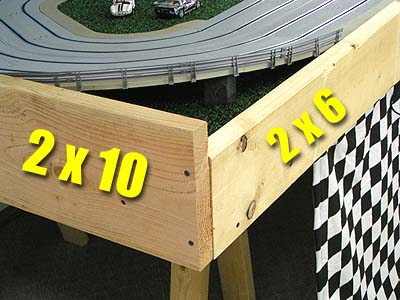
With that said we feel our design fits our home racing needs. 4 lanes of road course action in only a 4 foot 5 inch wide by 16-foot long table. The tables were built using our standard building methods but we realized the width was a little on the short side to include the turn borders. To solve this we simply added an extra 2 by 4 on each side of the table and this allowed the perfect amount of space. Doing this was also a very easy task, so even if you are not a professional carpenter…don’t let that bother you.
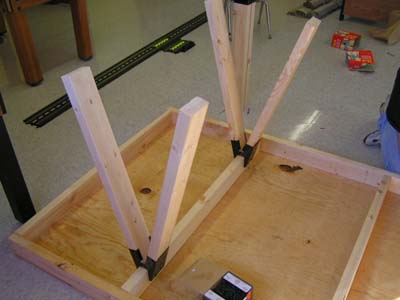
Instead of custom building legs for these tables, we have found that using inexpensive sawhorses work even better. They can be connected to the 45-inch centers with wood screws for a very sturdy, yet portable table base. It would take more 2 x 4’s to build legs all the way around, plus the supports for them, so using sawhorses helps not only in time and convenience, but in our budget as well. The ones in the photo were for the recent Boys & Girls Club Track we built, but the exact ones are utilized here.
The next step was choosing a carpet to cover our table. I am a strong advocate of using carpet simply because it is quick to mount and if you choose the right one, creates an excellent scale appeal. We utilize a plastic outdoor carpet found at our local Lowe’s Home Center. I like plastic carpet as it doesn’t have small fibers than can get into your motors or braid, plus it is very easy on your slot car exterior when those occasions arise that you de-slot. We mount this carpet using the very same small finishing nails we purchased for the borders and it holds it perfectly.
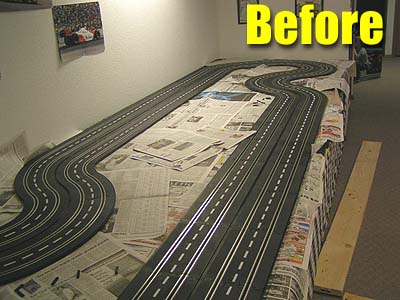
It was finally time to test lay our track. With Artin track it only took us about 10 minutes to have our layout completely assembled. Once it was completed, I began to look at our layout and felt it needed something more, but I couldn’t figure out at the time what it was.
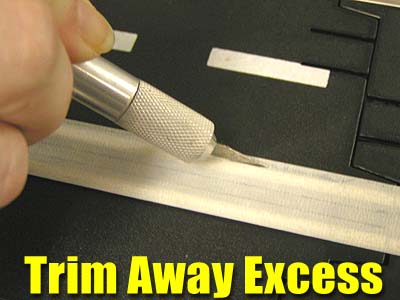
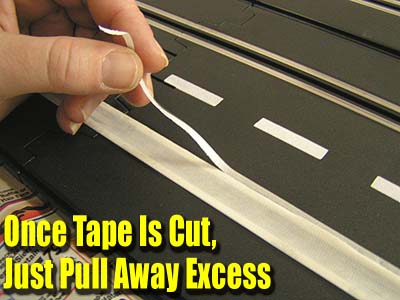
It wasn’t until I was viewing some of the tracks sent in by our readers that it hit me. The track needed to be painted. Now I have done quite a bit of track painting in my time but mostly on the turn borders and not the track itself. After trying a couple different methods of painting, the old tried and true masking tape came out and it was clear this was the way to go. We used ½ inch masking tape and set it flush to one side of the rails allowing the excess to lap over the other side.
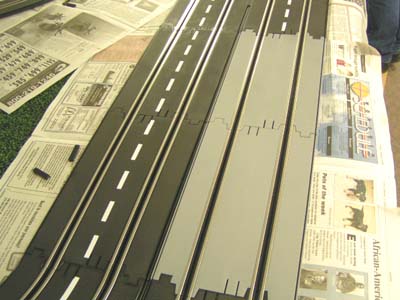

Then by using a small Exacto blade, we just followed the small seam on the edge of the rail and it cut the tape perfectly to size. It took us 2 hours or so to tape all the rails on our layout, but we took breaks here so you could most likely do it faster.
It was now all masked and ready for painting but what color to use? There are going to be different opinions on the color I chose but it worked well for us and provided a good deal of scale realism at half the price. We chose Wal-Mart/Dollar General $1.00 a can gray primer. The color we chose is a little on the light side for some people, but given the fact it was so inexpensive and that we actually liked the look it provided, it’s simply perfect.
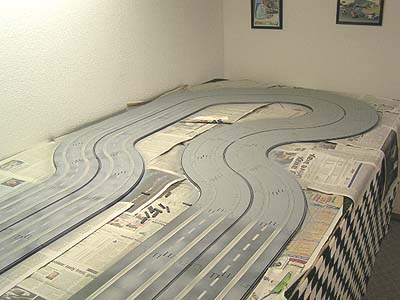
We started by giving the entire track a very light “dusting” coat. After an hour we gave it a second coat and then finally after another hour a third. After this third light coat we gave the entire track overnight to dry thoroughly and would finish it the next morning. The next day we started painting kind of like racing in which we had a start a point and just went around the track a section at a time. After 3 “laps” we had finished and the completed track looked great to our eyes.
Will this paint hold up to hard racing? I can safely tell you yes, and with good reason. We have used this same paint on prior layouts, one of which stood for over 2 years and it never began to wear away or needed touching up.
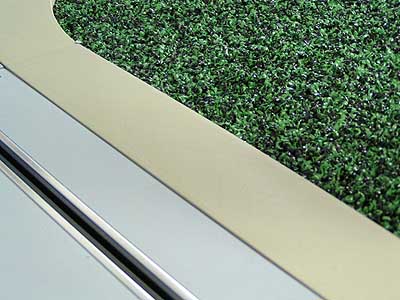
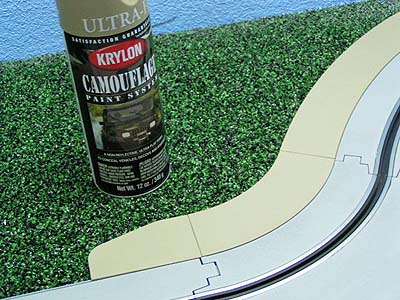
Borders were also going to be painted, but again I could not decide. First I was going to leave them gray and paint some rumble strips on them by hand. After looking at it I decided that it just didn’t look right and changed to sand colored paint to mimic a dirt effect. I chose a more expensive brand of paint by Krylon for this. It is part of the Krylon Military Camouflage system and comes in "ultra-flat". I used 3 coats of this paint directly over the borders and the photos show the result. This paint is easy to work with and dries very quickly, and this helped speed up the building process.
Before any wiring could be accomplished, we needed to choose what we would border the track tables with. As with the Show-Me Speedway, we used a 2 x 6 for the front panel and 2 x 10's for each end of the layout. You could of course use a smaller type board, but for the amount of people that race and visit our track, the stronger the better.
Now we have our layout assembled and painted and we were going to begin wiring. For years I have used standard power bases such as Carrera and recently Artin, to mount under the track and then run my wires from it to build the drivers stations. For me, it took the hard part out of the wiring side of track building as it is not one of my strong suits to say the least.
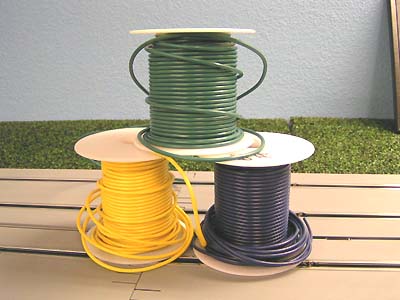
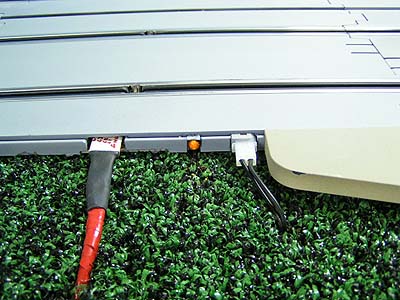
However, the good Professor Motor released some wiring centers with overload protection and thought I could use these instead. This way I could utilize a heavier, better suited gage wire for our track. I chose wire that comes in 16 Gage with a 100 feet per role and in assorted colors. Sometimes finding this wire isn't the easiest task, but most of your better home centers will order it for you if they do not have all the colors you need in stock.
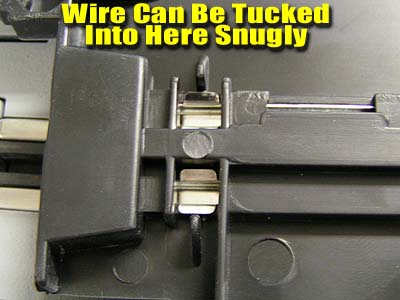
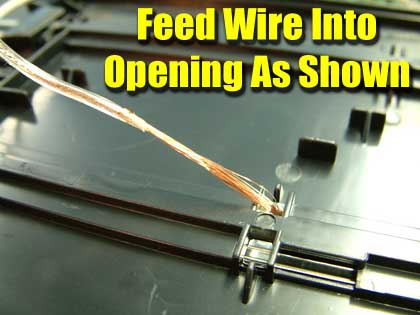
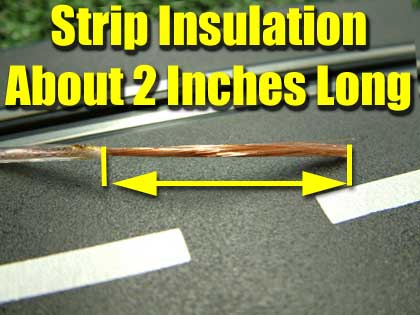
Another reason I chose this size wire is that Artin track actually has 2 small plastic tabs that are on each side of any openings under the track. 16 Gage wire can be tucked snugly in between this tab and the tabs for the track opening. By stripping your wire end that goes into rail around 2 to 3 inches, you can feed the end of this wire into the opening and have it very secure with no need for soldering.
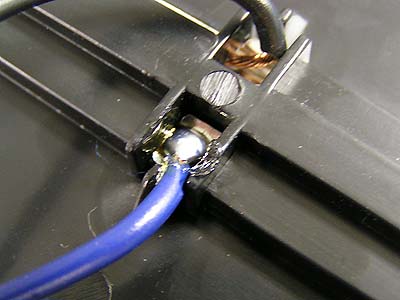
You can of course flow solder down into these connections if you feel the need to. For the sake of those choosing this route, the easiest way I found is to hold your iron right above the wire and just flow it heavily into the rail. If you use good 60/40 solder there is no need for any flux. It fills the entire rail with solder and makes a virtual sleeve for excellent contact. I didn't need to score the inside of the rails, rather it flowed to the top and this is where the final connection was made. It is hard to show you this process in photos, but hopefully you get the general idea.

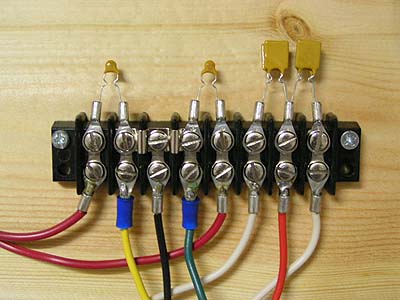
The instructions for the Professor Motor wiring centers are as simple as they could be and I began to make and run my wires. The instructions tell you what wire goes where and also has a diagram that shows a 4 lane application. Click the link below view this diagram in HTML format.
Each of these gadgets has 6 all-electronic self-resetting circuit breakers and is adequate to provide protection for a 2 lane track (2 of these would be needed for a 4 lane track). With this system installed controllers are protected against short circuits that may occur due to mis-wiring at the alligator clip hookups and the complete track wiring, cars & track are protected against an electrical overload that might occur with a car wiring issue or a short circuit across the track rails. At the same time, the circuit breakers will allow 6+ amps per lane to enable high performance motors to be run if desired.
Professor Motor 4 Lane Wiring Diagram
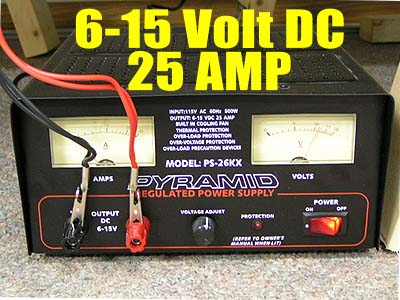
Power and control were easy to decide on. I wanted plenty of AMPS and adjustable voltage. In case you are wondering, it isn’t an overabundance of voltage that you need for your models…it is AMPS. With our new Pyramid adjustable power supply we have more than enough for any ready-to-run model on the market. As for voltage, you won’t see my level rise above 12 volts. So if you ever want to visit and race with us, keep this in mind. I know some of you have not had the chance to upgrade your power supply yet, but it should be at the top of your “to do” list along with adequate controllers.
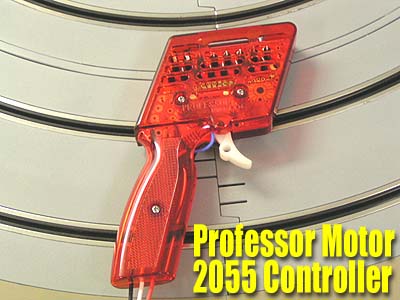
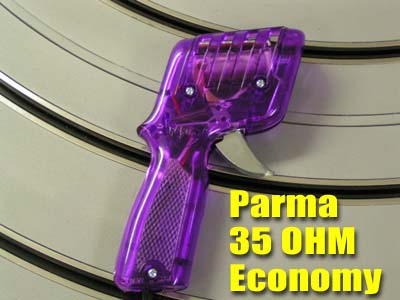
As for control, I decided to go with Parma 35 ohm Economy controllers for the visitors to use and have Professor Motor Standard Silver Series controllers for the more advanced enthusiast when they need them. In my opinion, home slot car racing doesn't need any controller but these two models shown. Some enthusiasts prefer having the higher end controllers with adjustable braking and advanced tuning, but for me these two controllers are perfect and will run just about any 1/32nd scale slot car you can buy today... remember...some of us DO have a budget.
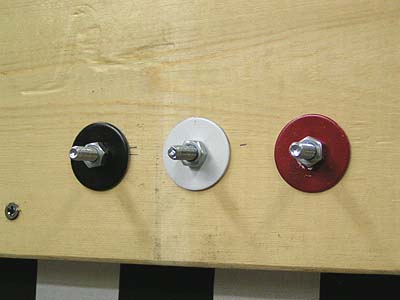
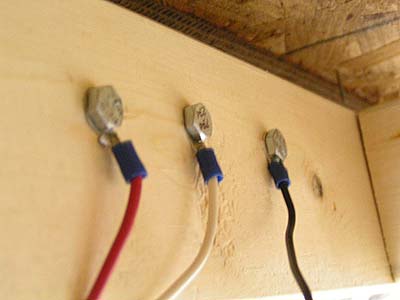
Hook-up is staying with the tried and true 3-bolt method as I have found this to be the easiest and most convenient. You can find these body washers and bolts at nearly any hardware store and just paint the washers yourself. Again, Professor Motor provides you with the option of getting these hook-ups in complete kits if you want them, so instead of having to paint the washers yourself, you can get them ready to go. Due to the thickness of my side boards I had to get extra long bolts, so I made mine myself. Using a standard electrical connector on the back of a bolt is all you need for a good connection.
Now that the wiring was finished it was time to start working on the banking we wanted. I felt the layout could use some SLIGHT banking on each end to not only add realism but to allow for easier driving in our non-magnet models.
Bank Artin track? You got it, and it is easier than you might think although it does require a little effort to get it right. When I say slight banking, I mean only about 2 or 3 inches along the outside. Most banked track found today in pre-molded form is simply too steep and has too much banking, especially in the smaller radius curves. You find this out when your cars scrape the bottoms on the track. A slight or “lighter” bank still allows you to take advantage of it while not having it interfere with your models.
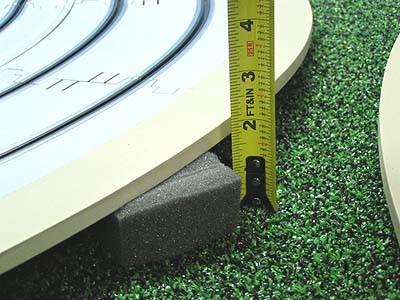
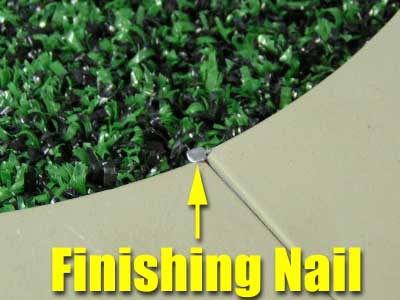
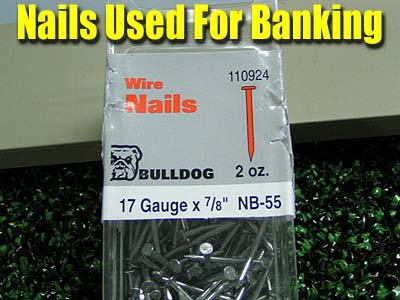
First we needed to fill the gaps on the track as we did on our oval. Using the same Plastruct channel material, we began mounting it in place. The key here is to use hot glue to not only seal the channel in place but it also strengthens the bond of the 2 tracks. While we waited for the hot glue to completely dry, we began to secure the insides of the corners. Doing this is the key to getting a slight bank with this track. Using small finishing nails we placed them in the borders as shown in the photo. Now it was time to set the degree of banking we wanted.
You can use almost any material for this, but I used some scrap packing foam because it was easier to trim and maneuver under the track. Hopefully the photos show you how easy it is to do. The best advice I can give you on banking your own track is not to be afraid of trial and error. Set the track how you think it will work well and TEST it in all lanes with several different types of models to make sure the operation of the models is how you want them to be before you permanently secure it to the table and start adding scenery. For those with Carrera track, this method works just as well, so give it a try before you invest in the molded corners.
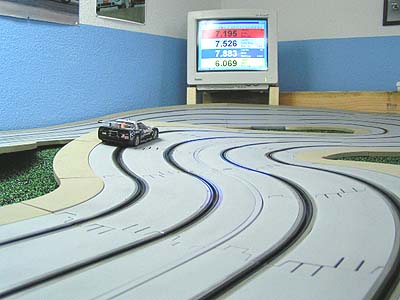
When it comes to a lap timing system for our new track, we knew from operating on other enthusiast’s layouts across the country what we wanted. It would be computer based with the monitor in easy viewing distance for the drivers. One good thing about computer based lap timing is that older systems can be purchased for a fraction of their original cost and work perfectly to utilize the software. I have an old Pentium 3 450 MHz and it looked pretty rough but would still do the trick. I took some red primer and painted it to make it look a little better, but since it is hidden from public view, I could have skipped that step.

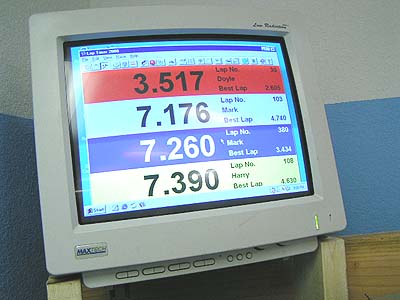
Software is another issue. To be honest, just about all software packages available today will work as intended and will allow you to enjoy your racing. I chose Laptimer 2000 by Gregory Braun because our friend down the street from us, Doyle Burke, uses this system and we liked how it operated. It is also a free download, which for some of you might mean a great deal. Gregory has been in our hobby for years and has one of the most informative websites about slot car racing you can find. I respect that kind of enthusiasm to say the least, so LapTimer 2000 it shall be.
The only problem I personally faced with this type of set-up was that I only know enough about electricity and wiring to keep myself alive. This system would need a sensor track built for it to interface with the computer and this is simply something that is out of my league. That is where Carlson’s Slot Cars comes to the rescue. They design and build custom sensor tracks made exclusively for lap timing software. I had a chance to test some of their products recently and during the testing I knew this was the route we would take. Click HERE for a full review of the system.
So I ordered a sensor track from them and in a few weeks it arrived. We had to mask off and paint the track of course and we were very careful not to get paint near the sensors inside the rails. Hook-up of this sensor track is about as painless as it gets being virtually all Plug and Play. Once it was installed, we simply turned on our computer and loaded the software and were ready to begin racing. One thing about this software is that it has sound to it so that when you cross the start/finish line you can hear engine sounds and for us it really adds to the fun of the racing.
SCENERY
When it comes to scenery there are many methods out there that render great results. The methods we use are ones that over the years have given us not only decent scale detail but the durability we needed for our home racing.
Click Here For Race-Able Scenery.
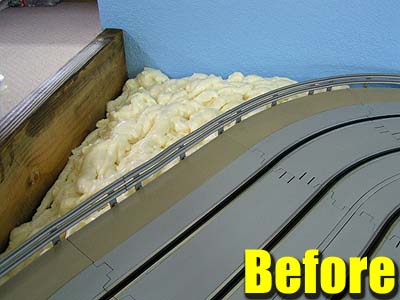
We started with spray foam and allowed it to expand and dry. This makes an excellent sturdy base for our banks to rest on. While cleaning the track, the spray foam supports the track very well and holds up to excess weight. After it has dried, I use a mixture of red primer, then gloss brown and green for the base color.
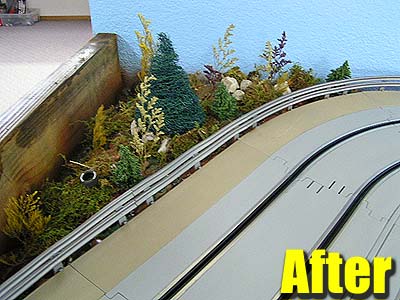
While the paint is still wet we begin to add the scenery materials featured in the article and the end result makes a big difference. Small rocks were taken from our driveway and items such as old spare tires are thrown in for good measure:)
FINAL THOUGHTS
This layout has certainly been a labor of love, but well worth it. You could easily have this entire layout built in one day or two if you wanted, so if you are thinking about building one like this, do not think it will take forever.
For me, this is my idea of what HOME 1/32nd scale slot car racing is all about. A very smooth and challenging track in a space small enough that fits in most basements or garages. Adding to it with decent power and control, along with utilizing the inexpensive track systems we have available to us today makes it even better in my eyes. You do not need a large budget to get started in this hobby to begin with, and building an advanced track like this really doesn't take much more from your pocketbook.
- Harry
As always feel free to contact me about this article or just the hobby in general at harry@homeracingworld.com, or better yet drop into our Message Forum and share your thoughts with other enthusiasts!