
![]()
One Afternoon...
This article was originally published 2 years ago. It is reprinted here to show some of you just starting out just how easy and inexpensive it is to build a Slot Car Table. Although many layouts require more space than a simple 4X8 sheet of plywood provides, it can be used to build smaller and/or beginner layouts.
Another great thing about this hobby is sharing it with others. And when it came time for one on my best friend’s birthday, the gift decision was fairly easy. Now over the past few years, he has enjoyed racing in our basement along with admiring the detail and smooth running of the latest cars coming down the pike. So it was time, he needed a slot car track for his very own.
When you build your basement or Garage Empire, sometimes buying complete sets, is more economical. Therefore, that’s what we did. But we had an excess of leftover track and accessories when finished. The question arose: “What are we going to do with all this leftover track?” Here was our answer, and the fun we had doing it was as rewarding as the gift itself. It does not take a lot of money or time, as you will soon find out.
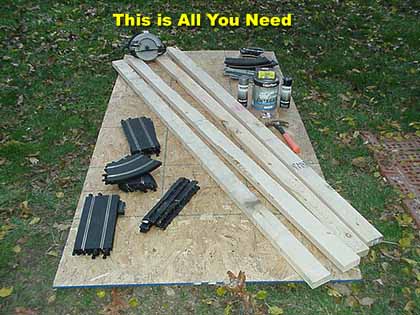
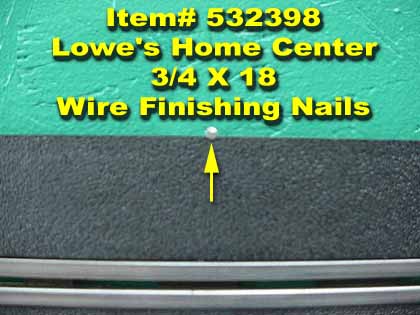
Of course, first is your initial bill of materials. Which all was obtained for less than 1 slot car. First off a sheet of 4X8 particle or chipboard, we chose 7/16-inch thickness. Then it was the 2X4X8 studs. A total of 4 were used. Paint was in order, so off to our favorite discount store (Wal-Mart) for a gallon of semi-gloss paint. Fastening the track was done with ¾ X 18 finishing nails, and when it was all said and done cost us less than $45.00. A bit more than a bad tie he would never wear, but well worth it, plus we shared the hobby far more than he ever expected.
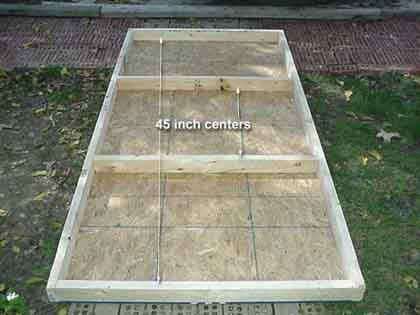
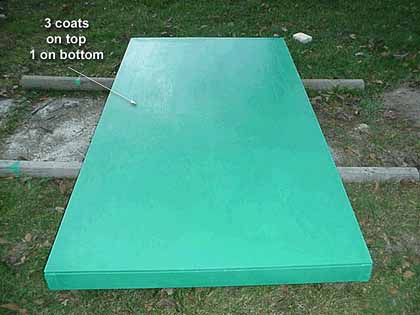
This construction is very simple, nothing fancy here. Take your 2X4’s and cut 4 each 45 inch long center braces. Ok, all the cutting of wood is now complete, put the saw away. Then put your 8-foot 2X4 on the sides, and place your centers. Nail in place, flip the table over and nail the top to the frame. Your no-frills slot car table is complete! Now it’s time to sling some paint. We gave our table a liberal dose of paint, one coat underneath and 3 on top. “Underneath” you ask? Yes, because this table is mobile, sometimes stored in a garage in different temperatures, so to protect the wood as much as possible, we added these extra coats.
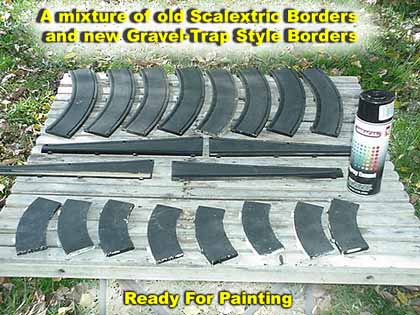
As the table dried, track preparation was beginning. Nothing elaborate here, a can of gloss black and gloss silver was all it took to dress up the track borders and guardrails. You could let them be as they are, but we like the effect of this and use it on our larger layout, so we incorporated it here as well.
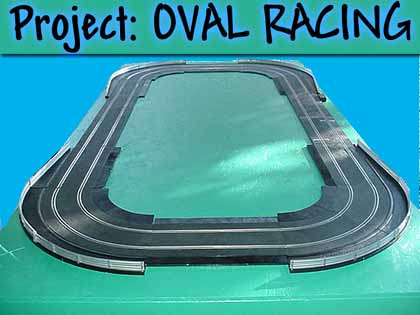
When dry, its time to let the “rubber meet the road” so to speak, with track construction. We chose a simple rectangle or oval, no it’s not Sears Point, but oval racing is fun, and quite appropriate for the beginner. Only using the nails on the outside of the track to fasten it allows the track to shrink and expand in temperature changes, yet holds the track firmly in place.

Our final touch was shoe polish. Yep, you read it right. Black shoe polish in the bottle with the sponge-like top works great to bring your track back to new-like finish. Apply it liberally; don’t worry about getting it on the track rails at all. When completed, take a rag, and lightly coat it with WD-40 and rub it along the tops of the rails, this cleans them right up with no effort.
And there you have it. Not bad for an afternoon, and really not even that much. We arrived home at 1:15 PM. Given football was on and we also cooked some pork steaks for our guests, the whole thing was completed by 4:30 PM. Sharing this hobby is far becoming one of the more satisfying aspects of our time spent involved in it. If you have the spare track, a few hours, and a friend that has everything (almost everything)…reward yourself as much as your friend. I can't think of a better gift to give someone, why hide all the fun that this hobby has to offer?
Build a slot car track.
Harry
As always feel free to email me about this article, or just the hobby in general. Or better yet, stop in our Live Message Forum and give us a holler:)