Saturday November 01, 2003
My Artin Mercedes
 Although the Artin Mercedes models will not win any
scale accuracy awards they are not without their virtues. Aside from the low
price, they carry with them a relatively smooth drive-train, adequate motor for
smaller track systems and overall
decent body shape. There are a few modifications though that I personally
like to perform and the results they bring are certainly worth the small amount
of time required.
Although the Artin Mercedes models will not win any
scale accuracy awards they are not without their virtues. Aside from the low
price, they carry with them a relatively smooth drive-train, adequate motor for
smaller track systems and overall
decent body shape. There are a few modifications though that I personally
like to perform and the results they bring are certainly worth the small amount
of time required.
The first item I would like to address is the front axle. On most of the models these front axles have a large amount of excess side-to-side free-play that not only can effect performance, it also doesn't help matters in the scale department. The procedure I follow is about as easy it gets in our hobby, so lets get right to it shall we?
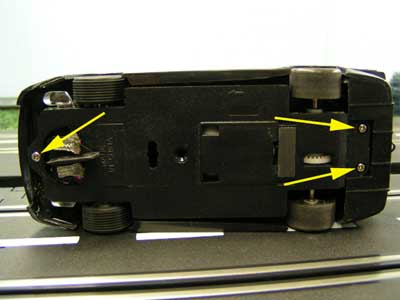
Turning the model over you will need to remove the 3 screws that mount the chassis to the body. While removing the body, be careful not to damage the lighting assembly in the event you wish to keep your model lighted. Once this is done, simply grab the front wheels with your hands and in a twisting motion remove one wheel from the axle and take out the assembly. If your wheels are on too tight to accomplish this by hand, remove the tires and use pliers on each wheel.
Once you have this assembly removed its time to trim the axle. I use our trusty Dremel Moto-Tool for this procedure with a cut-off disc attached. As an average I remove 3/32nd of an inch, or roughly the thickness of the axle for a start. In reality, you pretty much just go on sight and feel. Once I get this where I want it to be I use a small drop of Super Glue on the axle end and re-attach the wheel.
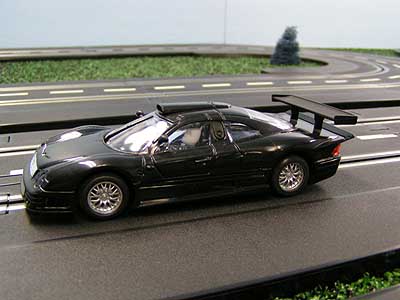
Now the second modification to perform is to lower the body on the chassis a little further. Again, this not only helps performance but it really improves the overall scale appearance of the model. My method of accomplishing this is to just slightly trim the front mounting post on the body to allow it to seat lower on the chassis.
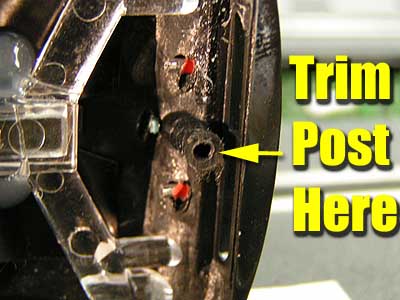
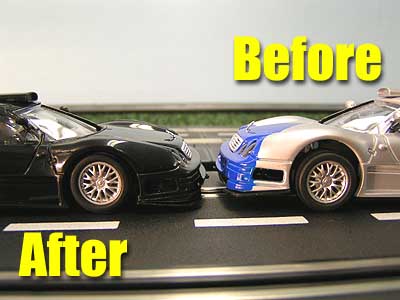
Since you already have your Dremel handy with the cut-off disc, trim the post slightly and then attach the body back onto the chassis and check the height. If it isn't where you want it, simply remove the body and trim a little more from the post. As you can hopefully see in the photos, this modification really helps bring the front end down to an acceptable level.
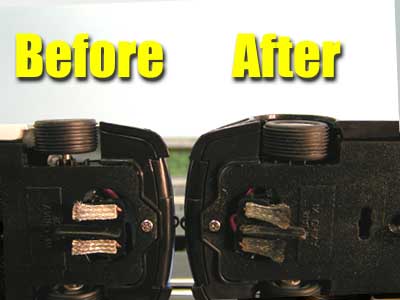
The next step not only increases performance, it allows you to accomplish this depending on your driving tastes. The front end on these models is still a little light for my liking so I choose to add lead weight as shown to help pin the front end down a little and smooth out the overall drive of the model. I use 1/4 ounce self-stick lead as shown in the photo but you can use any type that you prefer.
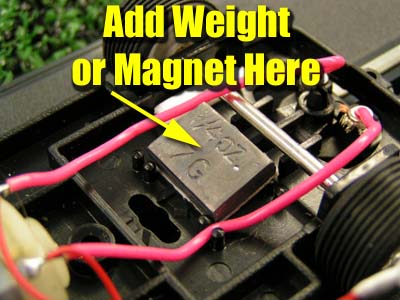
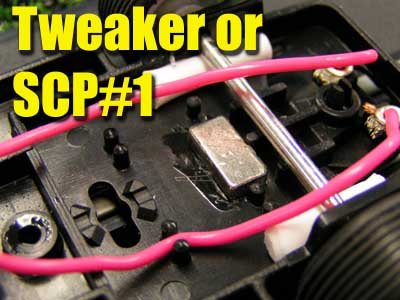
Now here is where you might want to change things slightly. I am becoming a non-magnet racing fan so this is why I use lead instead of additional magnets, however there is plenty of room to add a magnet here if you desire. For light magnet application I used one SCP#1 magnet and placed it as shown with Super Glue to hold it in place. You could also apply a stronger bar magnet here as well, or use a combination of different brand magnets to tune this mode to suite your tastes. However when it comes to the Artin cars, I don't like a great deal of magnet. The motor in these models are very mild compared to those found in other brands and adding a great deal of magnetic down-force is only going to add excess stress on it and over time will wear it out.
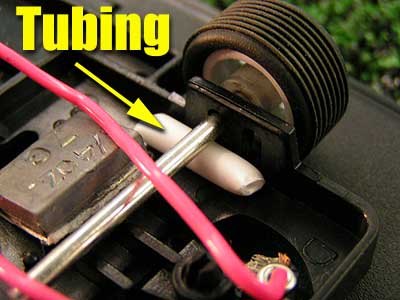
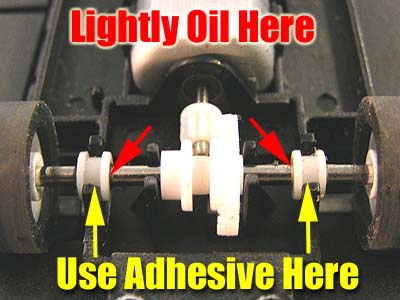
You also might notice that the front end is still raised from the track. The front axle on this car is a floating type design which is great for bumpy and uneven tracks, but since the Artin track is very flat and smooth I minimize this free-play as much as possible. Most of this can be eliminated by placing styrene tubing or strips as shown in the photos. I just used super glue to hold these in place and by no means must you use such a large piece, I only did this because they were easier to handle with my clumsy hands. While the body is removed I suggest heading to the rear and apply some adhesive as shown in the photo above. Not all models will have loose bushings but I do this as a preventive measure, then just add some oil to the bushings and each end of the motor.
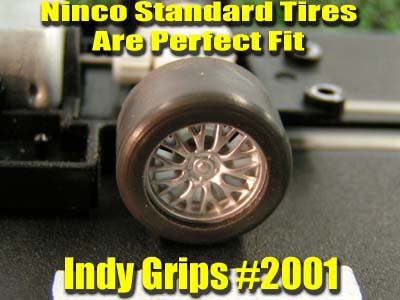
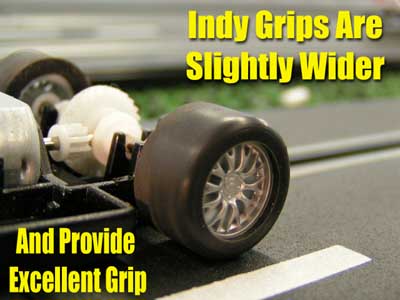
Now so far we have not invested too much additional money to get this model running smoothly, but here is where a few dollars can really make a difference. Adding after-market tires such as silicones or Supertires makes a world of difference in performance, I chose Indy Grips for my model since I had them handy. The tires on this model are identical to those used on the Ninco Rally cars and new Mini, so finding them should not be that difficult. This is perhaps one of the most important additions you can make, so I highly suggest them.
 With a little tuning here and there you should find a
much smoother, more appealing slot car. Again, these models won't appeal to
everyone but dollar for dollar they are a decent model. If you have a tight
slot-car budget or you are one of those people who enjoy the tuning process, I
can only suggest giving them a second look.
With a little tuning here and there you should find a
much smoother, more appealing slot car. Again, these models won't appeal to
everyone but dollar for dollar they are a decent model. If you have a tight
slot-car budget or you are one of those people who enjoy the tuning process, I
can only suggest giving them a second look.
- Harry
As always feel free to contact me about this article or just the hobby in general at harry@homeracingworld.com, or better yet drop into our Message Forum and share your thoughts with other enthusiasts!
![]()