
Sunday July 27, 2003
My Favorite Slot Car
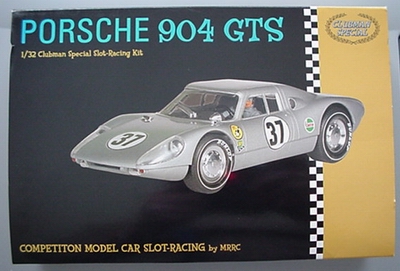
Porsche 904 GTS MRRC Kit
 I
have been building models of all types since I was about 8 and really want to
get into scratch building slot cars so this is a good place to begin to get a
feel for it I think. I have a few un-built metal chassis to work on but this is
the place I decided to start.
I
have been building models of all types since I was about 8 and really want to
get into scratch building slot cars so this is a good place to begin to get a
feel for it I think. I have a few un-built metal chassis to work on but this is
the place I decided to start.
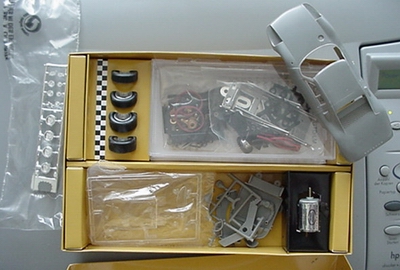
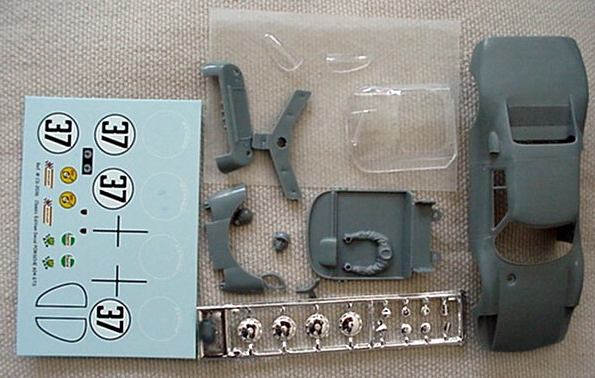
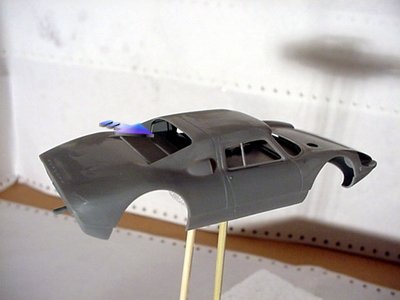
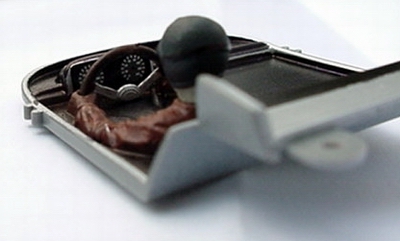
It is a very expansive kit and the smaller details
are great, a nice sight was the original mould writing on the inside of the body
'MONOGRAM MODELS, INC 1964' Good to know there is some serious history behind
this MRRC remake. The bodywork and most plastic injection molded parts
show many signs of sprue / flashing / mould joins that will need to be removed
and sanded.
3 hours (with coffee and kids breaks) later, only the body shell remains, no
flash or mould marks - just those sexy curves !

Now for the other 23 plastic parts. This is the sum of parts for the shell, and
for the running gear / chassis.
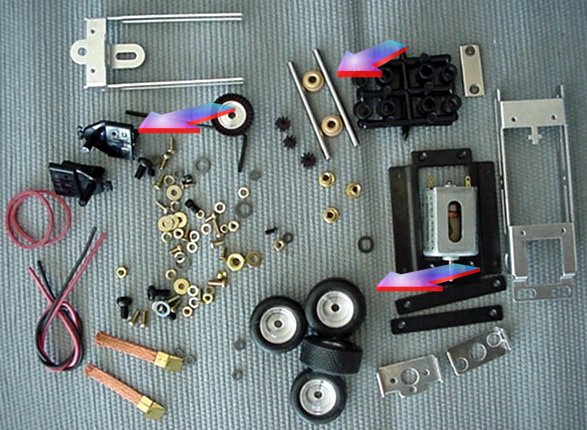
Interesting to note the two guides for
different tracks, 3 pinions (8,9,10 tooth) for custom setup, nice compound
treaded tires on aluminum wheels with 3mm solid axles and two sets of spacers
which are identical to the Scalextric Protec ones.
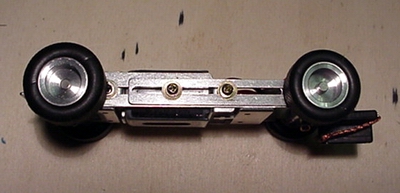
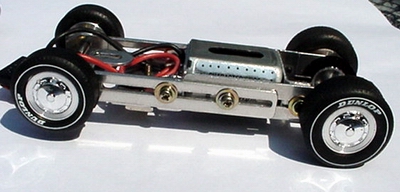
After a weekend break and a ton of work yesterday, I finally got round to the
Chassis this morning. It's fiddly but not hard. The main area to pay attention
to is making sure the measurements of the wheelbase are exact either side. After
a good 20 minutes reading the instructions over a coffee, it took me about an
hour to finish to the stage shown below, I am expecting to have to adjust the
wheel width, chassis length etc once I go to fit the bodywork.
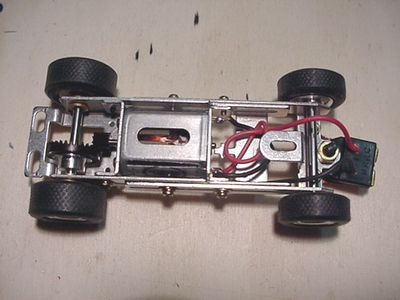
Here is where the real 'value' and quality' shows in this kit. There are elastic
bands supplied to give a self centering guide effect via the 'cross' shaped part
above the motor in the photo below, and the hook on the bottom of the guide. You
have the option of fitting a magnet (fair strength and size - Slot It 'u' one is
close for comparison) in one of two positions either in front of the motor half
way between it and the front axle or directly behind the motor. It is a screw
fit and you can lower it with spacers supplied.

If magnets are not your thing they even supply
a great weight plate (right of the photo above) that is again adjustable up and
down with spacers and even has additional weight you can add to suit. I am
really enjoying this and it is interesting to note that it includes a lot of the
options people have been asking for 'direct from the box' from most
manufacturers for months in places like Harry's here and SCI etc.
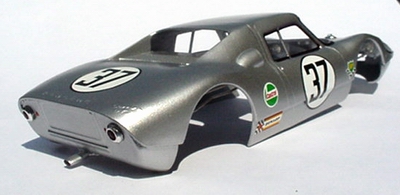
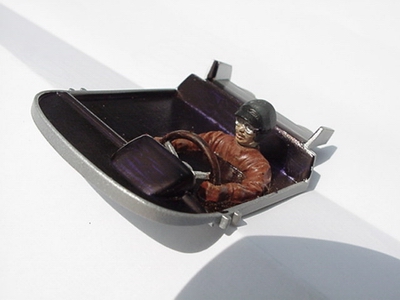
Next stage is complete and drying as I type. The body is built and all parts
requiring spraying in place, actually only the exhaust and interior tray and
that only because part of it forms the inside of the rear window as shown below.
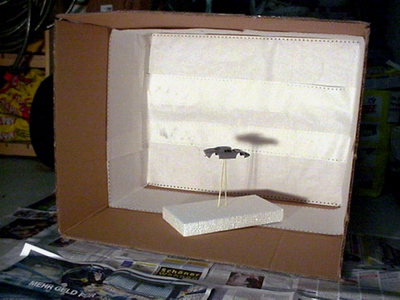
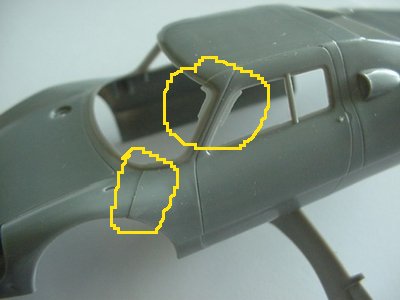
Time for the initial undercoat in a cheap, custom spray booth lit and heated for
drying by a 500W halogen light. I use the first thin coat as a 'miss' coat to
show up faults still apparent in the body work as shown, with two already
removed.
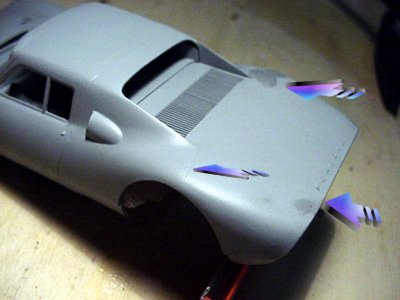
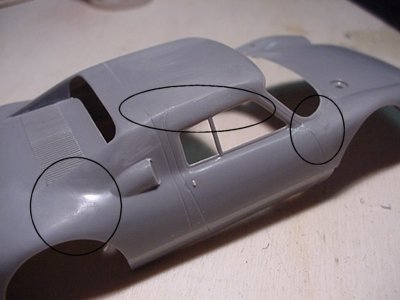
With the blemishes removed and the holes drilled for the lights (inevitable for
me) She is now Silver, with 3 thin coats and a gentle rub down between each bar
the last. All detailing was done with Indian Ink and you can see where I had to
drill the chromed lights out for the LEDS.
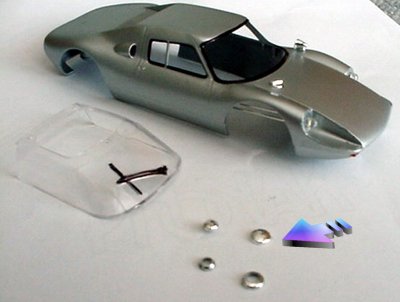
It is here that I found the only part of the entire kit that is a bit of a let
down, the Chromed parts have a lot of sprue on them and trimming means you lose
the Chroming somewhat and it can't be covered well after. Shame but a small
problem overall.
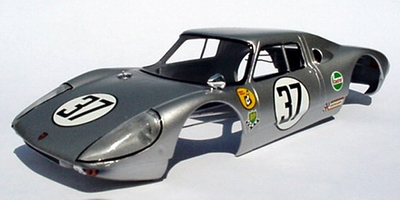
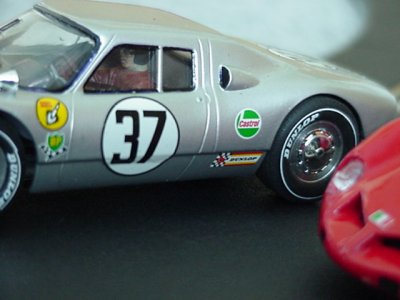
Time for the decals! They are extremely well done, trimmed as close as possible
for accuracy, very crisp, clear and a very good thickness enabling you to work
with them without tearing but at the same time once on, they don't look bulky. I
especially liked the ones for the tires and the light bezels. The LEDS fit well
into the light covers front and rear and do not detract from the model at all as
far as I am concerned.
Just the interior, clear coat ( I am testing the paint, ink and decals with the
clear coat at the moment to make sure they are all compatible) and chassis setup
to do now.
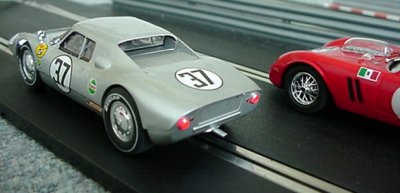
Screen and interior tray fitted, lights installed and tested, it was time to fit the chassis at last !
It went on very smoothly with none of the adjustment I was expecting, in fact
the only thing I had to do was remove the guide and install a spacer to get it
to the right height for the front wheels. Everything was then checked for
tightness and then oiled as necessary and it was time for the track.
It required little to no adjustment and runs very fast, smooth and balanced on
both Scalextric Sport and Classic (Ninco test will come over the weekend). I
have fitted the weight option without magnet and I am using the 9 tooth pinion.
A Magnet test will also be a future thing though it does not require one to be
fast, responsive and fun.
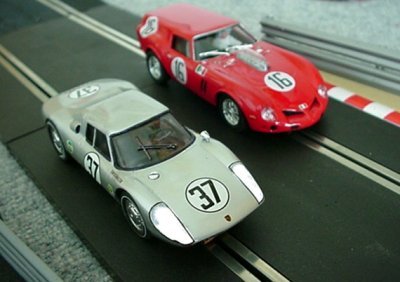
 This
kit has been a winner for me and MRRC will be getting more of my money if the
rest of their Clubman Kits are as good. I hope you all enjoyed the little side
by side run through as much as I enjoyed making it.
This
kit has been a winner for me and MRRC will be getting more of my money if the
rest of their Clubman Kits are as good. I hope you all enjoyed the little side
by side run through as much as I enjoyed making it.
- "Swissracer"