
![]()
![]()
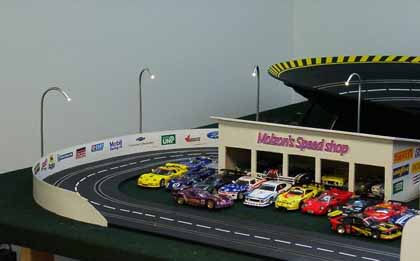 A few people have asked for an article on how to make street lights for their
race track So here it is. The look I was going for was a simple aluminum pole
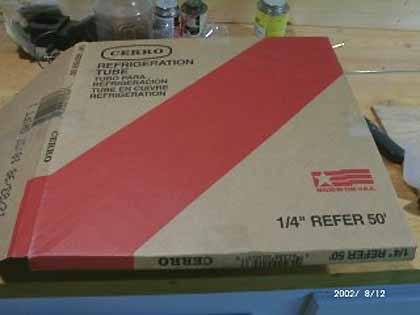
light. The materials you will need are 1/4 inch soft copper tubing (usually used
for refrigerator water supply) This should sell for about $20.00 for 50 ft at
most home supply stores ( Home depot, Lowe's )this should be enough to make
40-50 lights. You will also need a tube flaring tool.
A few people have asked for an article on how to make street lights for their
race track So here it is. The look I was going for was a simple aluminum pole
light. The materials you will need are 1/4 inch soft copper tubing (usually used
for refrigerator water supply) This should sell for about $20.00 for 50 ft at
most home supply stores ( Home depot, Lowe's )this should be enough to make
40-50 lights. You will also need a tube flaring tool.
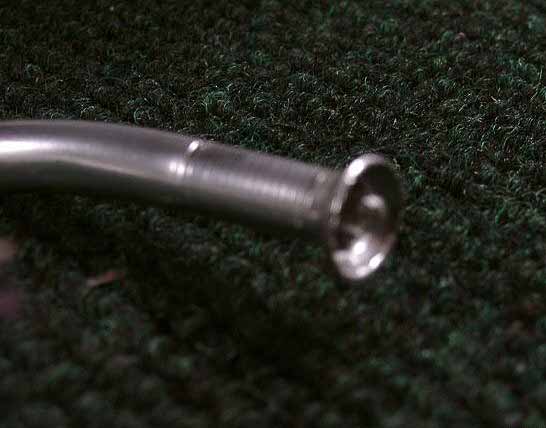
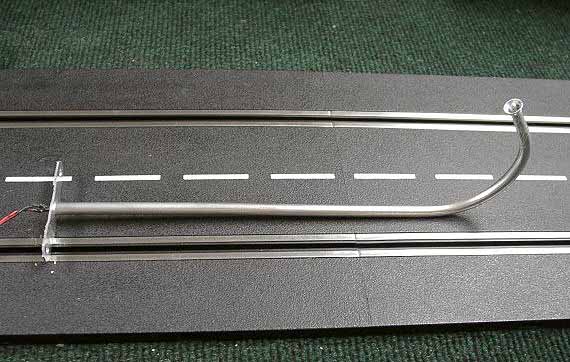
Next you will need 1/2 inch copper pipe hold downs, 1 for each light. You will also need the light bulbs. I used 12 volt mini bulbs that I found on Ebay but I have found a supply at All Electronics corp. First I cut the tubing to 11 inches. Then flare one end of the tubing. Once this is done you can put the bend in the top of the light. In order to do this you can bend the tubing around a can or bottle (something that will give you the right arch) I used a can of wd40. It was handy on my work bench. A good idea would be to mark a start and stop point on the can , this way the light will all have the same bend.
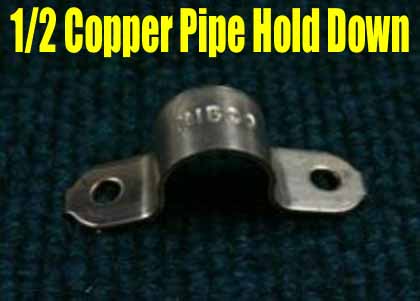
Now for the base, take the 1/2 inch pipe hold downs and flatten them. I put mine in a vise, Once it is flat you will need a hole in the middle for the wire to go though. The two holes on the side work great for mounting the light to the table. Once it is flat with the hole in the middle the two pieces need to be connected. I tapered a steel rod bigger than the middle hole in the base . I think you could also use a nail for this but make sure you will be able to get it out after the two pieces have been soldered. Put the rod in the vise, place the base on and then the light pole positioning the bend at a 90 degree angle to the mounting holes in the base.
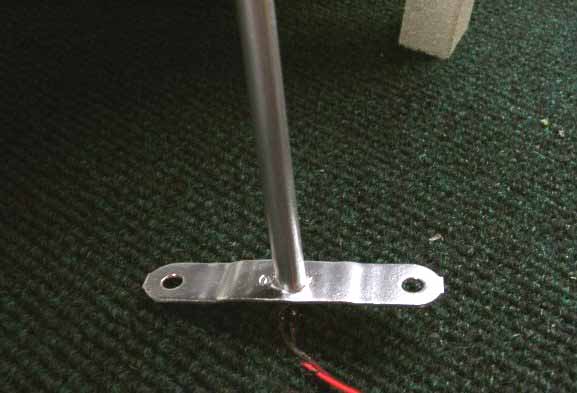
You should be able to push on the base and pole enough to hold them steady while they are soldered. At this point make sure the two pieces are straight and square , then solder them together. Make sure to clean off the solder residue and flux before painting. To paint the poles I hung them from the basement ceiling rafters with a wire coat hanger. After the light pole is painted feed the bulb with the wire thru the top of the light pole. I had to splice more wire onto the end of the bulb I had. To mount the light to the table , cut a slice in the carpet or whatever covering you have and pull back. Drill a hole in the table big enough for the wire to go through and feed the wire to the underside of the table. Then screw the light pole to the table and fold the carpet back over the light base.
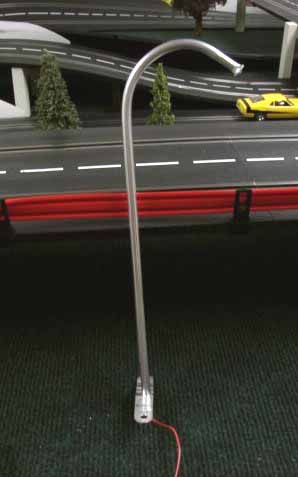
I think a good way of running the wires is to make a junction box under the table and the run a wire from the junction box to a switch near the drivers station and feed the switch with a 12 volt transformer. I used one laying around in a drawer for years. If you run more than one switch you can light up different parts of the track at different times.
If you have any questions or comments please email me at gene@slotcarplace.com
Also make sure you drop into his homepage and check out all the great modeling and photos he has done!
![]()