
Sunday June 03, 2007
Sunday June 03, 2007
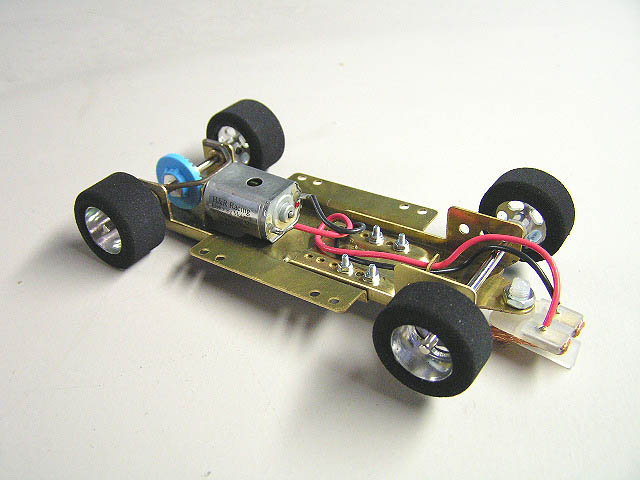
The H&R "Slider" Chassis

The following review is one I have personally waited to do for quite some time. I was fortunate to be behind the scenes during the creation of this chassis and it was not only a lot of fun, but a very eye opening experience. Finally after a few bumps in the road this chassis has arrived, so let us take a closer look at what H & R has brought us.

Right off the bat most of you that have been in this hobby for awhile will notice this chassis is similar to others we have seen over the years. However, this one is an all new design that makes it one of the most flexible platforms to model with for both commercial and home track use.
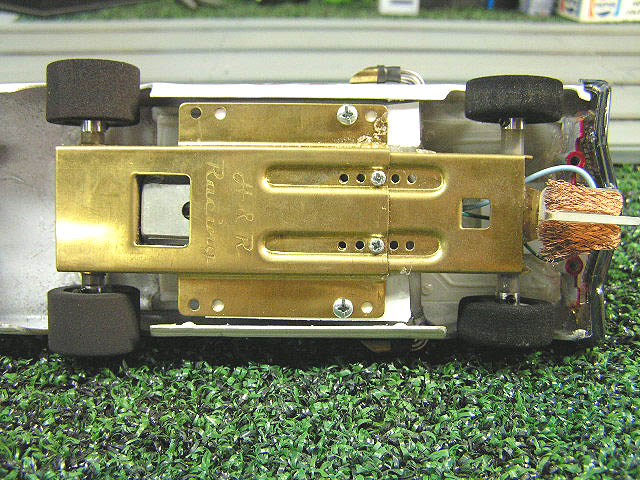
The first thing you might notice is the front end and the obvious adjustable hole settings it has. The chassis is a 2 piece format that has the front held in place by 4 small screws, 2 on each side. Having 2 sets of screws not only adds to the durability of the front end, but in the event you lose one at the track, you can still keep on racing.
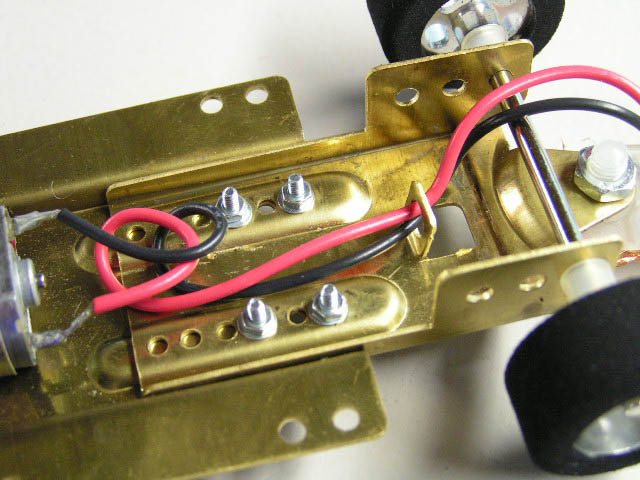
Simply by removing the screws, you can slide the front of the chassis to fit the wheel base you want to use and then just re-install and tighten them. This action is where the nickname Slider comes from.
You also can see the front bulkhead has an additional 3 holes for even more wheel base adjustments. Between these 3 settings on top and the 6 on the front pan make it a very versatile chassis with combinations that will fit most any body application without major chassis modifications. This should be a welcome change for many modelers in this scale, I know it certainly is for me.
The wheel base options range from 5.075 inches down to 3.700. I have tested a wide variety of model kits in both 1/24 and 1/25 and this chassis can fit them all. If you are an advanced scratch-builder there are even more possibilities. The front section can be fine tuned to a particular body. If the bolt hole selection still is slightly off, simply soldered in place to suit the body in question.
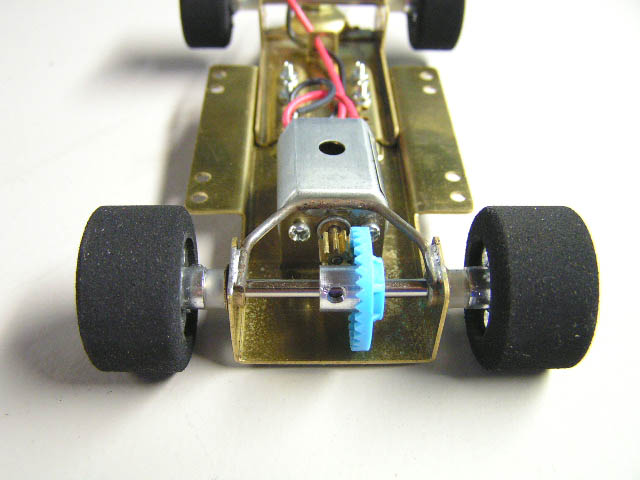
This isn't the only thing that sets this chassis apart. On some chassis designs the axles were different sizes. On the Slider chassis both axles use 1/8 to allow easier and faster wheel changes. So if you needed to use the slimmer front wheels in the rear to clear your body, you can just simply install them without having to drill the wheel to fit the axle. Again, this is a very nice option and one that I have utilized already.
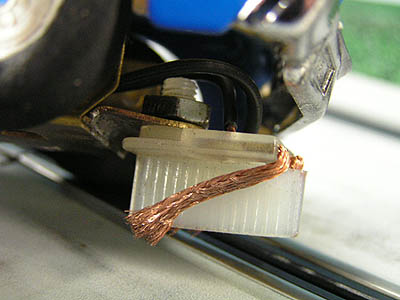
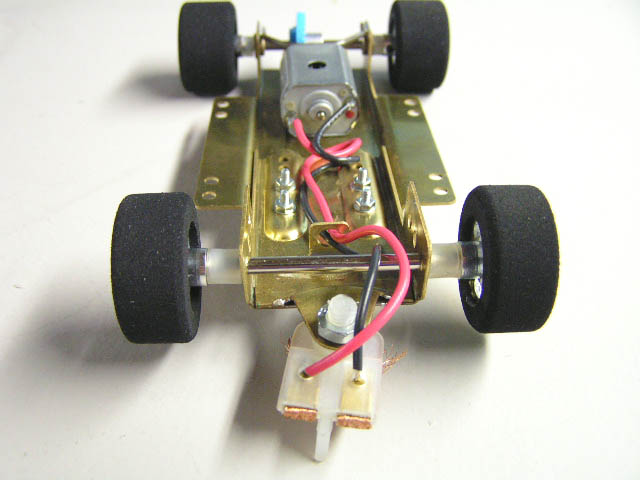
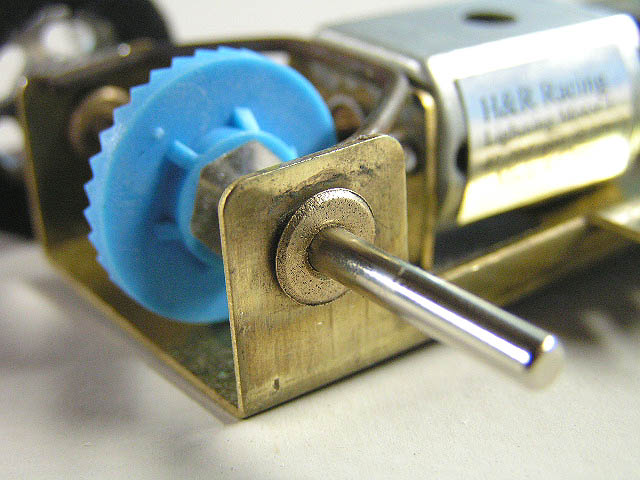
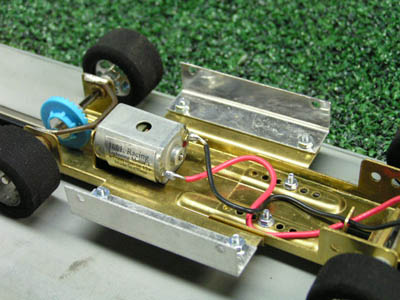
The motor used is familiar to many home racers and is quite powerful enough for most track applications. It is rated at 40,000 RPMS @ 12 volts and is equipped with a 9 tooth pinion that is turning a 33 tooth crown gear. Up front the guide used is pretty standard fare along with the braid.

The rear axle utilizes bushings which I feel is more than sufficient but you can always change them to bearings if you feel you need to. The important thing here is that these bushings are very durable and sit solidly in the chassis. I found no signs of them spinning in the chassis under full power.
The width of the wheels are set with nylon bushings that you can trim to suit your particular model. Again, these bushings have been in our hobby for quite awhile and are very durable and easy to sand or cut for the proper setting.
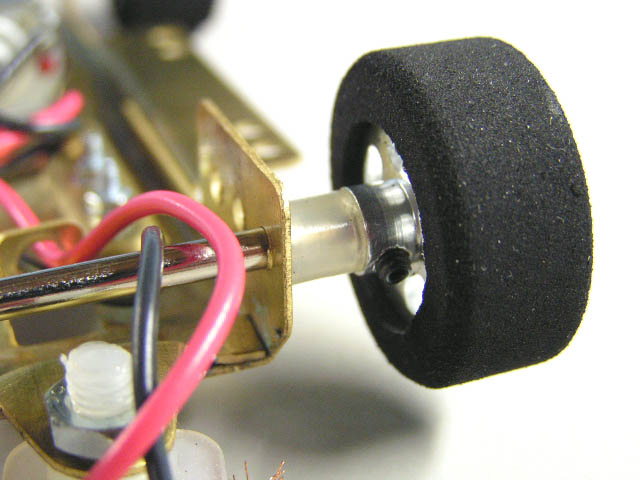
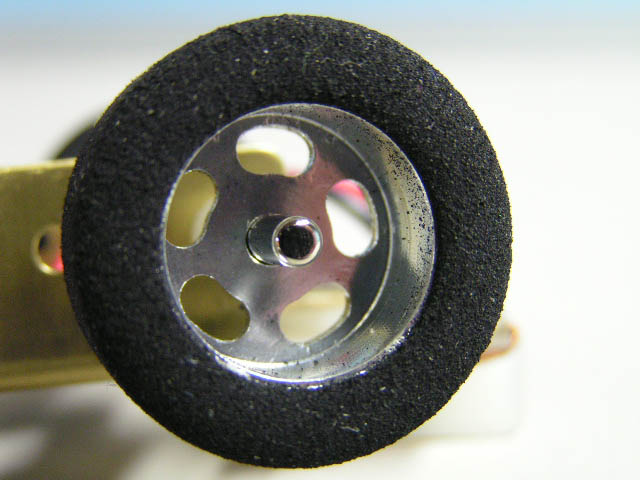
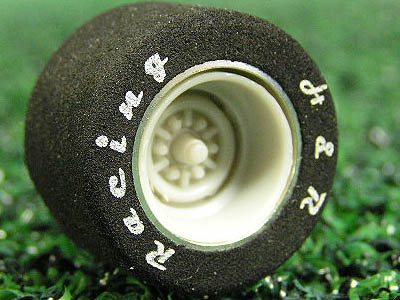
The tires are medium density foam glued to a new 5 hole aluminum wheel. This 5 hole pattern looks very good all by itself in my eyes, yet adding inserts for a more scale appearance is very easy to accomplish.
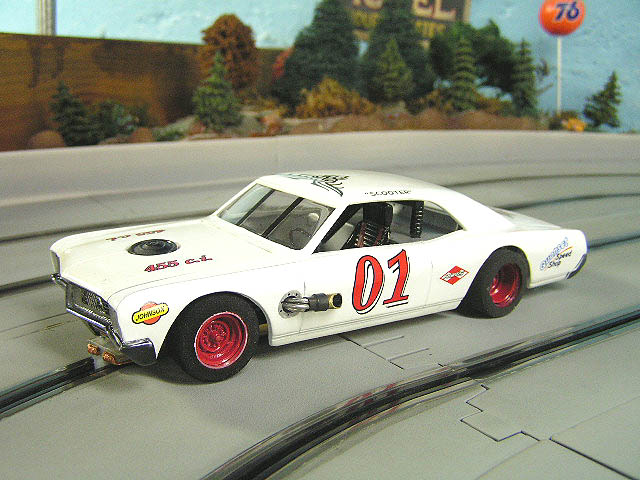
My first model with this chassis was a Saturday Night Stocker class body from a AMT kit. This is by far my favorite type of racing in this scale and the assembly went smoothly.
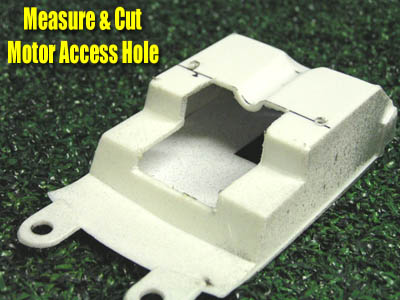
After setting the wheelbase I started on the interior. I first measured and cut the interior pan to allow for the motor access.
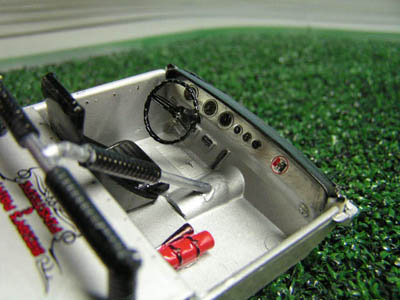
I used some of the roll bars and added a few decals here and there.

I like to use the interior tray for mounting the body to the chassis. This just allows me to try and create a more detailed model and that is half the fun. Once you measure and cut the interior tray for the motor to clear you an either leave it open, or use any sheet styrene to create a "doghouse" or cover to hide it. With this kit I chose to go with a doghouse cover and the results were pleasing.
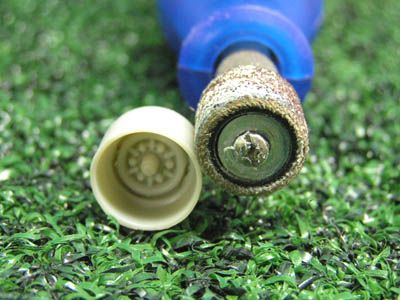
I used the plastic inserts found in the kit, sanded them down and hot glued them into the wheels. The trim the axle I used the smaller cutting disc in my Dremel, then sanded the edges by hand to clean up any flashing.

After this is was just a matter of finishing out the body and then hot gluing the interior inside. Once this was finished, I simply dropped the body on the chassis and lined it up where I wanted it.
I used a couple beads of hot glue to hold it in place while I marked and drilled the pilot holes for the screws. Once this was finished, I added the screws and away we were to the track.
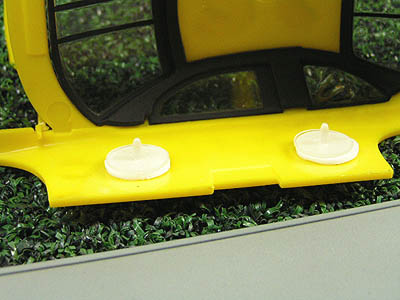
If you do not want to create an interior or use a lexan type tray, you can use the provided body mount kit. This kit included a section of double-sided tape that is pre-cut in circles to fit the plastic mounting tabs. Simply measure where they need to be on the inside of your body and set them in place. The points of the tabs rest inside the holes of the L shaped brackets and it is simply held in place by pressure. I mounted this to a NASCAR 1/24th scale ProFinish kit in about 15 minutes.
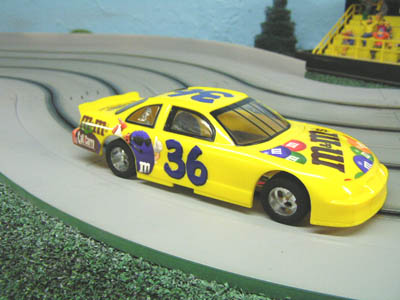
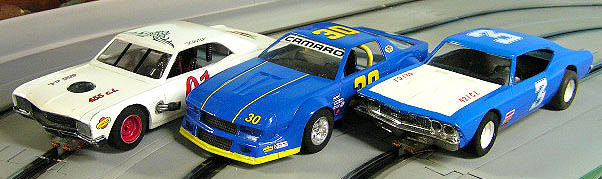
Since this chassis has been released I have made several models and I could not be happier with this product. This chassis is not just for oval/NASCAR racing either as I decided to build an IMSA Camaro for road racing too. I have plenty more model kits in my collection and all I needed was a chassis to build them on, and now I have it.
My Bottom Line
Although it is not perfect, this chassis is still a great platform to race with. It has brought some design elements that many enthusiasts have asked for and that scores big points with myself and others I race with. Another positive factor about this chassis that I feel is worth mentioning is WHO is bringing it to us. The name might be new, but the folks at H&R Racing has been in our hobby for many years and has a very solid reputation. I speak with them quite often and they are determined to continue to improve upon this first release.
I am just pleased to finally see this chassis and know that it won't be going away soon after we start a series. I think 1/24th scale racers have a lot to be happy for: An affordable, durable, and versatile ready to run chassis that will fit a wide variety of model bodies.
- Harry
As always feel free to contact me about this article or just the hobby in general at harry@homeracingworld.com, or better yet drop into our Message Forum and share your thoughts with other enthusiasts!
Thanks Go To H&R Racing &
SlotCarPlace.Com
For Bringing Us This New Chassis!

![]()