
Sunday July 22, 2007
Sunday July 22, 2007

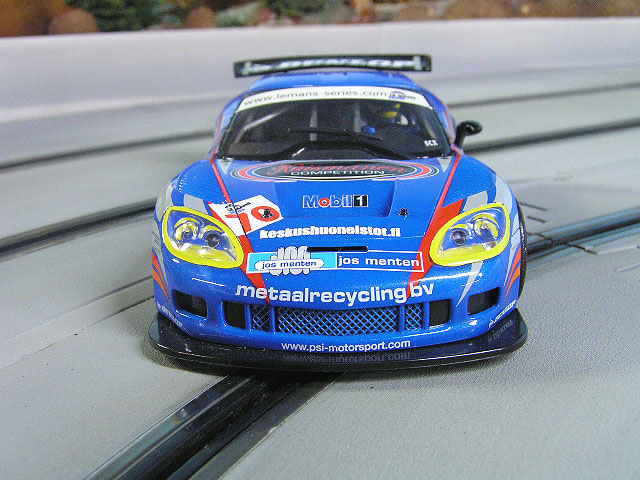
If you have not already noticed, SCX has really been heating things up with a flurry of new releases. One model in particular caught my eye and although I passed on previous versions, this time I had to have one. The Corvette C6R has been produced by other brands but after the latest NASCAR efforts from SCX that really impressed me, I wanted to try other models from them to see how they would stack up.
Before we get started, I want the reader to know that this review is quite different than ones we have done in the past. I decided to bring this model with me to a recent home racing event and get the opinions of other enthusiasts. After allowing others to give me their comments on both the overall looks of the car plus how it ran out of the box, it was pretty clear that SCX has made another good product for our scale. It is not without a few issues of course, but overall the reaction was positive.
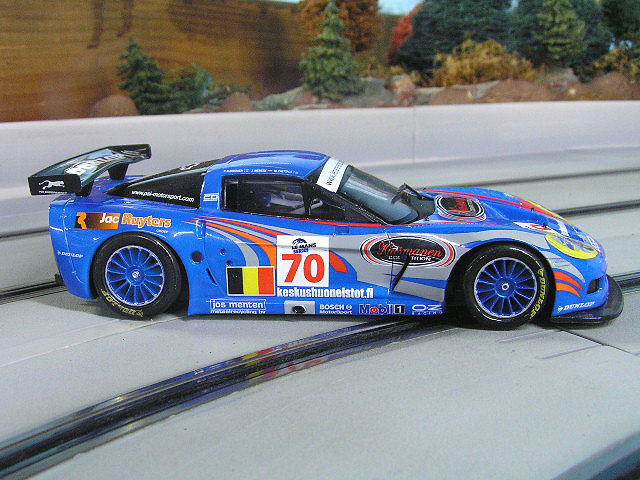

And looking closer at the model you should see why. SCX has created a fairly accurate rendition of this car and it pleased most enthusiasts who inspected it. I was impressed at the paint work as all markings were very crisp and clean with no signs of fading or runs. The light metal flake in the paint is also impressive and I wish my photos could capture it better. If you get the chance at your local hobby shop, pick one up and give it close look and you will fully understand.

Wheels and tires seemed well enough and most viewers appreciated the wheels painted in blue. Although I have seen only a few 1:1 photos with the car this way, it does appear to be accurate. The tires have the markings on them sealed with a light clear coat which sad to report does not hold up well to hard racing.
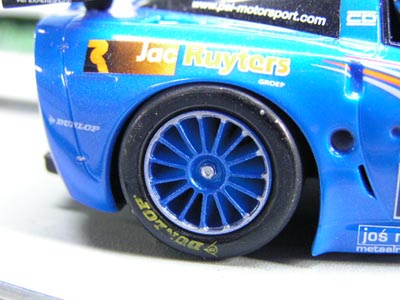
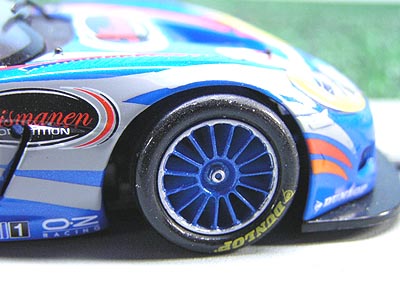
If these mean a great deal to you, another coat of clear might help, but with the flexing of the tires it will soon wear away regardless. I don't see this as a huge issue really, I only mention it as some enthusiasts did bring this to light during testing.
Initial Testing
Although this model did function out of the box, an issue did appear that really hinders the performance of the model: Tire to body rub. SCX has equipped this car with the same type of floating rear axle and motor pod assembly that is found on the NASCARS. This is the one item that I wish they would change as this design adds nothing to help the performance of the model in my opinion. All it really does is add excess body roll to a model that doesn't need it. And in this case it does more harm than good. Thankfully it is very easy to remedy so do not let this stop you from adding this model to your collection.
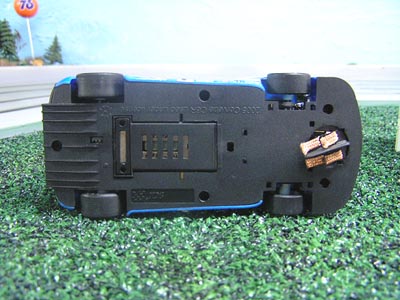
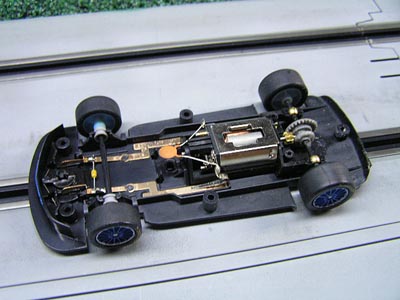
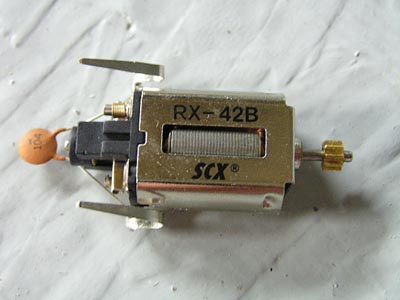
We will show our quick fix for this, but first let us take a peek under the hood. 5 screws hold the chassis to the body and are easily removed. Inside we see the SCX 42B motor equipped with a 9 tooth pinion that is turning a 27 tooth crown gear. Gear mesh is decent but some break-in will be needed. The motor appears to be the same one found in the latest NASCARS but this one is stamped SCX and Technitoys. As far as I can tell these motors are identical in performance so I suppose these markings mean nothing.
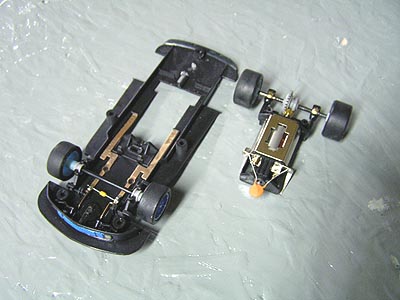
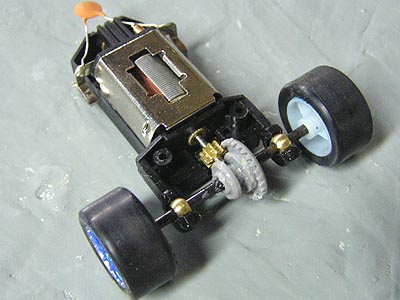
Here is where we see the motor pod assembly up close. This pod popped out of the chassis much easier than expected but it snaps back in and appears to be solid enough for hard racing. The motor and electrical contact is wireless and here is where problems can occur. If your model cuts out or seems not to have the power you expected, check the motor tabs that touch the contact strip in the chassis.
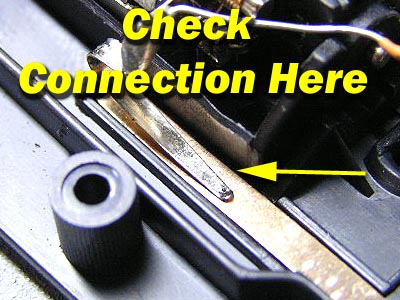
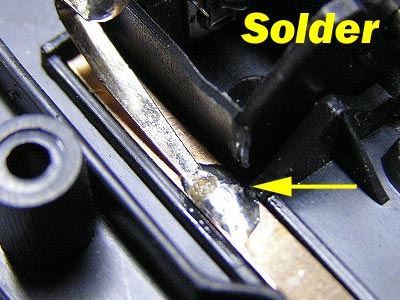
Even the slightest amount of oil or dirt here can effect electrical conductivity. Also make sure the motor tabs are properly adjusted. However, for best results you could solder this tab to the strip. Not everyone knows how to solder, or even wants to try, but this will be the best repair method. This is what I did and it just adds reliability to the system. Again, you don't have to do this, just making sure these tabs are properly adjusted will leave you with a fine running model.
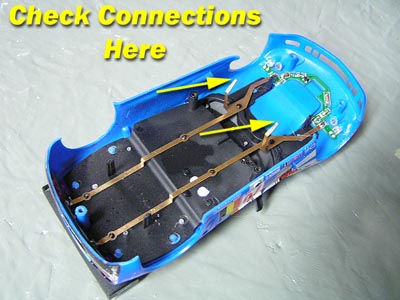
This same wireless design applies to your front and rear lights. If you see the lights not functioning or flickering during use, remove the body and check the 2 long tabs that make contact with this same chassis contact strip.
Up front I noticed a slight amount of horizontal free-play in the axle. Not a lot for most to worry about, but I feel a need to mention it. I decided to try and shim this axle to get it as close as possible but none of the shims or washers I had on hand would fit because they were too thick. I decided to make my own using Evergreen Styrene Part# 9010 .010 thick. I cut 2 small squares and simply drilled a hole to fit over the axle.
![]()
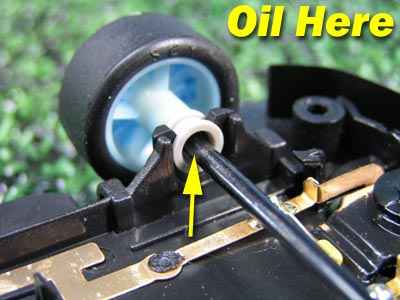
This worked perfectly although I admit it is a little crude. However, sometimes we have to make things work without having the exactly ideal material and such is the case here. After you re-install the front axle assembly, go ahead and add a light drop of oil on each bushing. I found them to be very dry and this really helped reduce the axle friction.
The last item is the motor pod itself. I simply placed the chassis on a spare piece of track to make sure it was level. Then I added a light bead of hot glue to each side. In the photo you can see where the hot glue is placed, do the other side as shown and you will have eliminated the tire to body rub.
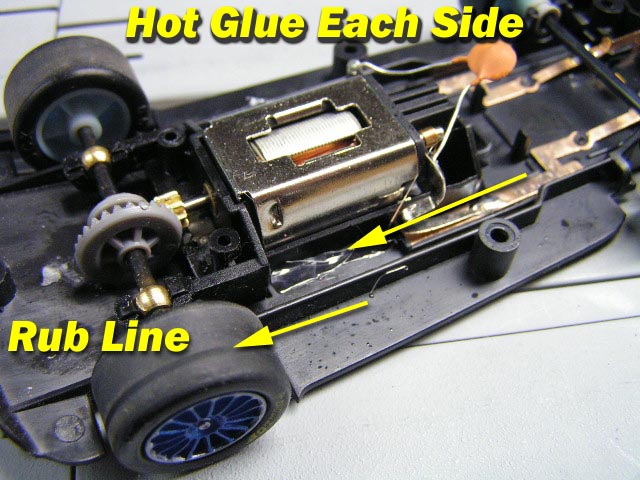
In the photo you can also see the rub line where contact was being made. After you glue the pod, sand and clean your rear tires and then install the body. Take some test laps and then inspect the tire again for any contact. If there is still contact, check to make sure you have the motor pod level with the chassis. This is why I use hot glue here as if you make a mistake, it is easily cut away and then re-applied where needed.
More Testing
After mounting the body back on it was time for more fun on the track. And fun we had! This car managed and average of 3.9 seconds which was far better than the 4.5 we had out of the box. A very smooth and clean running model with excellent braking and acceleration. I found it to be very forgiving as well when I decided to be a little heavy handed in the corners. The bar magnet can be adjusted of course, but I left ours in the fully tightened position. Just the sight of this car was pleasure enough for me, but after the small modifications we made the performance was equally pleasing.
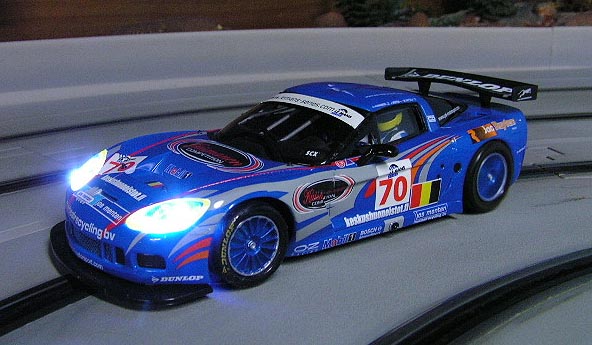
And let us not forget the lighting system. Lights add so much to a model for me when they should have them, and we were very happy to see them included here. We shut off our overhead lights and began some night racing action. The lights on this model are very bright and we really liked how it looked as it snaked through all the turns.
The bottom line is that SCX has made some improvements to their current line with the best being a motor that has plenty of speed and torque. I still think the floating pod assembly does more harm than good and perhaps SCX will realize this and make a solid chassis in the future. In any event, this car offers a good balance for both the beginner in our hobby and veteran enthusiast. I am glad I decided to grab one and most likely I will acquire another for a matched pair.
-Harry
As always feel free to contact me about this article or just the hobby in general at harry@homeracingworld.com, or better yet drop into our Message Forum and share your thoughts with other enthusiasts!
Thanks Go To Gene At SLOTCARPLACE for Providing Us With This Model!
![]()