
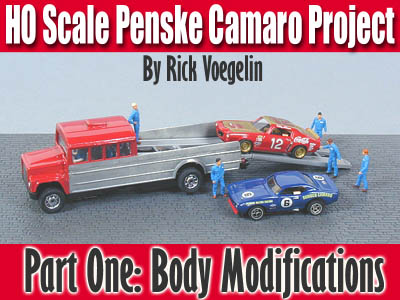
HO Penske Camaro Project
 When
Roger Corrie announced that he would host a Camaro Bash mail-in proxy race for
members of the HO Slot Car Modeling group, I knew instantly the car I would
enter: An HO version of the 1968 Penske Racing Camaro Z28 driven by Mark
Donohue. Since there would be a concours competition in addition to the race, I
wanted to model the real race car as closely as possible in HO scale, while
respecting the very restrictive rules on body and chassis modifications.
When
Roger Corrie announced that he would host a Camaro Bash mail-in proxy race for
members of the HO Slot Car Modeling group, I knew instantly the car I would
enter: An HO version of the 1968 Penske Racing Camaro Z28 driven by Mark
Donohue. Since there would be a concours competition in addition to the race, I
wanted to model the real race car as closely as possible in HO scale, while
respecting the very restrictive rules on body and chassis modifications.
I decided to cover my bets with a second entry, a 1970 Camaro inspired by Bobby Allison's short-track racer. It's a fictional recreation, since Allison actually drove a 1974 version with a slanted front end. The Johnny Lightning Camaro body that I would use as a starting point handles well. I hoped that either the short-wheelbase Penske Camaro or the long-wheelbase Allison Camaro would prove to be the hot setup on Corrie's twisty Green Run Raceway.
I kept a digital camera near the workbench as I worked on the cars and recorded the modifications (both successes and missteps) as I worked. My goal was to use commonplace household articles instead of expensive photo-etched parts. I also realized that these were race cars first and concours entries second, so there would inevitably be some damage inflicted on the track.
I enjoyed the doing this project, and I hope that you enjoy reading about it.
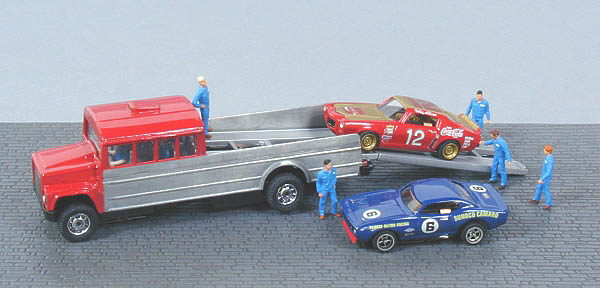
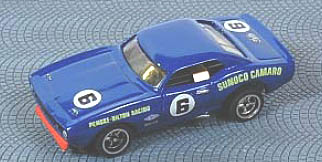
Above are my finished entries in the Camaro Bash proxy race and concours. Penske Racing's 1968 Sunoco Camaro, Bobby Allison's short-track Coca-Cola Camaro, and a motorized car hauler made from a diecast school bus. In this series I'll show how I built the two Camaros for the Aurora Thunderjet chassis.
I've always been partial to the 1968 Camaro body style. To my eye, it has the cleanest design among the three first-generation Camaros. While a 1969 Sunoco Camaro HO slot is commercially available from Model Motoring, I wanted to do the 1968 version.
From a racing perspective, I thought the 1968 version's round wheel openings would offer more tire clearance than the squared-off wheel wells in the 1969 body since the Camaro Bash rules prohibited cutting the stock wheel openings.
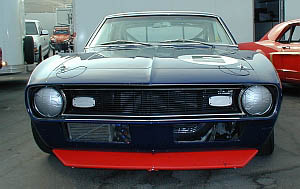
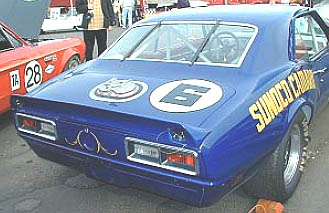
I attended the 2003 Monterey Historics at Laguna Seca Raceway, and photographed three restored Penske Racing Trans-Am Camaros. There were two excellent 1968 versions on hand: the No. 15 that raced at Sebring, and the No. 6 that ran for the remainder of the 1968 season.
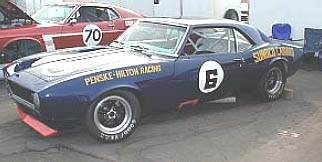
The No. 6 Camaro dominated the Trans-Am series – Donohue started on the pole nine times and won 10 of the 13 races. The real race car is now owned by Tom McIntyre, and it is a perfectly preserved example of the state of the racing art in 1968.
![]()
Fortunately the Trans-Am series has been well documented. Dave Friedman's book,
Trans-Am: The Pony Car Wars 1966-1972, is the definitive reference for the series' Golden Age in the 1968-70. It contains numerous color photographs of the '68 Penske Camaros. The May/June issue of Vintage Motorsports also had an article on McIntyre's restored Penske Sunoco Camaro.
The Trans-Am race cars of the '60s were very close to stock, although the racers soon began taking liberties with the rules to gain an "unfair advantage." The No. 6 Camaro's front bumper was removed, a factory spoiler installed, the headlights covered with duct tape, and the turn signal lenses replaced with aluminum covers – all modifications that I could reproduce in HO scale.
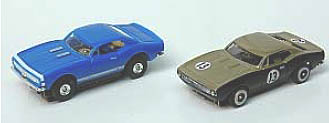
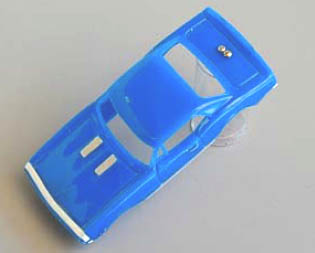
My starting point was a Model Motoring 1967 Camaro, shown here alongside a Smokey Yunick Trans-Am Camaro I'd modeled previously. It's an injection molded styrene body, as required by the race rules.
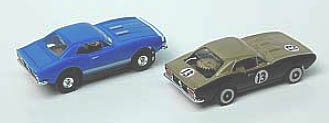
Unfortunately, the stock MM body isn't going to win any awards for authenticity. Like many HO slot car bodies, its proportions are somewhat distorted – the greenhouse is too small and the wheel openings are exaggerated. But I was determined to make the best of it.
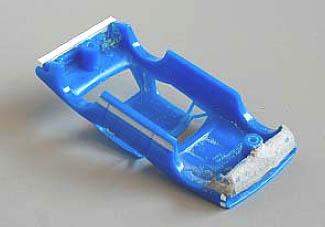
The first step was to remove the front bumper and grille assembly. Then I filled in the front valance panel with JB Weld epoxy. The fact that the dense putty added some front end weight was a nice bonus. Normally I would lighten a slot car body by grinding material from the inside, making the hood, roof and trunk as thin as possible. In this instance, however, the rules prohibited lightening the body, so I resisted the temptation to make it paper thin.
The rear bumper was also removed on the prototype. Other details I wanted to model were the fuel filler/vent assembly on the rear deck lid and the straps on the rear window.
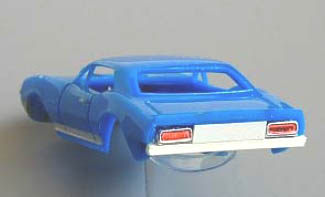
The rear of the Model Motoring Camaro is rather crude, with a large gap between the taillights. I made a rear valance panel and filled the space between the taillights with styrene. I trimmed the front and rear body posts to lower the car. The limiting factor on the '68 Camaro body is the clearance between the rear driven gear and the trunk lid. I solved this problem on my Smokey Yunick Camaro by cutting a section out of the deck lid and rear window. This time, however, the rules prohibited this modification, so the car sits higher in the rear than I would like – looks a little like a stink bug, but at least it's legal.
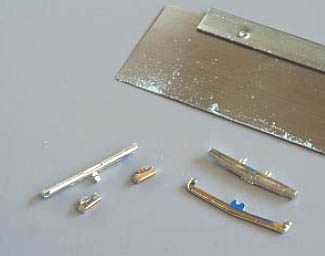
The grille and front bumper and the taillights and rear bumper are molded as assemblies. I used a razor saw to separate the bumpers, which went into the scrap parts box.

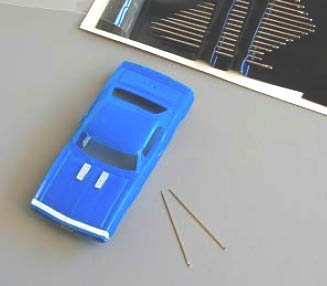
The Model Motoring Camaro has hidden headlights as used on Rally Sport versions, while the real race car has the exposed headlights and turn signals installed on Camaro sport coupes. I decided to model the exposed headlights and turn signals using sewing pins. The first step was to drill holes for the lights in the plastic grille.
It turns out there is a huge variety of pins. I went through my wife's sewing kit and found pins with .075" diameter heads for the headlights and smaller .045" pins for the turn signals.

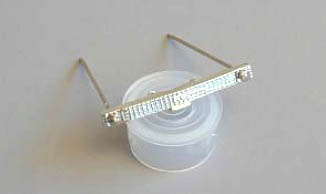
I also realized that pins could be used to model the fuel filler/vent caps on the trunk lid. I drilled two holes side-by-side in the center of the trunk so that the pin heads would be touching.
Here are the pins inserted in the trunk for a trial fit. You would not believe how many differences there are in sewing pins; I sorted through dozens before finding two with nicely rounded heads.
The hood pins are quite prominent on the real racer, so I wanted to include them on my HO version. I found an assortment of needles at a dollar store. The pack included two .020" diameter needles with incredibly small eyes.
Looked like hood pins to me!
I drilled .020" holes for the sewing needle hood pins. Holes for the wires that retain the hood pins were drilled with a 1/64" drill bit.
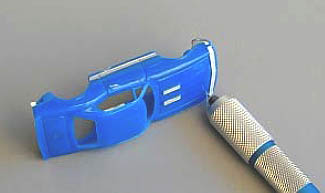
The Model Motoring body has the nonfunctional hood grilles that were available in 1967. Since the race car has a flat hood, I removed the grilles with a chisel blade, then filed and sanded the hood. The most prominent features on the sides of the race car are the exhaust headers under the doors. I glued pieces of styrene to the inside of the rocker panels to provide enough material to mount a miniature collector.
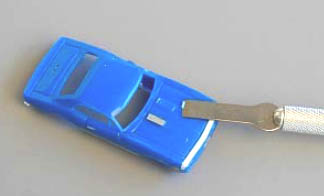

The rocker panels were grooved with a small round file.
An empty precision oiler provided the thin wall stainless steel tubing for the exhaust pipes. I cut small sections of the tubing with an abrasive wheel and then used a countersunk to make the ends of the tubing as thin as possible. With a plan and some parts, the next step was to prep and paint the body.
To be Continued in Part II of the HO Penske Camaro Project
.- Rick