
Tuesday March 11, 2008
Tuesday March 11, 2008
This review has had the help of many HRW
members. I want to thank all of you who helped.
If you are new to the hobby, make sure to visit
our forums where you
will meet the finest enthusiasts in our hobby today.
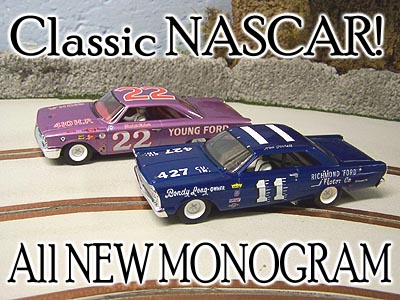
Perhaps one of the most anticipated model releases this year has arrived at my door. The Revell-Monogram Classic NASCARS have been talked about a great deal since the first test shots of the bodies were made public and now we finally get to see what these beauties are all about. Has it been worth the wait? Let's find out!
To start things off I have to admit that I am simply thrilled to have them. This series of NASCAR had some of the greatest drivers & mechanics of our time and they raced hard and fast for little more than pride. I am one who does not take for granted the models that are in front of me. 10 years ago if you asked anyone if there was a chance they would be done, you would have been looked at like you just lost your mind. Then in the summer of 2003 Carrera released the first of the classic NASCARS and since that time, this form of racing in our hobby has exploded. Now it is Monogram's turn to join in so let us look closer at our new contenders.
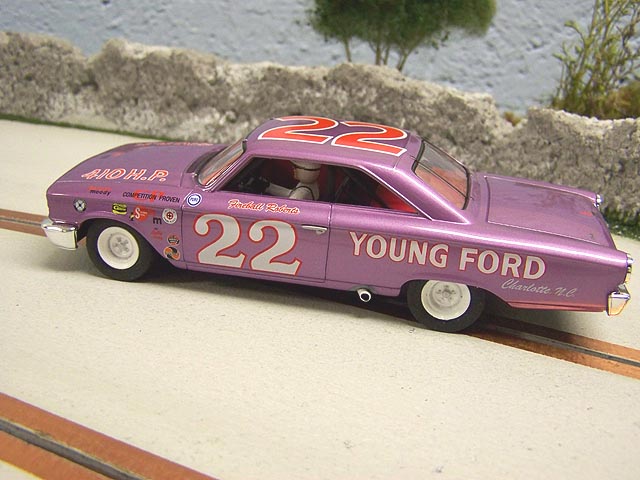
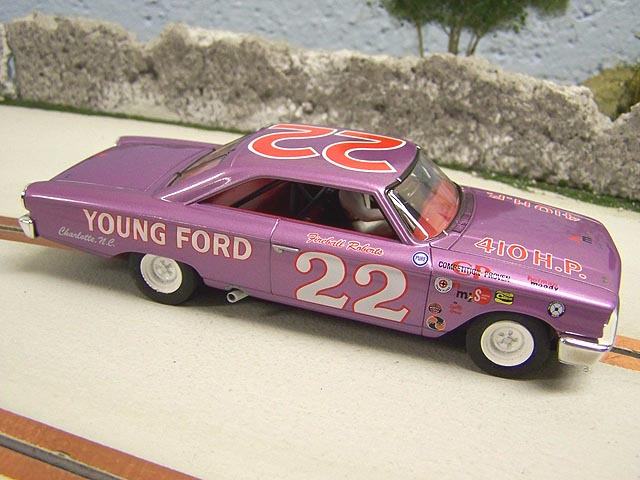
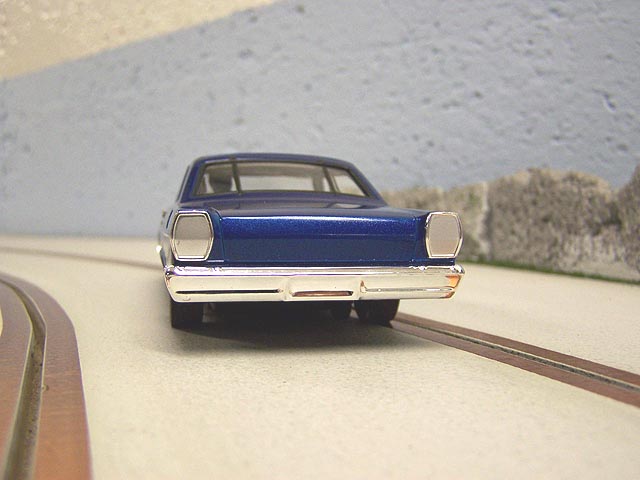
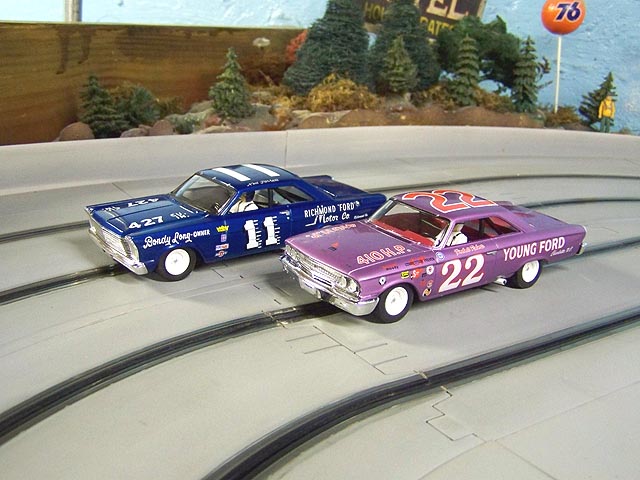
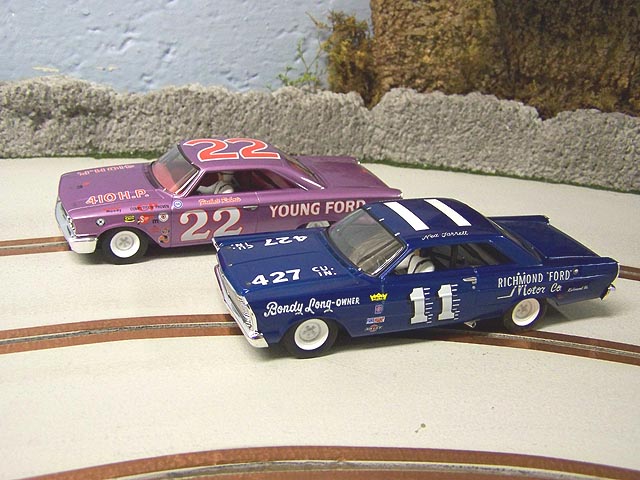
Our first model is the 1963 Ford Galaxie driven by the legendary "Fireball" Roberts. Overall the paint work here is outstanding. The purple looks a little on the dark side, but it is close enough to suit me. It appears the decal placement is very close to the car he started with at Bristol TN. In any event, there is no mistaking it and the scale detail here should please most enthusiasts.
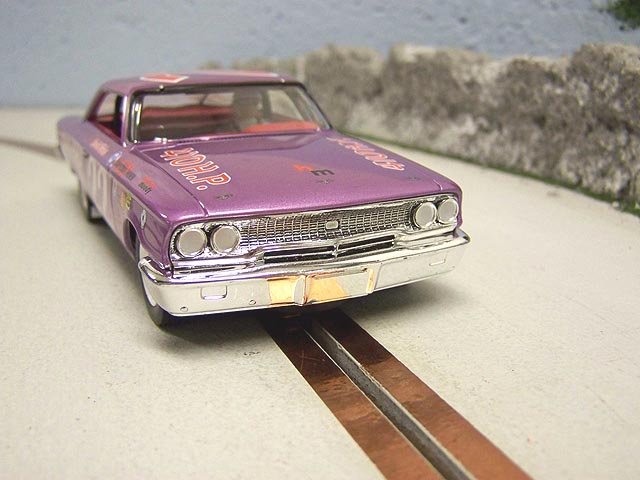
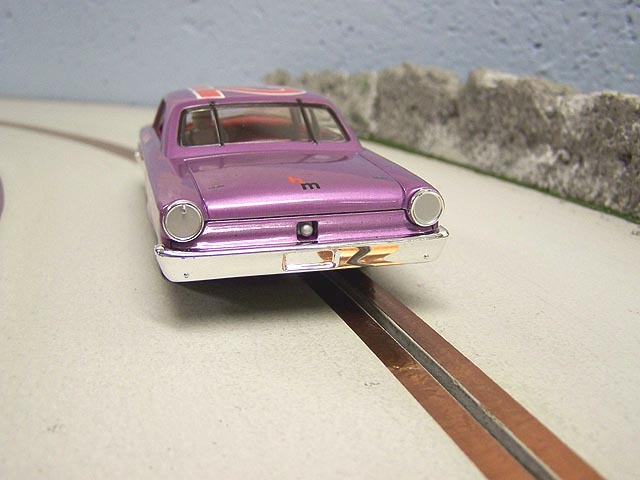
Overall the body shape, size and fit is impressive. They have really done an outstanding job with this Ford. Proper window trim accents the car well with good front and rear grill and bumper detail. All of this surrounds a very nice interior with good roll bar and driver detail. Yes, so far I am very impressed!
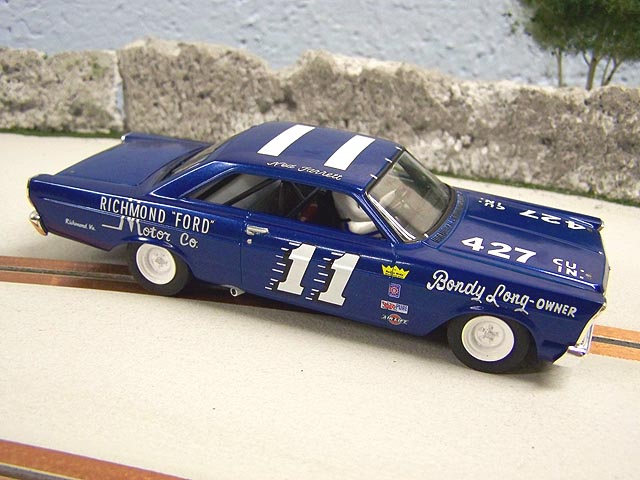
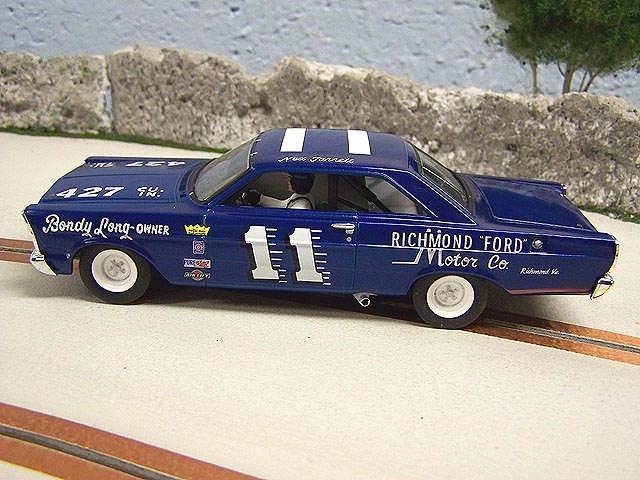
Moving to the #11 1965 Galaxie things are equally nice. I am glad they chose this model as Ned did win the Championship that year. Paint work here is equally impressive with very opaque markings with no signs of bleed through. Some nice touches that appear on both are the hood and trunk lid locking pin markings. Little things like this just add to the fun of this model for me.
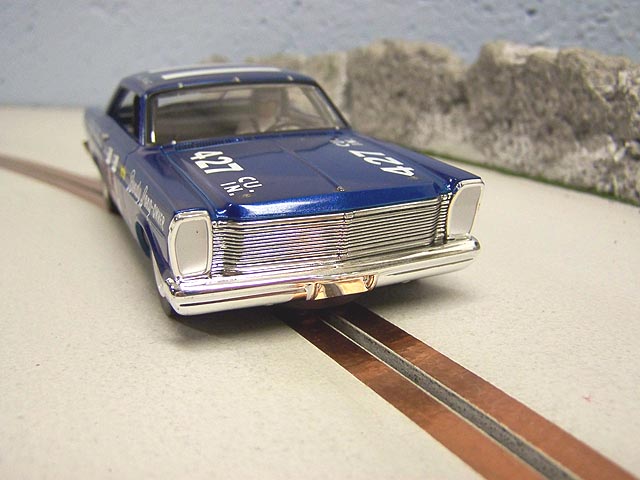
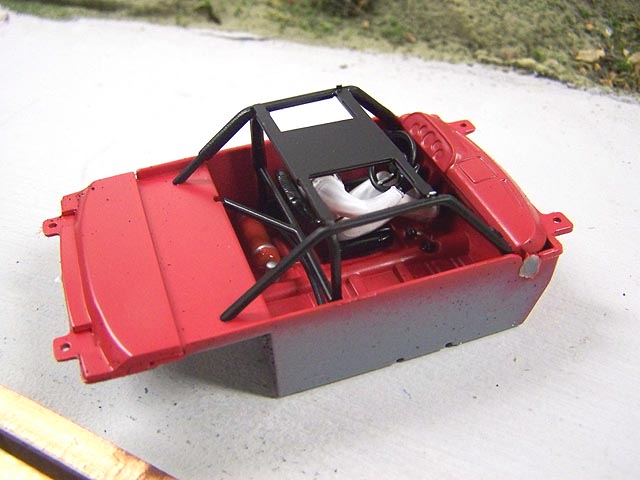
Overall shape is also done very well with good attention to detail on the front grill and rear shape of the tail lights. We also have another fine looking interior with old Ned firmly gripping the steering wheel. Given the color it was easier to spot the fire extinguisher which adds a touch more to the scale effect.
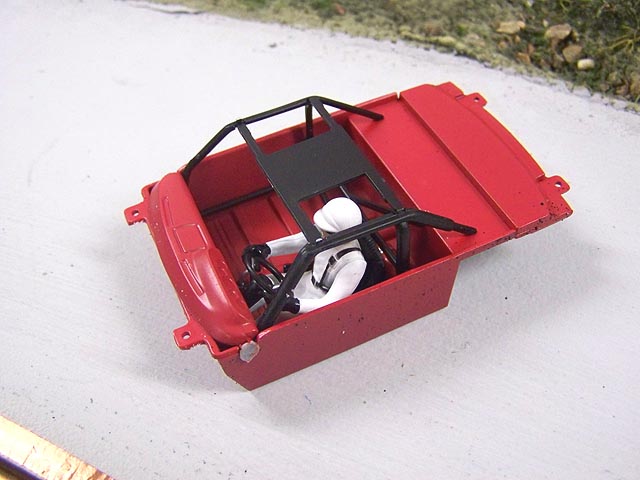
Speaking of these interiors, I think they deserve a close look. Full roll cage and complete driver figure really draws you in. What I found odd is no decals representing our gauges. It isn't that noticeable however, but some enthusiasts would like to have seen these applied. I am only showing the Fireball interior here but each has the dash molded for the particular model.
On looks alone this cars get a thumbs up from me. Very well done in our scale and have all the small details that most in 1/32 expect to see.
Moving down to the wheels and tires I was happy with the way the wheels looked. They appear to be very close to scale although I did not bother to measure them. For my eyes they appear fine and compliment the model well. It was the tires here that made me take a second look. They look slightly on the small side, but this can be just my misjudgment. The sidewalls just seem a little on the short side giving it the look of a smaller diameter. Nothing drastic really but deserves mentioning.
I also noticed the compound was quite soft. Just going on feel of course, but they appeared like they would hook up well on different track surfaces. Time will tell of course.
It was during this inspection that I noticed the rear tires were VERY close to rubbing the inside of the body on Fireball's #22 car. The #11 car was close on one side but was obviously clearing the body. Our first track test will find this out quickly. I like to rub a black magic marker on the outside of the tire and then run some hard laps. If she is rubbing, when we remove the body we will know.
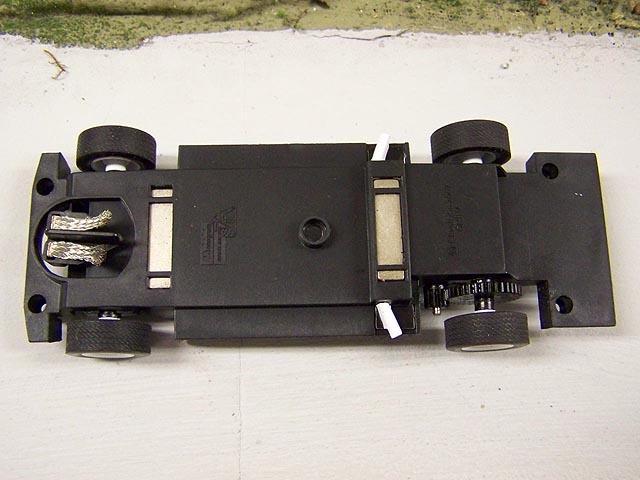
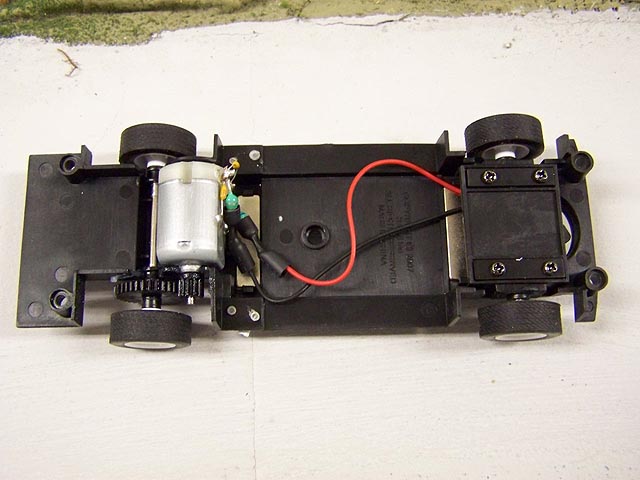
Turning the models over we see that they have identical chassis. This is great for me as it should deliver some very close racing. We also see dual bar magnets, one in the front behind the axle and one near the middle, in front of the rear wheels. The rear magnet pocket is huge and hangs very low to the ground. Ok, I cannot wait any longer so let's get to the track!
Box Stock Testing
Artin Plastic Track - Aftermarket Power @ 12 Volts - PARMA 25 OHM Control
The first pull of the trigger told me we had some issues. The car still ran...and it ran quite fast cutting 4.2 second average lap times. However it did so with a sound from the gears that was not pleasant. Imagine putting a box of rusty nails in a blender and turning it on. Still, the car did perform out of the box so it passes our test. But honestly it was not impressive. Braking was good although heavy magnets helps this of course. The car has plenty of top speed, and felt as if it was geared more for a larger (longer) track than our 4 x 16. There could be many reasons for this bad sound and we will get right to trying to figure it out.
Pop The Hood Already!
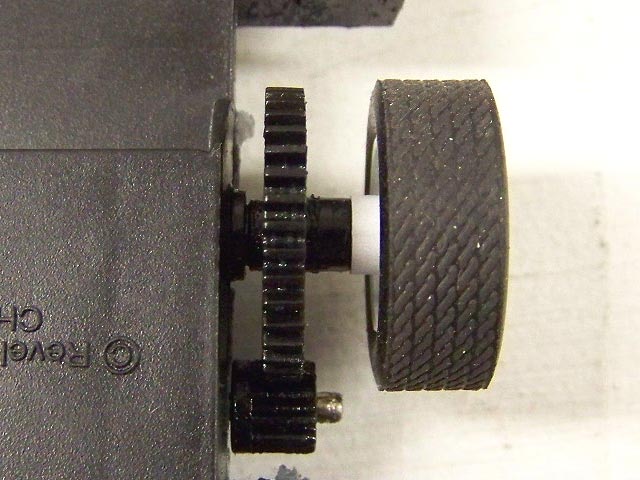
4 screws mount the chassis to the body and after removal we get a close look at our chassis. The Mabuchi motor is sitting on its side with a 11 tooth pinion that drives a 37 tooth spur gear. This spur gear is an issue as well. The clearance it has between it and the track is VERY little. And the choice of a 37 tooth spur is not what I expected. If they would have stayed with a more industry standard of 36 then we might have a little more breathing room here.
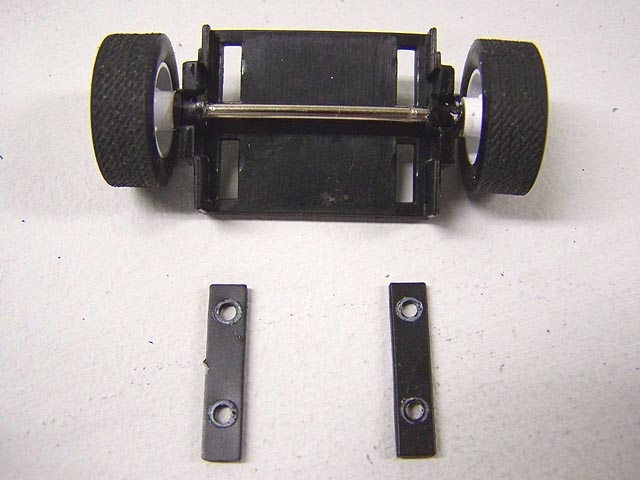
The rear axle is held snugly in place and found no spinning of the bushings. The problem we found as the bushings had a good amount of free-play allowing the axle to move around inside a little more than we care for. There is also some side to side free-play in the axle which could be the cause of our tire rubbing the body. Easy enough fixed as a small Slick 7 shim was used to clean things up. Given the clearance issues of the tire and body, lightly trimming the axle might be just as easy. We shimmed one car, and trimmed the axle on the other. Both options will do the trick as there is not that much free-play to clean up.
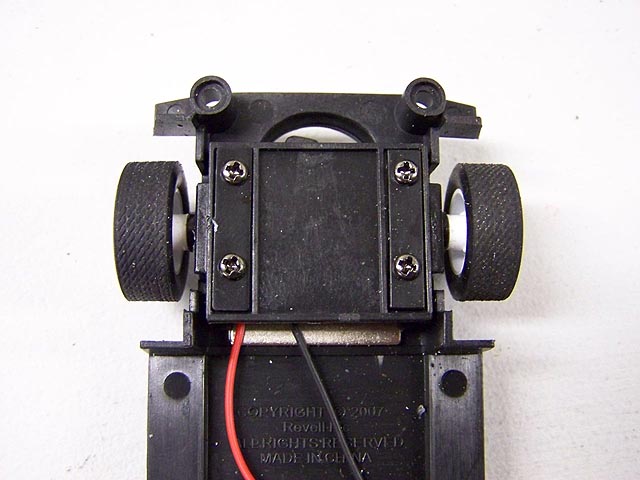
Up front we see an unusual design, or one we do not see often. The front axle is held in a bracket that mounts to the chassis with 4 screws. They have shims in them which will allow the wheelbase of the chassis adjusted by using different sized shims. I like this idea as it makes this chassis a versatile one that could be used for a wide variety of models. There was some side to side free-play here, but nothing drastic. I decided it was so little that I would just sand down the axle on one side a little.
The front guide is deep enough for most, but there is some free-play in it vertically. Placing the model on our wood track surface we could see the guide could be shimmed down closer to the rails and provide better contact as well as have our keel deeper. I used some Evergreen 3/16" tubing part# 226 and cut a thin piece. Then I simply sanded it by hand until it was at the right thickness. This really improved things up front.
![]()
Now time to play with the gears a little.
Before you do anything, check the pinion and make sure it is properly seated on the shaft. We found both of ours were sitting too far out and the flange on the back of the pinion was rubbing the spur. Using a small flat tip screwdriver, we pushed ours back slightly and this made a big difference with our gear noise issue.
Looking closely it appears the angles of the teeth are not exactly matched. No real issue as we have seen this before and we have cleaned things up. We added Turtle Wax brand polishing compound to the gears and then set the car on a powered sanding block. We used an old tire to prop up the rear and let the car run. Our block is only 6 volts so this is ideal for breaking these in.
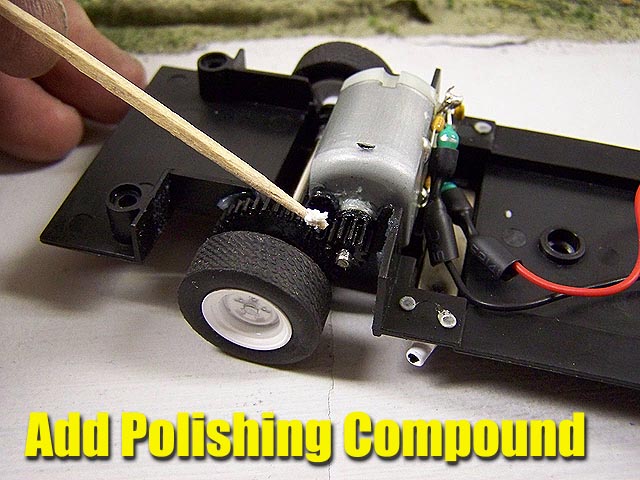
It does take awhile. We did a 20 minute block of running, then added more compound and ran it another 20 minutes. This did help a great deal and things were much quieter. We decided to do it one more time using a little graphite lubricant and this really delivered results. Much smoother and the noise was reduced even more. It still has a chatter to it, but nothing like before.
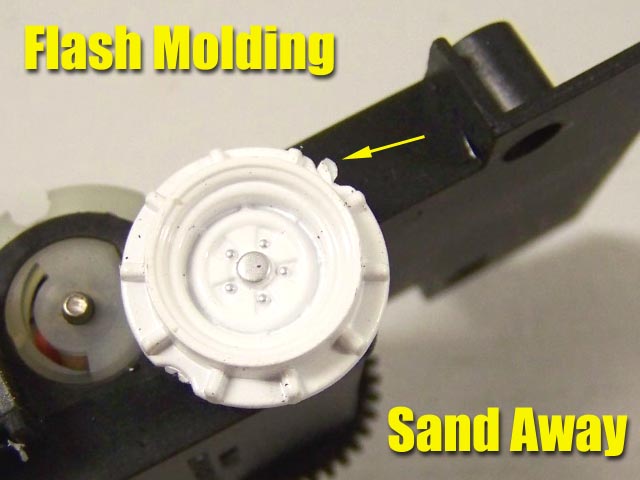
Time to look at the wheels and tires. I removed the tires to inspect the wheels for flash molding on the inner rib. There is some here so we sanded them clean. We re-installed the tires and sanded them lightly. We could not go to far as we would then have the spur gear touching the track. This is where the biggest issue is for me. We are used to sanding our tires to get them as round and true as possible. With the spur gear being so large and or the tire being on the small side, you can only sand so far.
The good news is we still managed to get a smooth running car with only minimal sanding. After-market tires are already in the making that will allow us more clearance in the future for even more fine tuning.
Wood Track
Testing
4 Lane MDF Routed Wood Oval - Flat Latex Surface
Copper Tape Conductivity - Aftermarket Power @ 12 Volts PARMA 25 OHM Control
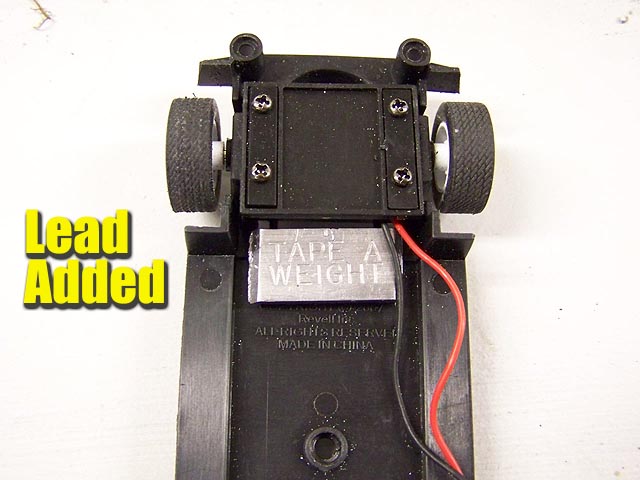
After the break-in of the motor and the wheels and tired cleaned up it was time to see how this model reacted non-magnet. Although we still had some gear noise, the model performed better than we expected. Our good friend Tom was on hand for the testing and we traded back and forth with our test car for an entire afternoon. It was clear some weight was needed and Tom loaded it up. This was the hot ticket so to speak as the car had much less chatter on hard acceleration and really improved the cornering.
Overall Verdict
I have to say I am a little disappointed. These models are simply stunning to look at and are excellent representations of the 1:1 legends. But I feel Revell/Monogram could have delivered a better product underneath these great bodies. They remind of my Fly Classics only NASCAR style. They look great, but you are going to have to work on them a little to get them right. The tuning we do to our Fly models has not stopped us from collecting and racing an embarrassing amount of them and I feel the same way about these beauties. So I will get more and try to re-create the fun of this era in scale.
There is more positive than negative about them and the 2 models we have are now are simply FUN to race. I do not take for granted having a ready to run classic NASCAR in my hands. I am happy that they are here and hope they continue to make them. At the current price they are also easy on the budget, which is a major plus for many enthusiasts. If you are a fan of this style of racing, you might as well get one. Once you do and you take some time tuning them, you most likely will want more!
- Harry
As always feel free to contact me about this article or just the hobby in general at harry@homeracingworld.com, or better yet drop into our Message Forum and share your thoughts with other enthusiasts!
Thanks Go To CincySlots.Com For Providing Us With This Model!
![]()
Copyright © 2008 HomeRacingWorld.com All Rights Reserved