Wednesday December 14, 2005
NINCO ProRace ProDriver Kit
Do you think of yourself as one that likes to tinker or build rather than just buy something ready to run? If so, read on because NINCO has released a new ProRace ProDriver kit that just might be up your alley.
A kit like this really lets you know that the selection in our 1/32nd scale hobby is growing. NINCO has decided to release a series of models that caters directly to the tuner/builder inside of you. But why did they decide to bring us this special kit? Well, many enthusiasts are involved in club racing along with dedicated home track leagues across the globe. They want a model that is easily tuned to certain track specifications and also enjoy painting and building their own liveries of their favorite driver/team. Even home racers who are not heavily involved with a club can benefit from a kit such as this one. Having the different gearing and tire combinations alone can allow anyone to have fun adjusting and tuning their models.
With that said, let us take a closer look at what NINCO has brought us:
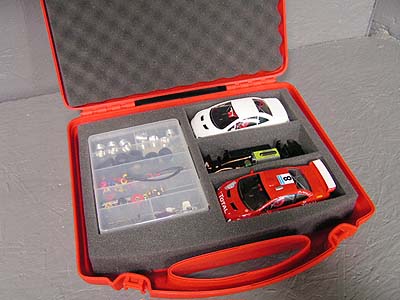
The case includes:
2 bodies (painted and unpainted)
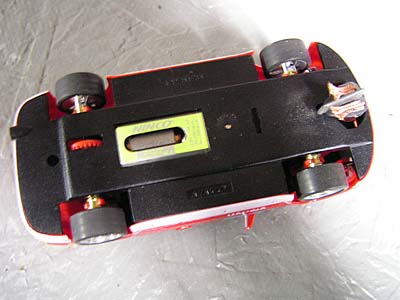
1 chassis with NC-6 motor and pinion plus button magnet
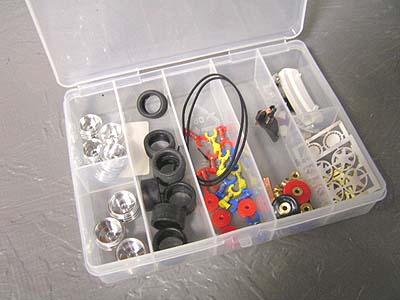
4 different etched metal wheel detail kits.
Assorted detail parts for your unpainted and painted body.
3 Crown gears - Blue is 26 teeth, Black is 27 and Red is 28.
Front guide with braid.
4 brass axle bushings.
2 Axles
9 Allen head set screws (Wrench included)
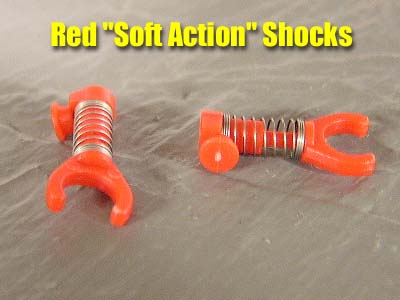
3 combinations of shocks - Yellow/Hard, Blue/Medium, Red/Soft
Pulleys and belts for 4WD applications
2 Sizes of tires
2 Sizes of aluminum wheels.
There is certainly a lot to offer the beginner or even advanced enthusiast. A small instruction booklet is included to help guide you through assembly. In many ways it is very easy to follow but then again it might just confuse some beginners. There are a few issues with it that in my eyes need to be corrected (see below). In the defense of NINCO, it is most likely designed this way for the advanced enthusiast who this kit is largely targeted for. I only say it might confuse some as I have seen this kind of advanced product in the past and regardless on how clear you make it, some enthusiasts still might have trouble.
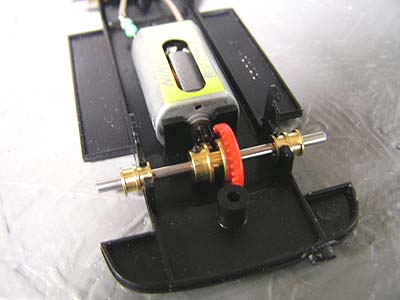
Getting Started - Axle Assembly
Using the guide provided, I assembled my real axle. On the back of the instruction booklet there are "TIPS" on performance. One of these shows (or attempts to) how to choose the correct tooth rear crown gear. The graphic shows the 26 tooth ideal for tighter or twisty road courses. The 27 shows it can be a balance between that and broader, larger radius environment. The 28 finally shows that it is ideal for larger and broader turn radiuses. I chose the 27 for our home track.
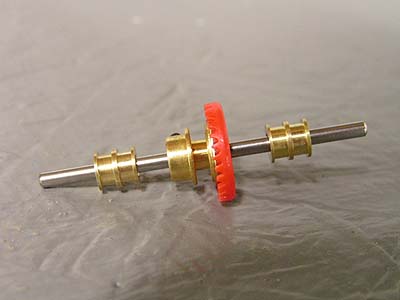
Here is where I have the first issue with the instruction booklet. It shows to mount the pulleys for the 4WD system in both the front and rear. Although it looks easy enough, I assure you it is not. The pulleys are pressed onto the axle, making it all pressure based to keep them from spinning on the axle.
Pressure, and a great deal of it is what you are going to have to apply to get these pulleys mounted. To be honest, I could not press these on by hand and neither could several other enthusiasts I asked to try. I cannot see where NINCO would not include some sort of guide to help enthusiasts with this matter. Although I am not going to use the 4WD, if I wanted to, I would need a good vise system (Or ideally The NINCO gear press tool) to press these pulleys into place. I personally feel this is a major issue for many enthusiasts out there who want to utilize the 4WD system but perhaps do not have the correct tools to mount them cleanly and safely. The guide tells you how far they should be mounted onto the axle and you are not going to get them there easily without the proper tools.
I think NINCO should look closer at this system. In my view, it takes away from the concept of a QUICK CHANGE setup that the rest of the model is. If you want to change the crown gear you will have press at least one of the pulleys off. I think that these could have been easily designed to be of set screw design as the gear and wheels. If not, perhaps just a larger hole that would allow the pulley to be pressed on by hand. The pressure of the 4WD is not that great and these pulleys put on this way would do the trick.
NOTE: I presented my opinions to Bob at Model Rectifier Corp. He in turn contacted NINCO directly and discussed this matter as well as others. It appears that they are going to look at this pulley system and try to enhance it to make it easier. In fact I was told all of these comments were going to be closely evaluated because they want to make this series of models the best possible. I have to give credit to MRC and NINCO for responding this quickly. From my standpoint it appears they do listen to the enthusiasts and try to improve things based on our feedback.
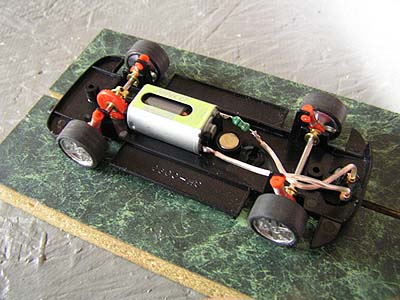
Installation of my crown gear was very easy. One tip you might want to try is NOT to tighten the crown gear set screw until you move on to inserting it into the chassis. The motor is already equipped with a 9 tooth pinion and the shaft of the motor and the pinion will tell you exactly where you must set your gear before you tighten the set screw. The pinion appears to be steel with a black anodized coating instead of brass as most NINCO inline motors are equipped with. Since we are not using the 4WD drive system we can go ahead and snap the axles into place both front and rear.

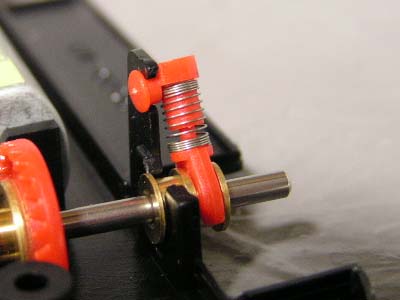
Shocking Isn't It? - ProRace Shock Installation
The shocks in this kit feature all three levels of stiffness but I chose the Red "Soft Action" Shock. Installation here is very simple and straightforward and you should have no trouble with this step.
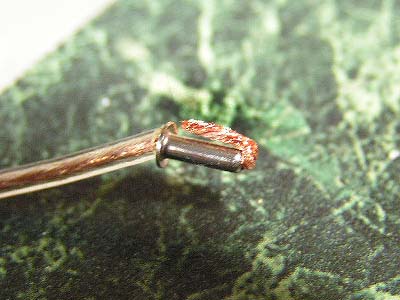
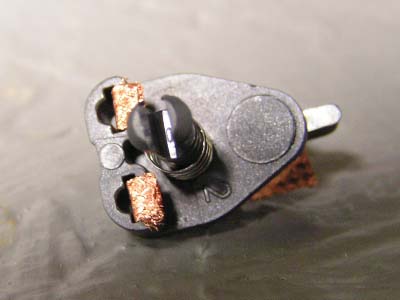
Front Guide
If you have never installed a new set of braids in a slot car, this step might take a little effort. The lead wires are fitted with small inserts that are designed to fit between the braid and plastic socket. The trick is that you must have some of the lead wire hanging over the insert so that when you push it into place, it grips the lead wire as well preventing it from popping out easily. The best way I have found is to get the insert started by hand and then use a needle nose pliers to fit it inside the rest of the way.
Wheels & Tires
Here is an area that although might seem easy enough just might confuse some racers. The instruction section of parts included show that you get 8 wheels but it does not tell you they are different sizes. The tires are also different sizes and need to be placed on the correct wheels they were designed for. The instructions do not cover this clearly as it is only mentioned in the "TIPS" graphic on the back. Even here the small black and white photo does not clearly show which tire they are talking about.
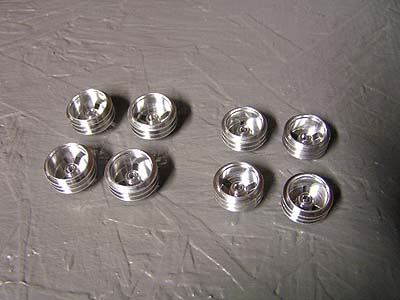
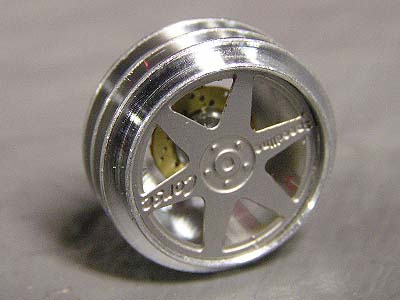
This model is designed to have all 4 of the same size wheels used all the way around. The etched metal wheel inserts are also sized accordingly so you have matching wheels. The "TIPS" section indicates that you should use the smaller 15mm wheel fitted with the 19x10 mm tire for smaller, tighter curve layout designs while for larger, broader radius tracks you should go with the 17mm wheel fitted with the slick 20x10 tire. Once you choose what wheels and tires you are going to use the installation is very simple. The wheels are held in place by one of the small Allen set screws and my wheels only had one of the holes threaded to accept the screw.

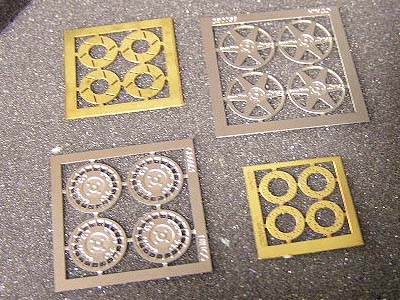
The wheels come with etched metal detail additions to increase the scale appeal of the model. Each set of 4 is designed for a particular sized wheel. The instructions show that you can use a hobby (Exacto) knife to trim these away from the sprue and then shows a file for cleaning them up.
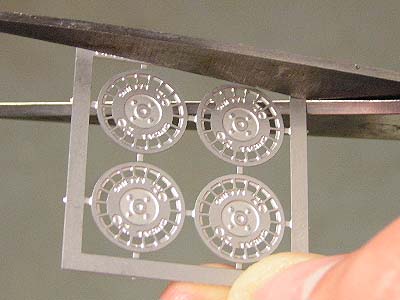
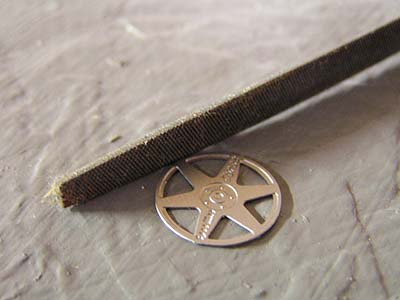
Although you can do this with a hobby knife, it is much easier to use scissors. A hobby blade will take a great deal of force to cut through these etched metal pieces and I have just found that small hobby or even household scissors make the job much easier. Once you cut them free, take a small flat file and sand the burrs (flashing) off the outside insert until it is smooth and flush to the touch. The inserts set neatly inside the wheel and actually stay in place rather well even without adhesive. I did however use a light drop of Super Glue on mine as one insert seemed a little loose and would come off rather easily.

Chassis Installation
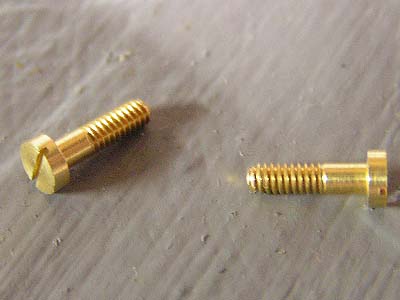
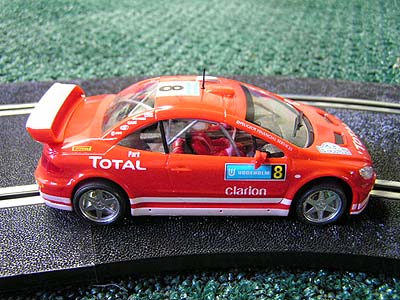
Installing the chassis to the body is a very simple affair. Using the 2 body mount screws you will have this completed in juts a few seconds. These are the newer metric screws designed with a shank on the end to allow you to back off the screw to allow the body a slight float effect if desired. We are almost completed. The body I am using is the pre-painted one, and the only item left to add is the antenna on top. Once I pushed this into place it was time to hit the road.
The other body is unpainted and will need to be finished by you if you decide to choose it. The instructions are clear where the parts go and where to add adhesive. This is the part of the kit that really adds to the fun of the overall product. I see so many times where enthusiasts want to do their own liveries and wish for a body just like this. Well, for those who have been wishing they now have some to work with as all the ProDriver kits have them.
Performance
One of the things I enjoy about NINCO models is that they still are keeping with the standard button magnet. Although some enthusiasts want as much magnet as they can get, I am not one of them. I want a model that provides me a challenge and forces to me actually drive it. It amuses me when I read comments from fine scale purists who feel the cars like this Rally model need more magnet. If realism is truly the goal, then why stop at just scale appearance? I cannot enjoy a model such as this cornering like an F-1 or Indy Car. Rally cars should slide!
My first test of this model was favorable to say the least. I first tested the model using standard NINCO power and control and then with after-market PARMA 35 ohm controllers with a regulated adjustable voltage power supply. Silky smooth operation seems to sum things up perfectly. Round and true axles, wheels and tires give you the racer a great platform to start with. Gear mesh was also very smooth with power from the NC-6 more than enough for my modest sized layout.
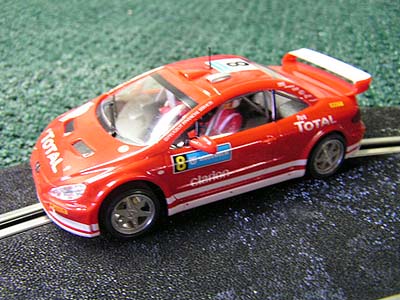
On standard power and control, lap times were an average of 4.7 seconds with the magnet left in place. This button magnet still gives you recovery time to control a slide and I enjoyed the model a great deal just the way it came. However, I could not resist pulling the magnet and seeing how well I could handle all this motor in such a light model. Without the magnet my times soared to 5.2 seconds. Of course I needed practice because the motor is powerful enough with the magnet, and without it made things very difficult to find a smooth balance.
It was a handful at first, but practice is your #1 upgrade. I then turned to the aftermarket power and control. I turned down my power supply from 13.8 to 12. This really increased the fun factor of the model for me and made the car easier to control. Adjustable voltage can be a very impressive upgrade and NINCO sees this as well with their own adjustable power supply soon to be released. The Parma controllers gave me an even wider range and with the magnet I was easily in the 4.4 second range. The lower voltage just gave me more control in the corners and I really enjoyed the car at this level.
In the end, I have mostly nothing but good to say about this new kit. Although I do feel some changes need to be made to make it even better, the final model operated very nicely. Given the fact NINCO is looking into changing this kit to make it a better product for beginner/intermediate enthusiasts, can only commend them on their willingness to bring us a better product.
I think a kit like this is a great change of pace from the average ready to run market. Sometimes nothing can satisfy you in this hobby like building and tuning your own model. This kit will give you a taste of this and I certainly advise those of you who enjoy the tuning and building process to take a closer look.
-Harry
As always feel free to contact me about this article or just the hobby in general at harry@homeracingworld.com, or better yet drop into our Message Forum and share your thoughts with other enthusiasts!
Thanks Go To MRC For Providing Us With This Sample