
09/06/2012
09/06/2012
My Monogram NASCAR

Tuning A Classic For Wood Track Racing
You have likely seen many approaches taken by true advanced enthusiasts that deliver great results using the existing parts of these models. Since I do not race in any series or club that have rules forcing me to use them, I replace them with quality parts. The added cost is not an issue for me as I feel these models are worth the investment. Once completed I end up with a silky-smooth model that finally runs as good as it looks.
The following is the parts list along with the source I like to use.
You can use any brand or vendor you like. This is simply my list and I am trying to make it easier for you to locate them if you decide to try this yourself.
PARTS LIST
Slot Car Corner New STEEL WHEEL *Preferred*
Paul Gage 15x8 XS Tires *Preferred*
Slot.it 19MM 36 Tooth Spur Gear *Preferred*
Slot.it 6.75 MM Pinion *Preferred*
Slot.it Axle *Preferred*
Slot Car Corner Bushings *Preferred*
Slot Car Corner Braid *Preferred*
Slot Car Corner 15x8 Insert Wheels (1 pair)
Slot.it 18MM 36 Tooth Spur Gear
The following steps are after the model is take apart. I tear it down to the bare chassis.
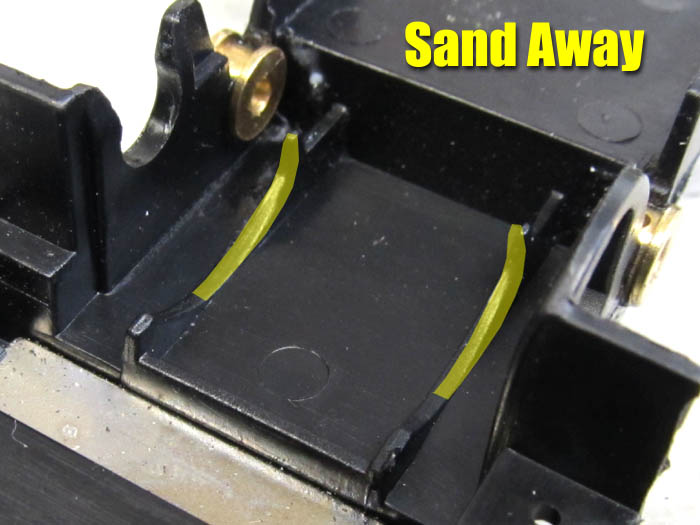
STEP ONE - Chassis Modifications
The first thing I do after it is torn down is to sand the outer edges of the chassis. This helps in getting a good float and stops any binding it may have. Remove the exhaust pipes first, you can glue them right back when completed.
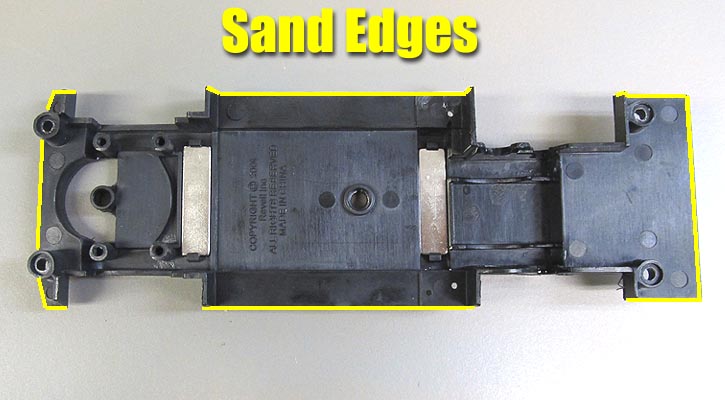
You can do this how ever you like but I like using a sanding barrel in my Dremel.
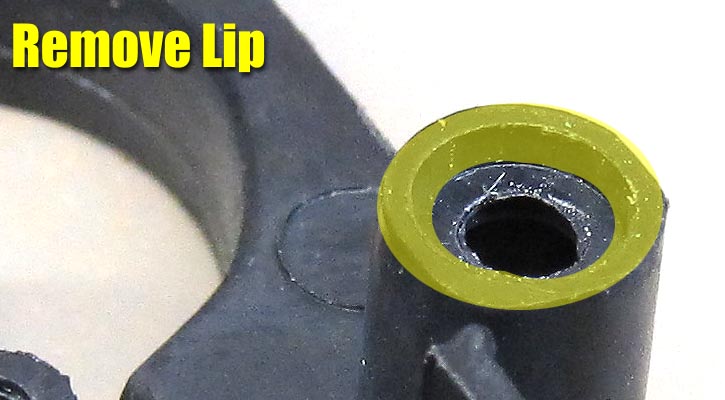
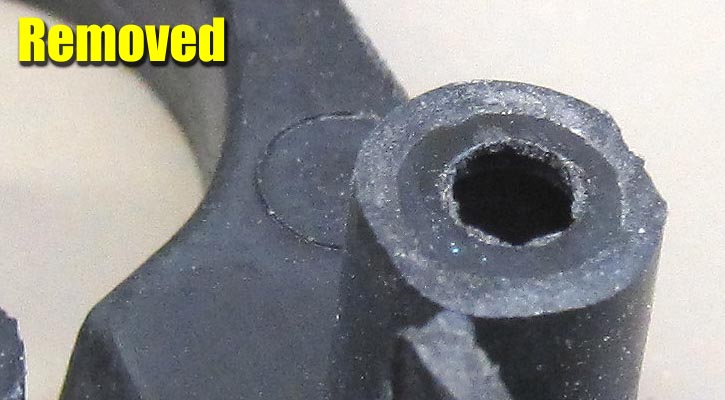
Next, I remove the "lip" on the chassis mount posts. These can contribute to the chassis to body binding as well.
I do not lower the body on my NASCAR models. You can of course do as you see fit. But the amount of work involved in interior alterations or full replacement is not what I wanted to try and accomplish.
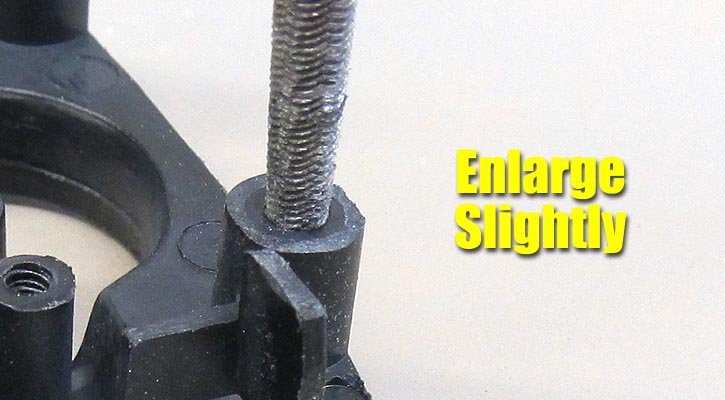
Finally I take a rat tail file and enlarge the chassis mount holes. You do not need a lot here, just a little to make sure there is no binding once you install the screws.
STEP TWO - Rear Bushings
Snap the new rear bushings in place. Since the chassis cradle for the bushings allows excess movement, add some oil to the axle and move it back and forth through both bushings until it is as smooth as possible. You do not want any binding here, so just take your time.
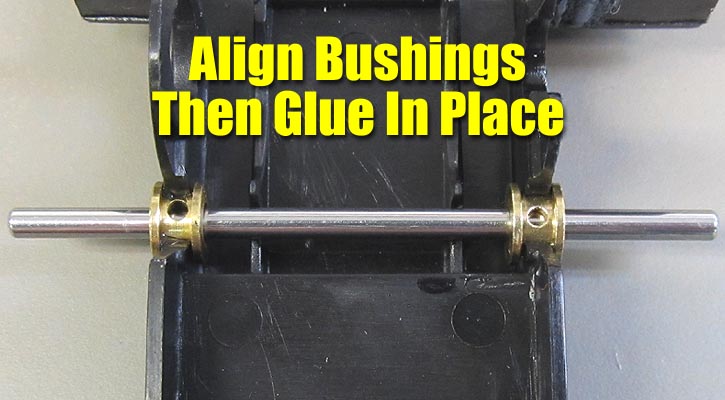
With the axle oiled and in place, add some super glue to the bushings. Just a light drop on the end of a toothpick is all you need. The toothpick helps you avoid getting any glue inside the lubrication holes if you are using bushings with them. Once you add the glue, spin and move the axle back and forth to make sure no glue is sticking to it.
Let this set for at least 30 minutes to allow it fully cure. If you use different adhesive, adjust your time accordingly. While it is drying, move on to the next step.
STEP THREE - Front Guide
Just about everything else under the body needs work so why not the guide as well? The problem is two-fold. The height of the guide is too high in the chassis causing the front tires to hold too much weight. Plus, the braid they use has the crimped ends that rub the track causing very bad vibration.
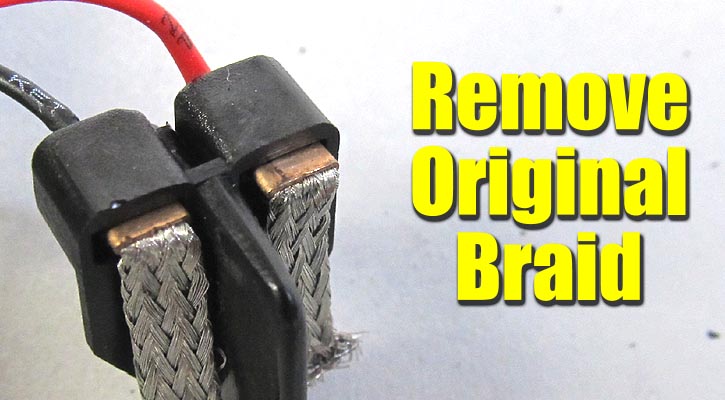
You can see the crimped ends that insert into the guide. This is as far as they go and why you have this issue.
You can do two things: Replace with an all new guide system, or make do with what you have. In my case I will make do.
I cut new braid to the length I like and then solder wires onto the ends. As shown below.
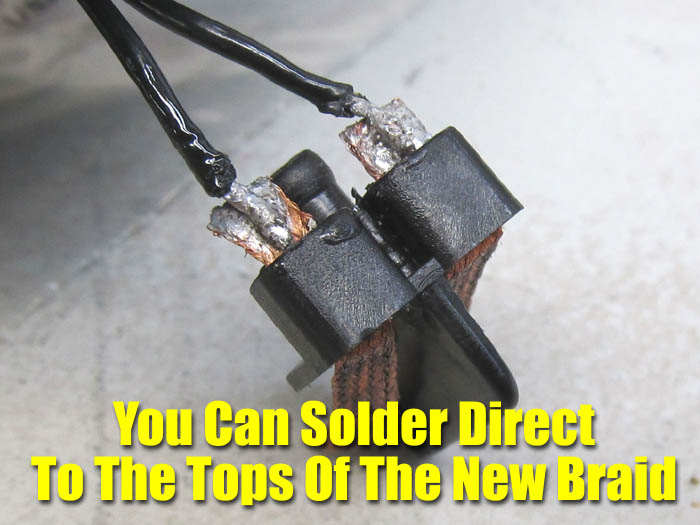
Then I insert the braid through the guide and add a drop of Super Glue to the tops. This is NOT very pretty but it is effective and my testing has shown it to withstand hours of HARD racing.
The second thing I do is to lower the guide. I do this by first trimming the guide mount hole. Just shave a little off the top until the guide can be inserted and it snaps in place.
TRAIL AND ERROR HERE. Sand a little and TEST FIT your guide.
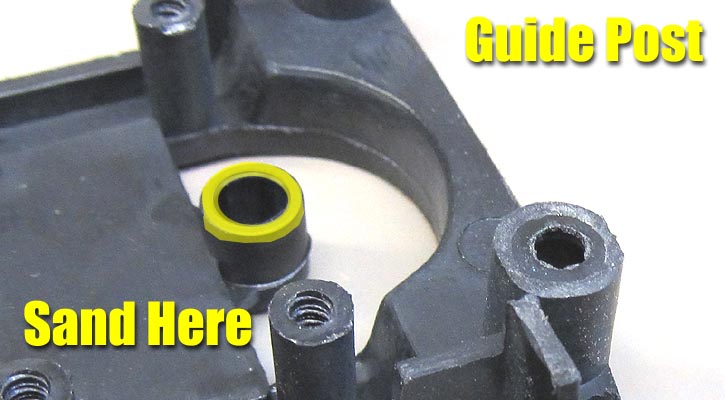
Now you need to address the excess free-play in it. I do this by adding a shim on the guide base.
![]()
I find these washers at Lowe's or any good hardware store. Remember, this is just what I like to use.
![]()
Cut off the edge of a washer so it snaps onto the guide. You might have to use 2 of these to get it where you like it.
I will leave that up to your own taste as this will vary from track to track.
STEP FOUR "A" - Gearing
Since trying new gear sizes I have come to the conclusion that ordering the 19mm Spur gear and 6.75mm pinions are the way to go for these cars. Almost the same size as stock, but still allows a little more clearance between the Spur gear and track surface.

Coupled with the slightly taller Paul Gage tire, this way everything works with NO chassis modifications.
STEP FOUR "B" Using Smaller Gears
If you decide to use a smaller diameter gear (18MM) , or smaller pinons, it will mean you have to have room to move the motor back to set the new gear mesh. This will require some chassis modifications to allow the motor to be pushed back far enough to allow for the ideal gear mesh.
Start with these two ribs. I like using a round milling bit in my Dremel.
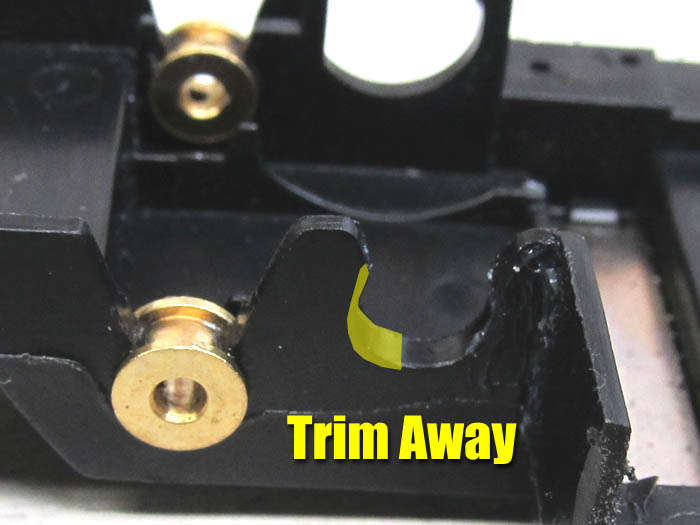
Now trim the above area shown. I use a hobby knife and just shave it away until I have enough removed.
STEP FIVE - Motor/Axle/Gear Mounting
Time to install your axle and motor with pinion along with the spur gear.
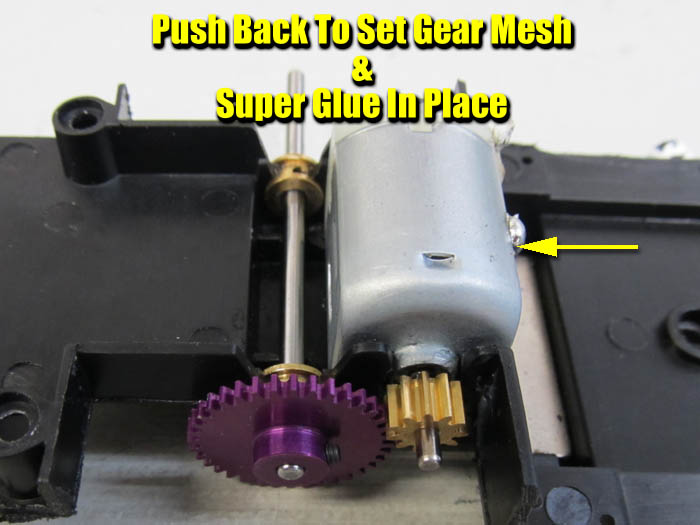
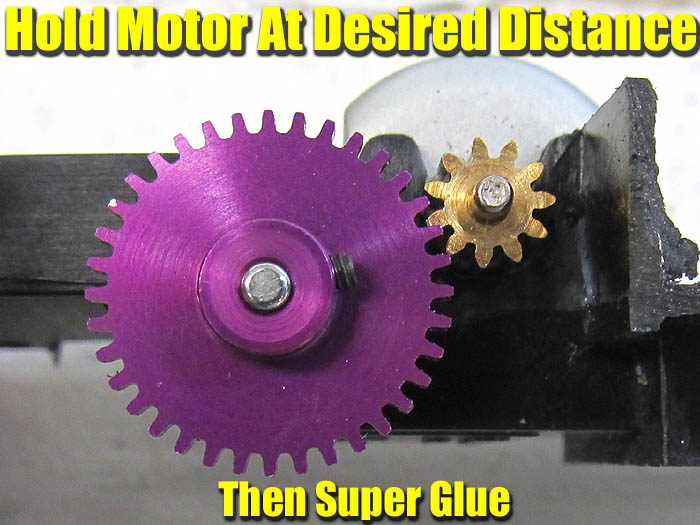
These two photos show how to mount and set the gear mesh. Once you snap in the motor, look at the gears as shown below and push the motor forward until you have the distance you want. Once it is set, flow super glue along the front of the motor.
If the motor does not go back far enough, remove it and shave more chassis material away until it is where it needs to be.
STEP SIX - Wheels & Tires
Time to get our wheels ready for mounting.
This is the all new STEEL wheel designed by the crew at Slot Car Corner. It is a bolt on fit for these models and highly recommended. It is easily painted to match any model and saves you time from making your own inserts. These are my new standard wheel for all future models in my collection. Use the 15x8 standard size.
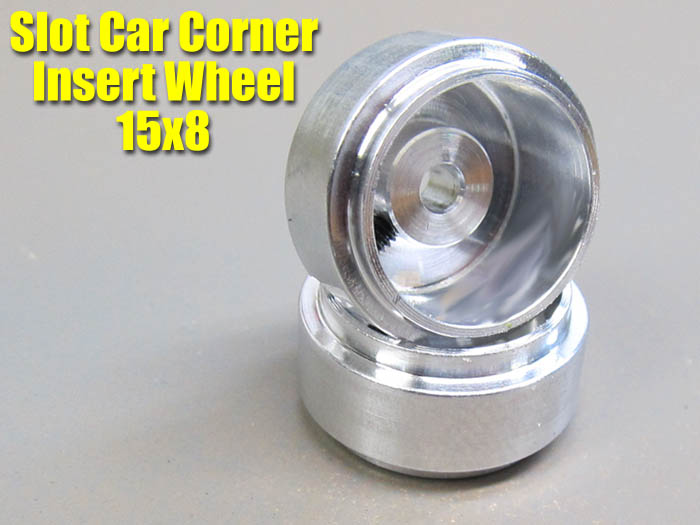
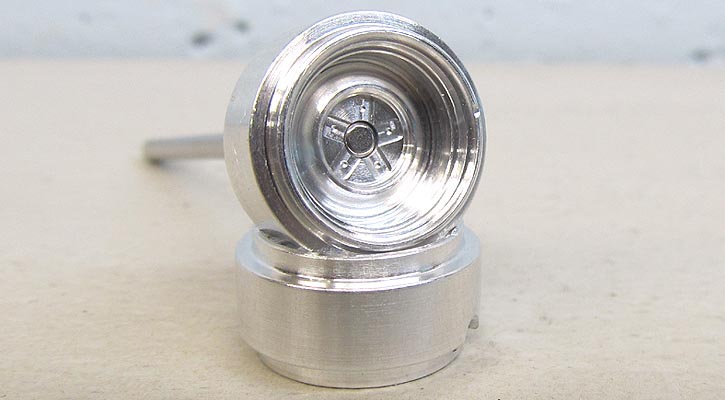
If you still want to use the insert wheels, which are perfect by the way, you will need inserts. I do NOT replace the fronts.

Making inserts for the wheels can be more of a task than some of you will want to attempt, but you can use the original wheel and sand it down to fit inside. I wanted an easier route so I purchased ready made inserts by fellow slot car enthusiast Mark Thomas of Derby City fame. They sit inside the wheel just fine. You need to set the distance of the insert with a shim so it looks correct, then glue in place.
Once you have them ready it is time for paint. I used Testors gloss light blue. It was close enough for a match for me.
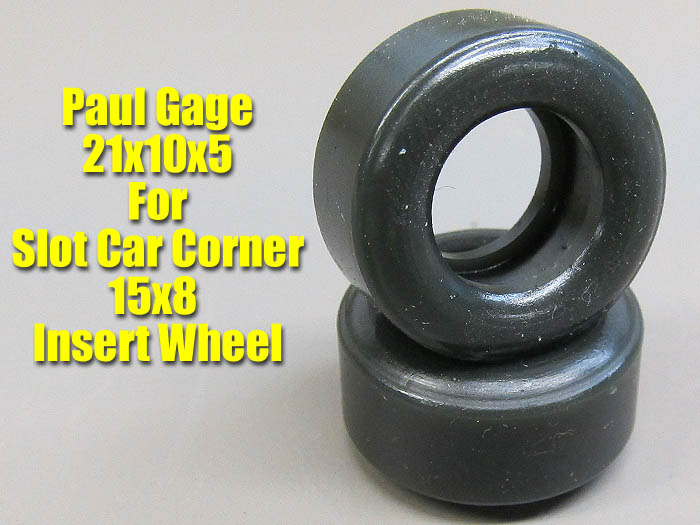
These Paul Gage tires are a great compound urethane blend. Very soft AND easy to sand.

All painted and installed. Looks good enough for my home racing.

Here is the completed chassis. Now all we have to do is mount the body and head out to the track!
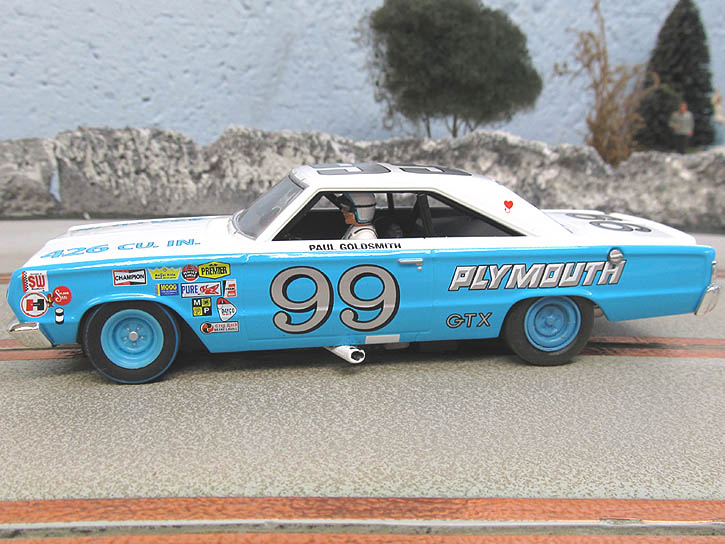
After all this effort you should have a great running slot car for your routed track.
Not all of you will want to go this far in making these models run better. This is just my personal method to get them to the level of performance I prefer. Our oval is a fun race track but it is NOT forgiving. If there is a bad wheel, sloppy guide, or loose fitting axle you will find out in a hurry. So for me it was "all or nothing".
I hope it helps some of you in the future.
-Harry