
Saturday August 09, 2008
Saturday August 09, 2008

The NASCARS released by SCX have been some of our favorites here in the old dungeon. With very little effort, you can improve the overall performance of them for virtually any track surface. So if you are fans of these great models, read on and see if our quick tips can help you improve your current collection.
Although you could invest more of your hobby dollars in after-market parts, I usually try to take what is already supplied and make it work. After all, these models are priced right for those on tighter budgets so saving a little more here and there is always a good thing. For those just starting out in our hobby, you do not need to do anything to enjoy these cars. These are just some simple tips we have found that make these nice cars even better.
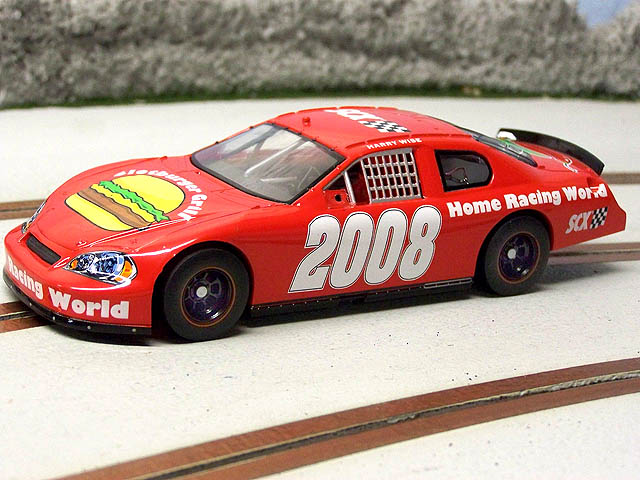
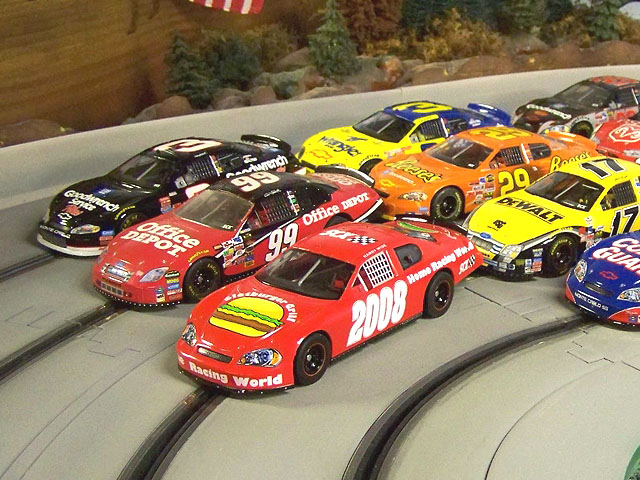
Let us start our tuning on our very own HRW Slotburger NASCAR! (Pretty, isn't she?)
Improving Power Contact - The Easy Way
The chassis on these cars is unique as it employs a pivoting motor pod. Some enthusiasts really like this design as it does add some float to the model. It can however have a couple issues. First, the tabs sometimes do not make good contact and you lose power. Secondly, if the tabs are bent unevenly, it can cause the car to lean to one side.
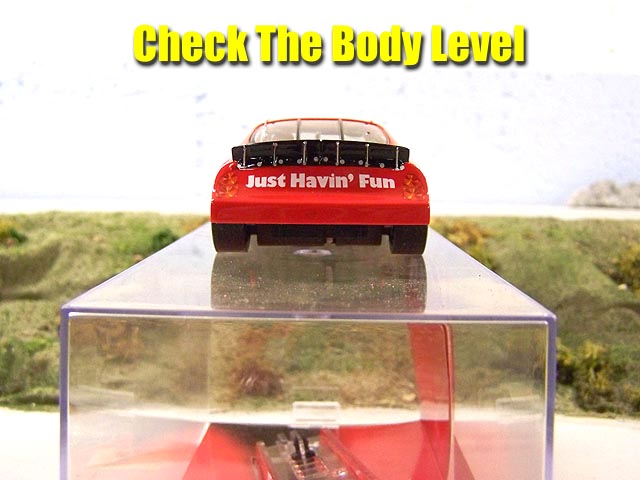
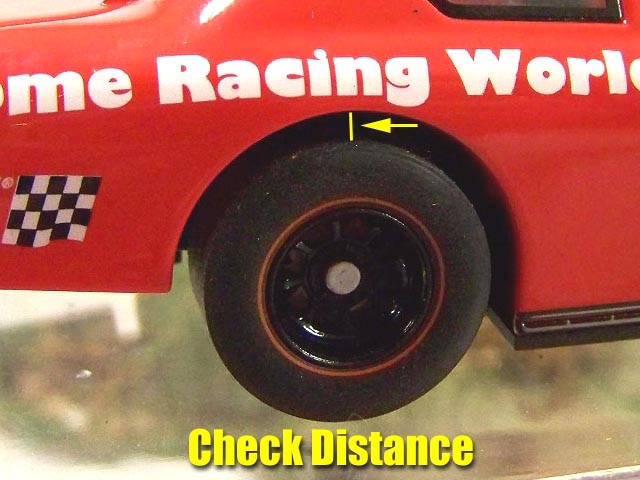
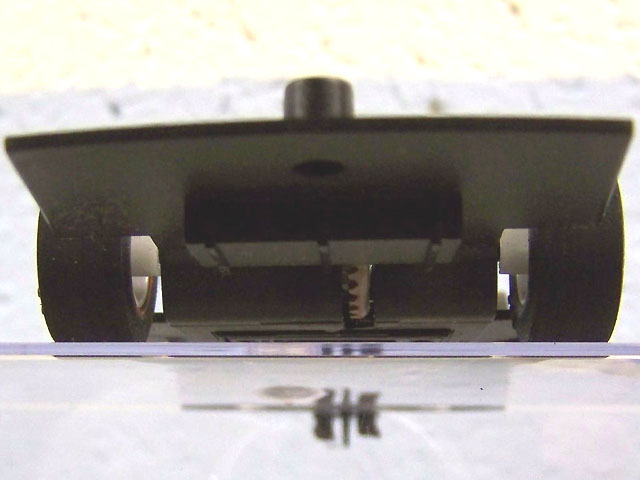
First inspect the car from the front and rear. You can use the top clear lid that the car came in and make a quick set-up block. Place the car with the guide just hanging over as shown. Now bring the car to eye level and check to see if the body is leaning to either side. One easy way to tell is checking the clearance between the top of the rear tire and the bottom of the body. Make a note of what side it is leaning, if it is at all. You will want this information later.
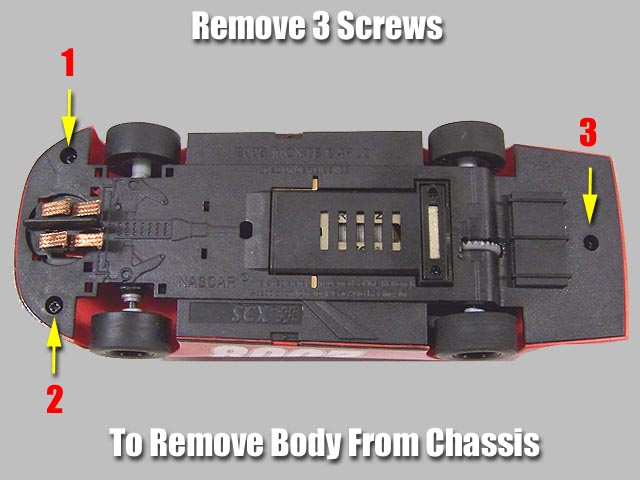
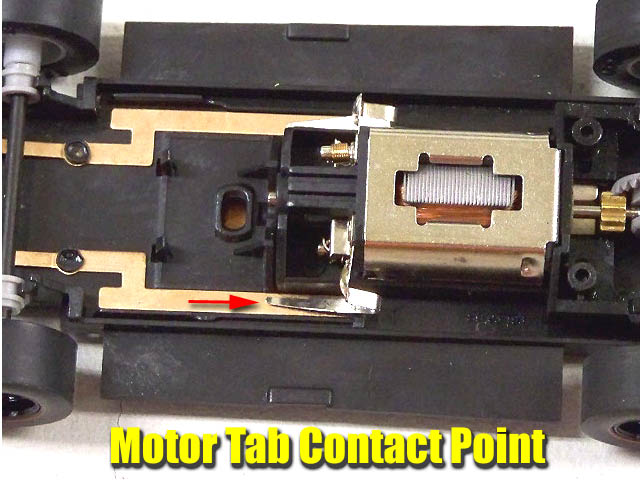
Let's get right to it. Remove the 3 screws that hold the body to the chassis. You now see the motor and pod assembly. You can snap this entire pod assembly out by simply taking both ends of the chassis and flexing them down, then add a little pressure to the bottom of the pod and it should snap away easily. You can now see the motor tabs that pick up power from the power strips in the chassis. This is the area where most power problems occur because the tabs are not making good contact with the strips.

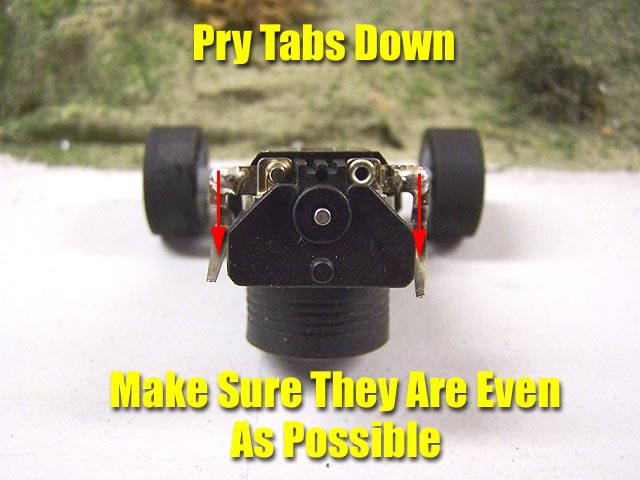
Take the motor pod in your hand with the tabs facing you. Gently pry down on each tab to give it a little more contact pressure on the strip. Do not over-bend ok? Now when you are doing this, try and get the tabs as even as possible so your car stays level.
After you have done this, simply snap the motor pod back into place. Re-install the body without the screws and check it on your "block" again to see if it is sitting level. If so, you are ready to go.
While The Body Is Removed
There are 4 tabs molded into the body. At first glance you might think they are designed to keep the axle bushings, both front and rear, from popping out. Well, such is not the case. The front posts actually barely touch the top of the axle. There is no vertical free-play to limit due to the solid axle being mounted with bushings, so I trim these off a little so they are not touching the axle.
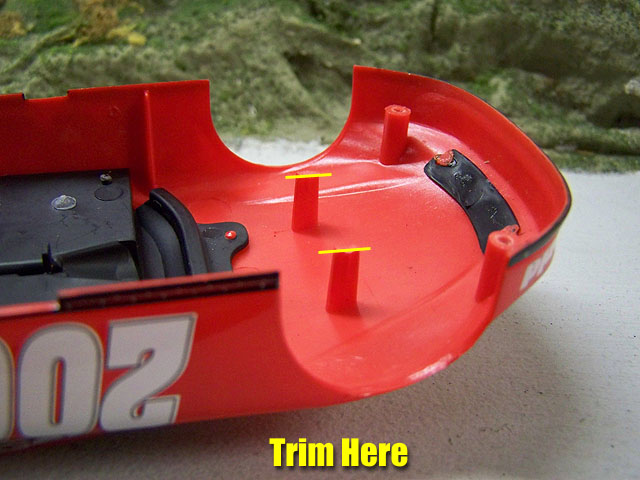
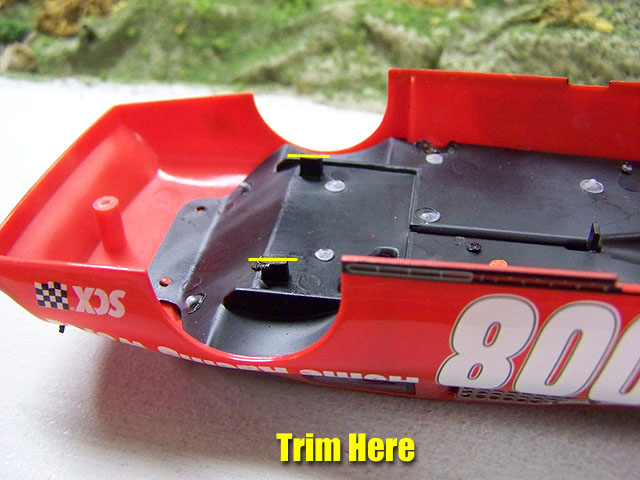
The rear tabs lay on top of the bushing appearing to limit the amount of travel the pivoting pod can have. Since we are going to glue our pod solid, I trim these away as well. One main reason I do this is it reduces the amount of vibration from the body to the chassis and makes the car a little smoother and reduces the rattle noise some have.
Improving Power Contact - The Hard Way
Not really hard, but requires a little more effort and some limited soldering skill. What I like to do after adjusting the tabs is to simply solder them in place.
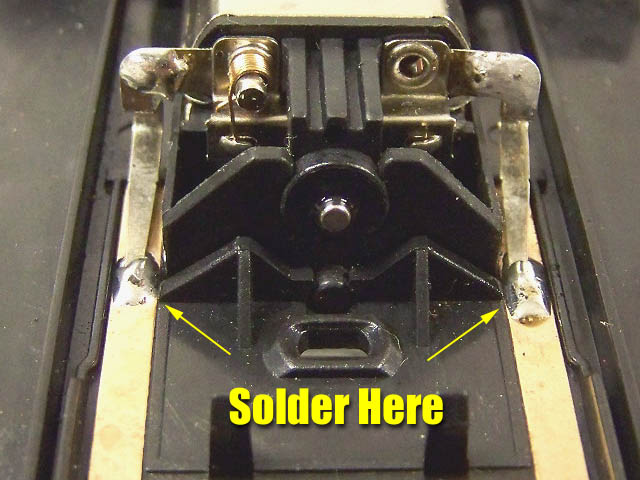
This makes your power connection a much more bullet-proof. I use a 60/40 solder as it flows easier and does not take such a hot iron.
Let It Roll?
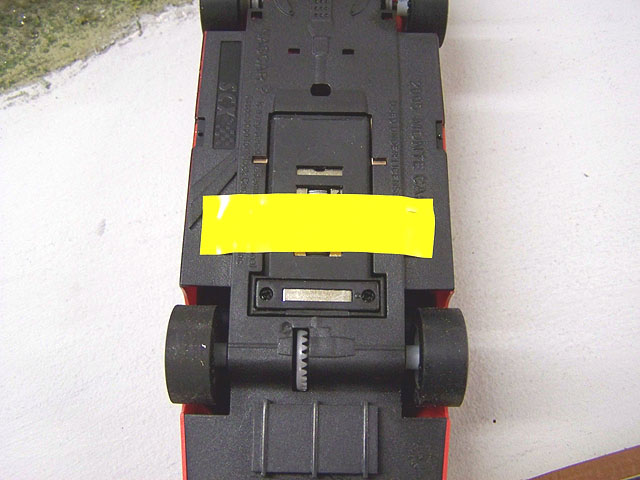
As I mentioned before, this pod system introduces body roll. What we like to do is limit and/or eliminate this roll effect depending on your track and driving tastes. You can limit/dampen this roll effect by simply placing a strip of tape across the bottom of the pod and chassis.
On some of the tracks I have tested on it helped a great deal with lap times. Why? Because when you go into the corners a little hot, you want that momentum (power) to go to the rear wheels and not the top of the body. When it goes to the body, the car wants to tip over. When transferred to the wheels a little more, it slides the rear end out allowing you more time to correct.
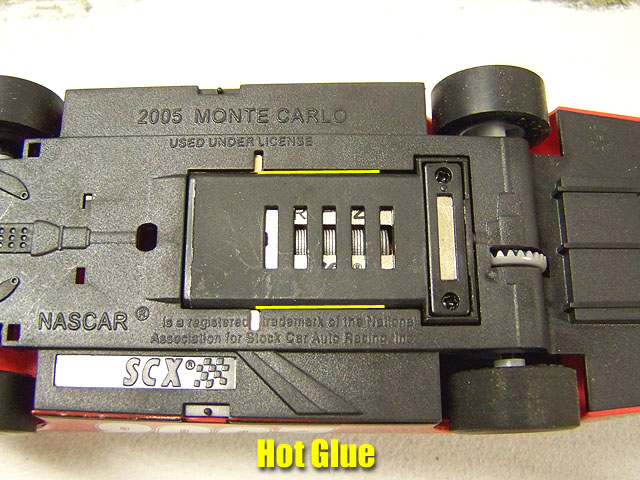
For our home track (4 lane routed MDF with slight banking) we eliminate the roll entirely. One method is to set the chassis on your block and make sure it looks as even as possible. Then add hot glue in very small lengths on each side of the pod. Now, replace the body and double check your balance. If it is off, the hot glue is easily cut away with a hobby knife.
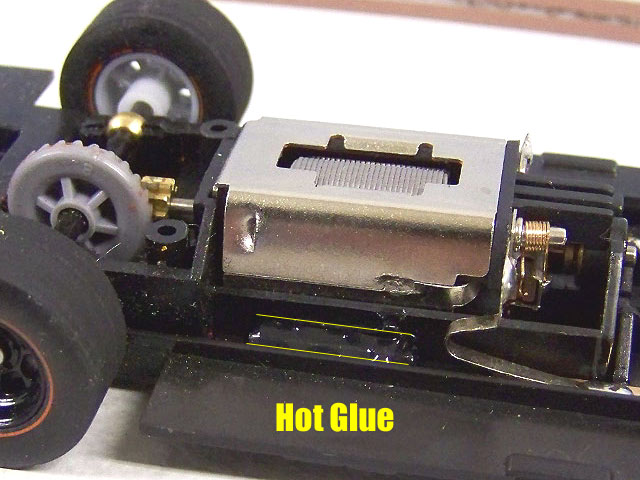
You can also do this without body removal and is the method we like to use. We simply set the rear wheels where they appear evenly matched to the body and then run hot glue on each side of the pod seams from the underneath.
Up Front
The front axle on these cars do have some excess side to side free-play that could be cleaned up. I used washers/shims from Slotcarplace.com (Part# SCP1) to fix it.
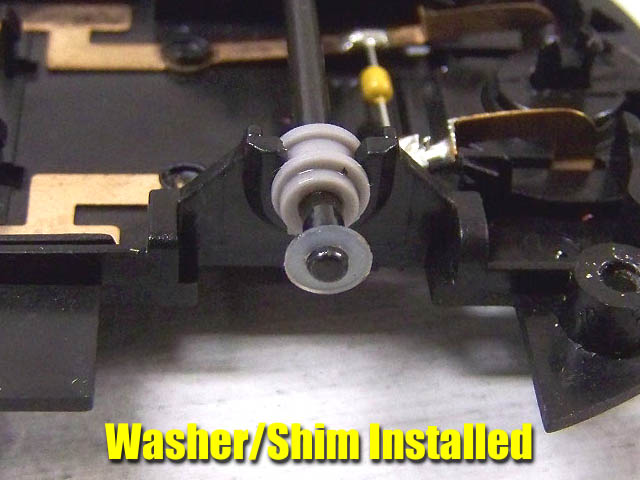
Simply twist off one wheel and insert a washer. Then slide the axle through the bushings and install the next. 2 of these eliminate almost all of the free-play.
Guide Tuning
The front guide can be an area where power flow can be reduced due to heavy use. In most cases that I have seen, the tabs/braids simply get dirty and need to be cleaned. I like to use a pencil eraser to do this and it works very well.
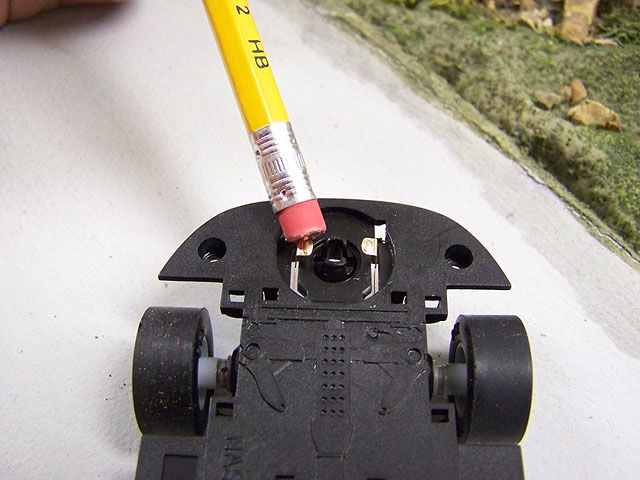

Just rub the contact tabs until they are shiny and then do the same for top of the braid. HINT: If the braid is very dirty and will not come clean, take the braid out and flip it over. Of course, if it is worn out go ahead and replace it.
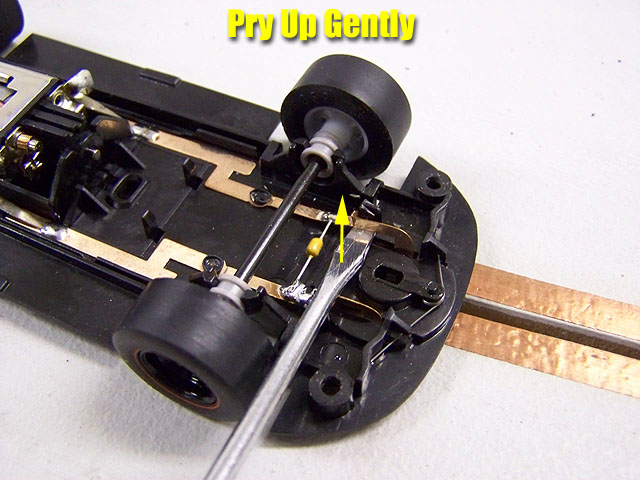
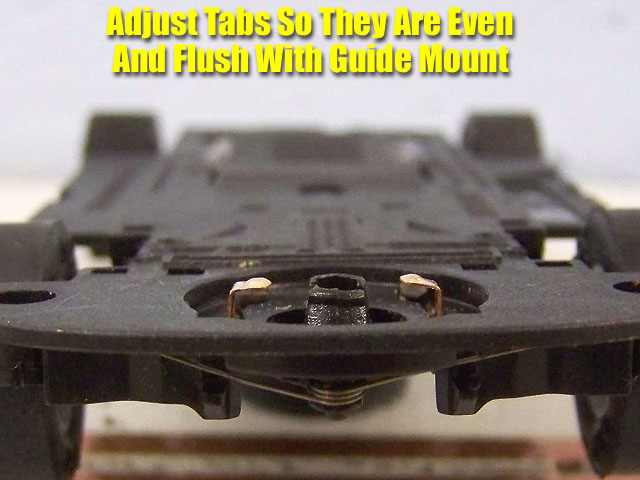
These tabs can also be adjusted for better performance. Sometimes these tabs are bent down too far and cause the guide to have excess pressure on it. This causes the front end to raise up. I adjust these tabs with a small flat tip screwdriver as shown. I pry up on the tabs until I get them to sit as close to flush with the guide mount.
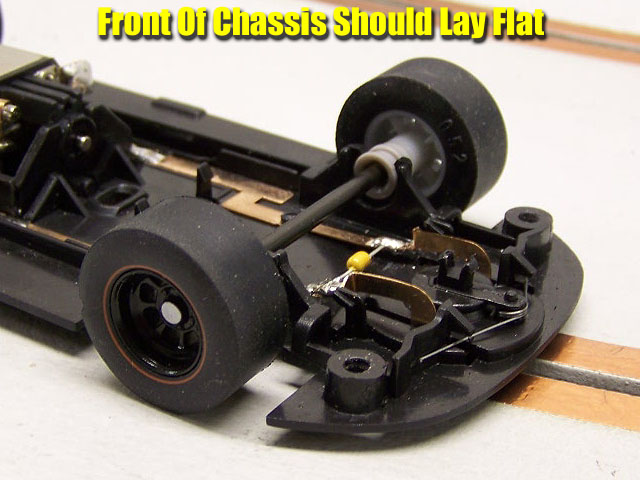
When you do this, you should be able to sit the chassis on the track and the front end will not raise up. Then with the body installed, this small increase in weight will make things as close to ideal as you could ask for.
Rubber Meetin' The Road
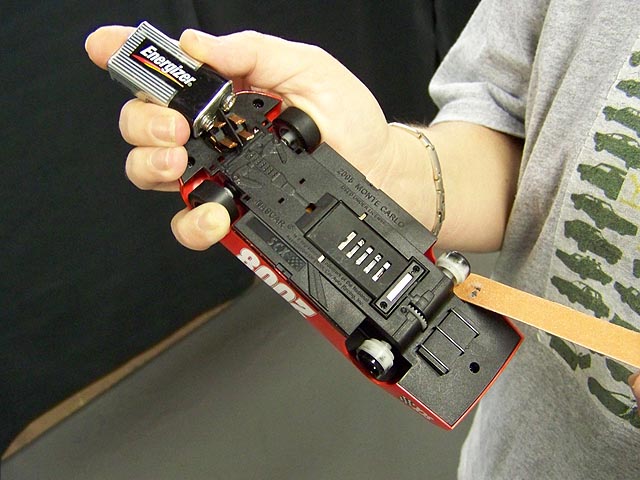
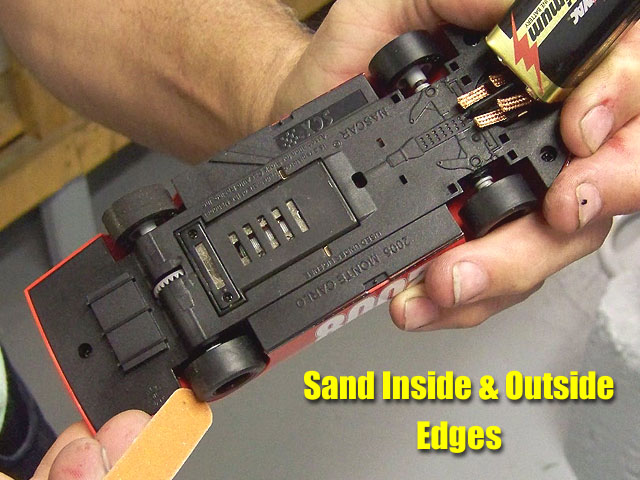
It is now time to look at our wheels and tires. This tuning tip can be applied to almost all of our ready to run cars today. First, remove the rear tires to expose the wheel. Then using your track, sanding block, or just a 9 volt battery apply power and sand the inner and outer ribs on the wheel to remove any excess flash molding.
You can do this using a variety of common materials. From your wife's Emory boards to Dremel sanding barrels. Just a few seconds is all you need to clean them up. We often use a 9 volt battery and an Emory board as shown.
Now remove the front tires and the body. To sand the front wheels we do this by hand. Snap the entire assembly out of the chassis. Now you can get some sandpaper and twist each end in the paper to clean up any flash. Now re-install the front axle leaving the tires off.
Now to install tires on the rear to sand them true. Make sure you have fitted the tires on the wheel all the way and begin sanding. There are many ways to sand tires, but for simplicity, lets just use our track. Get some medium grit sandpaper and tape it to your track.
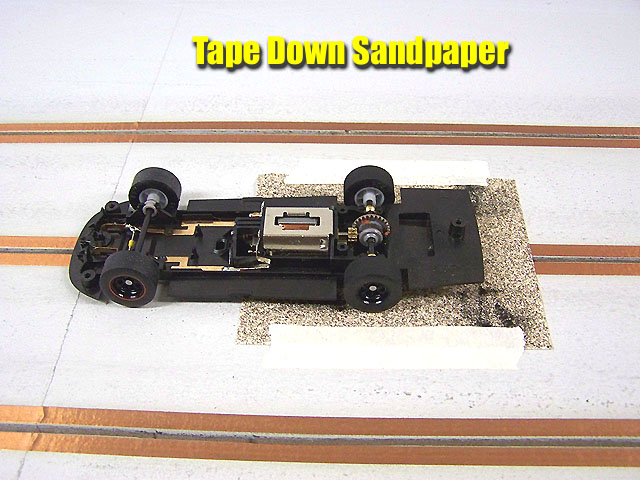
Then, hold the car backwards and apply power. Lower the car evenly on the sandpaper and begin sanding. We like to sand in 10 to 15 second bursts until the tires look round and completely sanded.
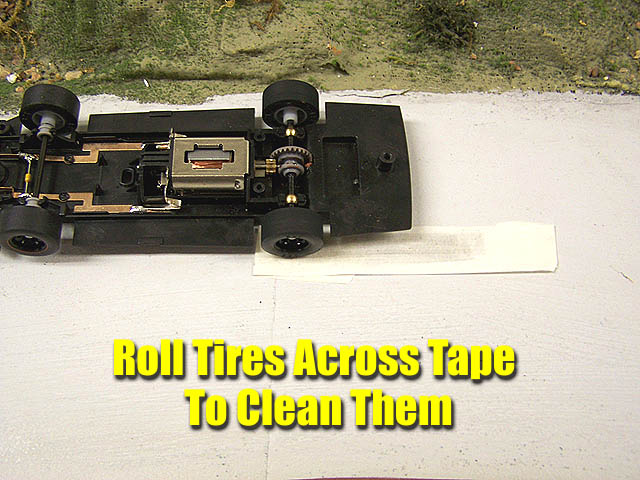
Time to clean them up. Roll the tires across some masking tape as shown. This will remove some of the "tire dust" that is left behind making them very clean. Now, take these tires and remove them from the rear wheels and transfer them to the front. You will now have a front end that is smooth and less prone to hopping. SCX has made this car with a good tri-pod effect with the front tires barely touching the ground. With a little sanding up front, it just improves it.
Now install tires on the rear and repeat the sanding and cleaning process. Here you can use your case lid once again. Place the car on the lid like shown in the photo. Bring the rear tires right to the edge of the lid.
Now pick the lid up to eye level and look at your tires. You can see if they are making a full contact patch or that you need additional sanding. I like using the edge as sometimes these case lids have a slight bow to them and the edges are usually very flat and true. You are almost ready for action.
NOTE: On many of these cars, sanding the outside and inside edge of the tire really helps in performance. This rounds the edges a little and helps the car from chattering going hot into the corners. You can do this using the method we showed to sand the wheels. This time just move the board over on each edge. About 5 to 10 seconds is all you need.
Jiffy Lube
Time for some lubrication. Using almost any light oil, apply a light drop on each of the rear bushings, each end of the motor and the front axle. Why the front axle?
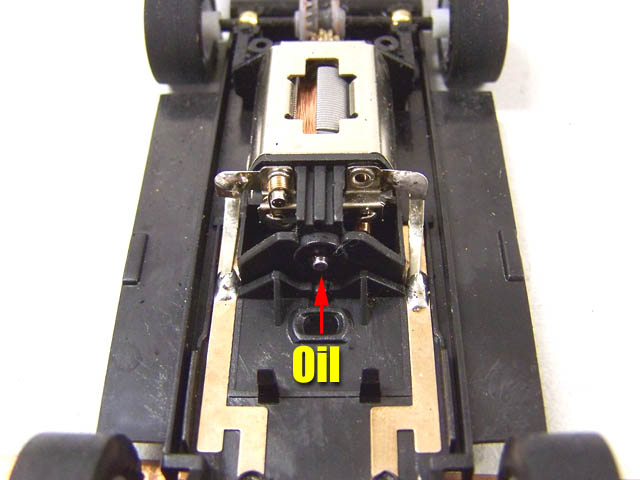
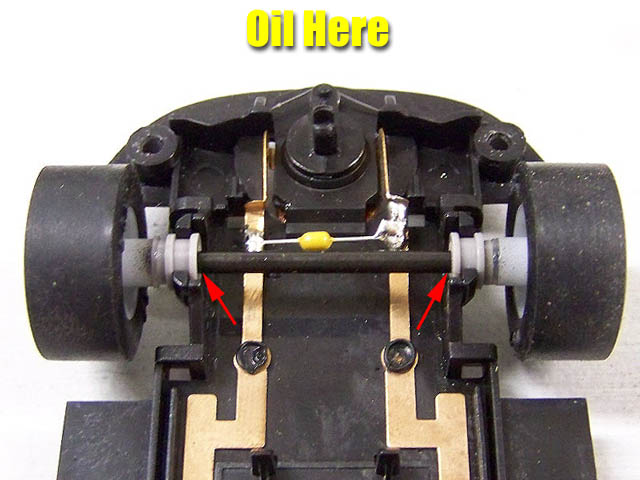
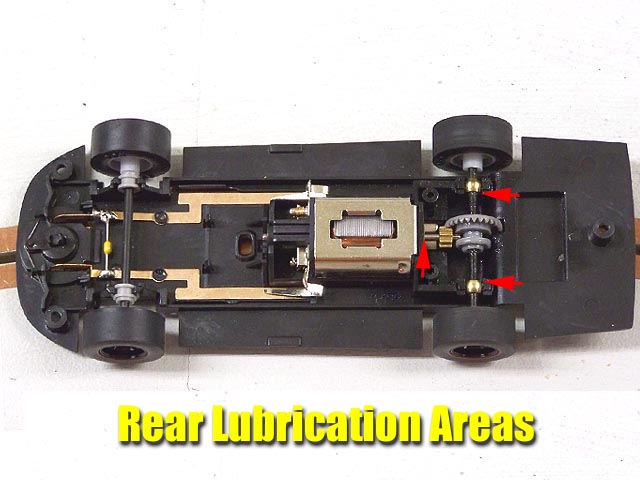
Sometimes a dry front axle can actually cause excess noise with vibration. Just a light drop will last a very long time, so try it and you might find a much improved sound (or rather less) from your model.
Break-In
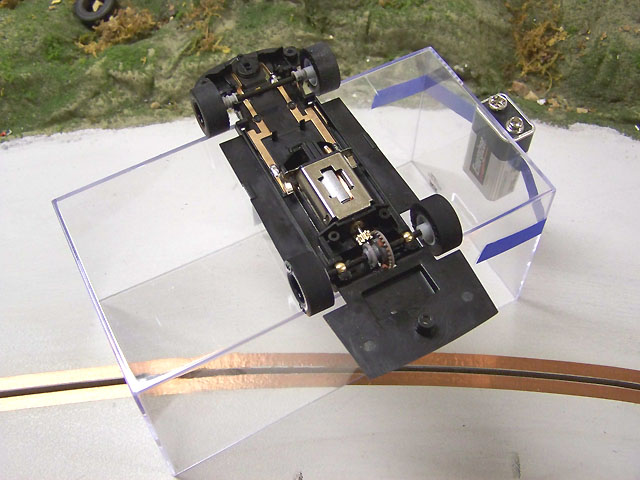
Nothing I know of takes the place of good break-in time to smooth out our slot cars. Advanced enthusiasts in our hobby have almost countless ways they like to do it. Some just race them and let time and use do the magic. You can make a easy break in rig with your case lid if you would like. Tape a 9 volt battery to the case as shown and place the car with the braids touching the tops of the battery. To raise the rear end of the car you can use one of your front tires. This holds the car very well as it resists vibration.
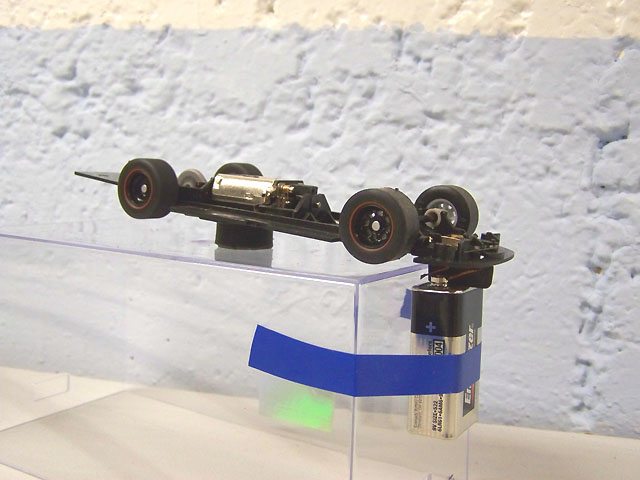
I like to put a little Turtle Wax rubbing compound on the gears and then just let it run until the battery is almost dead. This really does smooth things up quite a bit. After this running, I add one small drop of oil on the gears and we are now ready for the track
So what does a little tuning get you? Well, on our track we cut a shade more than on full second off our lap times. This may not seem like much, but you can certainly see and feel the difference. The car is very quiet and smooth and the action on the track is all the fun you can ask for.
With the COT versions right around the corner that will add even more to this line, don't forget about these cars. They are every bit as fun as any other NASCAR and should deliver years of close, "paint trading" action.
- Harry
As always feel free to contact me about this article or just the hobby in general at harry@homeracingworld.com, or better yet drop into our Message Forum and share your thoughts with other enthusiasts!
If you are an SCX Fan, Check Out The New Website!

Check Your Favorite Dealer For This & Other SCX Models
Copyright © 2008 HomeRacingWorld.com All Rights Reserved