
Friday February 22, 2008
Friday February 22, 2008

Part Two - Chassis Nerf Bars & Body Mount
It is time to start creating our nerf bars. Making these can be a little time consuming, but are well worth the effort in the end. Although there are many different ways to make them, I have found a process that I enjoy which gives me not only strength, but acceptable scale realism.
Our first task is to choose the correct area on the sides of the chassis for our side bars. Place the body over the chassis and line it up where it is straight. Then choose points that allow some space near the edges and mark them with a pen. HINT - On the Camaro choose a spot on the outer edge of the door.

Now turn the chassis over and draw a line on the sides to help guide your cutting. If you are a little off, no sweat...it will all work out in the end.

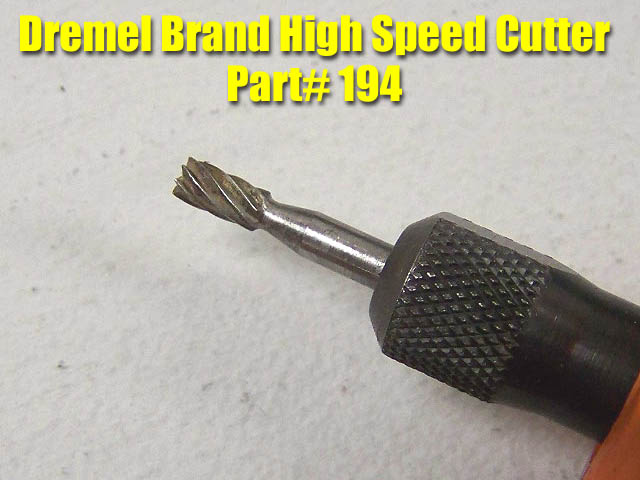
Now it is time to fire up the Dremel using the same cutting bit we used for the front and rear body areas. (Dremel Part#194) Follow your line until your cut is flush with the top of the chassis. Even if you go a little far that is ok as the tubing will sit firmly on the top of the chassis. Cut all 4 slots and clean the flash away with your hobby knife.


Time to get started on our "nerf bars". We like to use Evergreen .100" Rod Part# 213 along with 1/8" Tubing Part#224. If your local hobby shop is out of the .100" Rod, you can substitute with 3/32nd Tubing Part#223. I use these 2 different sizes in order to make mounting easier and also to provide added strength at the glue joints. Plastruct also makes tubing and rod that is identical. Check your local stockist on which brand of plastic he carries. Either brand will work perfectly.

Let us start with measuring and cutting the side nerf bar braces. These braces serve double duty as a body mount point as we will show very soon. I like to brace the .100" smaller rod against the side chassis braces then place the body on top to make sure I have the right amount of distance. A good rule of thumb is to cut these side bars where they are even with the outside edge of the front and rear tires. This will allow the slight amount of room we need to mount the side bars and still look good. The front axle on the Artin chassis has some excess side to side free-play, so line the axle up evenly to set your length. We will fix this free-play later when we tune the chassis.
For this model, the front 2 braces are cut right at 1/2 inch. Once these are cut I use hot glue to hold them in place. This allows me time to adjust the bars to make sure they are as straight and level as I can get them. If I make a mistake, it is easily removed which is why I like using hot glue in areas such as this.


Having the braces up against the chassis walls makes it a very strong joint when glued. We have had literally hundreds of wrecks and only once has one of these side braces came loose. And in the event that does happen, it is an easy quick fix.
Moving on the rear braces we use the same methods. This time the rod will sit further into the chassis to rest against the chassis side wall. We cut these to 3/4 of an inch and fit nicely. A little hot glue to hold in place and we are ready to attach our side bars.


For the side bars we now will use the 1/8" tubing. Simply cut the tubing the same length as the side of the body as shown.

Now to mark the areas on this tubing where it will fit over the side braces. This is easily enough accomplished by holding it up to the side braces and marking the areas with a pen.

You can drill/mill out this tubing in different ways, but I like to use a Dremel with the 9905 Tungsten Carbide Cutter. Why this tool? Well, it is just easier for me to start the cut and it also allows me to widen the edges in case I am off a little either way. You could simply use a 3/32nd size drill bit but only use it in a pin vise or just do it by hand very slowly. When using this cutter in my Dremel, I set it on the slowest speed. After I see it is through, I go behind the cut with a hobby knife and clean away any excess flash.


If you do not have a small vise like I do to hold the tubing in place, you can just use some duct tape and tape it down on your work surface. If you are going to be scratch-building in our hobby, there are some handy tools you may need to invest in. A small, inexpensive vise like this is one of them.
Once you have drilled these holes out, test fit them on your side braces. Once you are satisfied that they fit nicely, add a drop of Testors brand model glue to each post end. Why not Super Glue? Because Super Glue sets too fast and will not allow you to adjust your side bar. With Testors, you can apply the bar and then adjust it up and down to get the bar centered on the side post.


Wait about 30 minutes for the glue to cure and you can begin on your body mounting.
Here is where these side braces serve double duty. Place the body on top of the braces and line it up to where it looks right over the wheels.

Then mark the areas on the body with a pen. Now take the body and using your Dremel with the cutting tip used for the chassis and body, start to make cuts in these areas.

MODELING TIP: I like to cut the notches on the left (drivers) side of our models slightly deeper then the right. This allows the body to sit at a slight angle as you see often in oval racing.

Begin with just a slight cut and then test fit the body to make sure you are lined up. Keep cutting and test fitting until you have one side of the body sitting down onto the braces and at the height you need.
NOTE: If you see that the body is not lined up evenly, or dog-tracking to the right or left, just enlarge the holes to allow the body to float so you can twist it to mount straight. Making the holes larger will not hurt the looks of the car as they are virtually completely hidden by the side nerf bars. I performed this on our model as shown above.
Time to repeat the process for the other side and you are ready to test fit your body.

Looking good! We are getting closer to having our race car finished. Let's move on to Part 3!
