
Thursday June 03, 2010
Thursday June 03, 2010

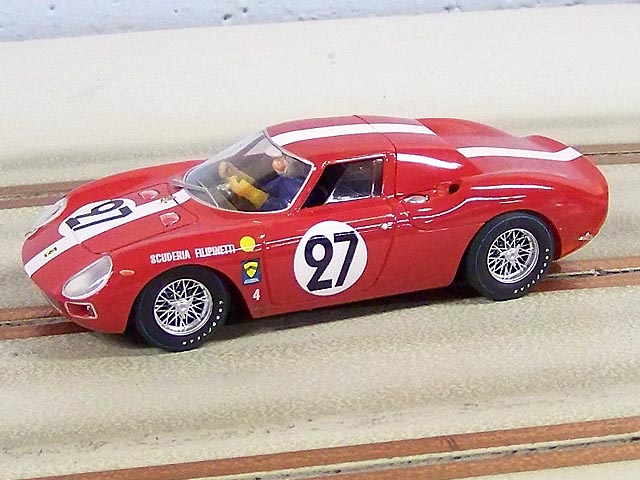
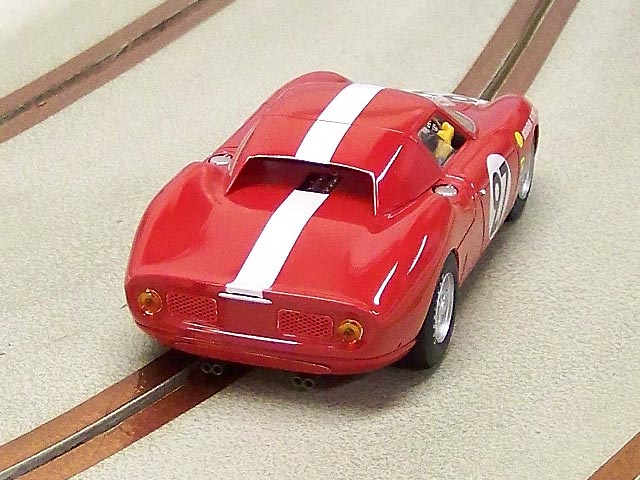
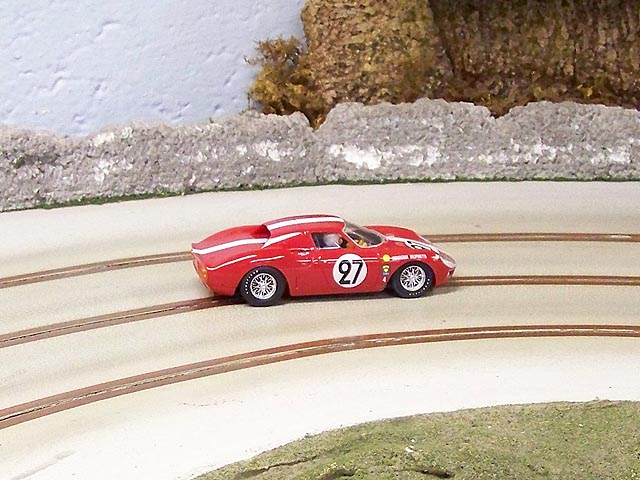
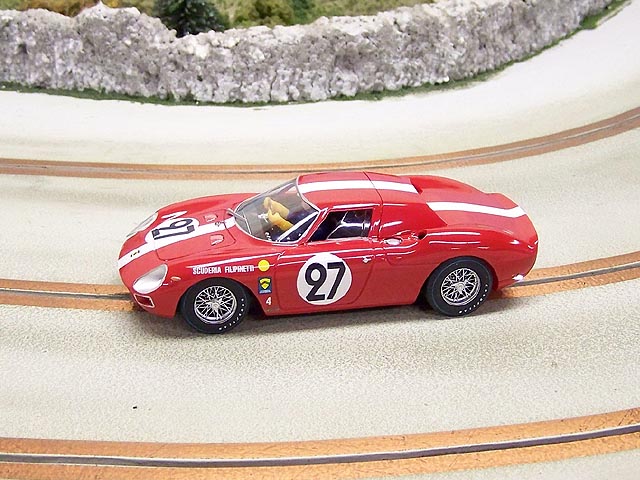
Ferrari 250 LM - Le Mans 24 Hour 1965 - Dieter Spoerry/Armand Boller - 1/32nd
Scale
This review is one that I have really looked forward to. After seeing this car on Cincyslots.com I wanted to get it and see how well Fly (Flyslot) could do. It has been a VERY long time since I have bought a model from Fly but this car was too attractive to pass up.
And it appears Fly is still noteworthy in the appearance category regardless of a name change. Of course nothing is perfect but I think they did a very good job overall. However, since I asked about this car in our forums I will let you read those initial responses so you can get a better idea from the viewpoints of more advanced enthusiasts.
There is just something about a classic car like this. For me, I think these cars are much more attractive than anything produced today. They just seem to have more personality if that makes any sense. Then again a lot of us feel that way about American iron. In any case it is classics such as this that has been a mainstay in our 1/32nd scale hobby for years and I am betting they always will be.
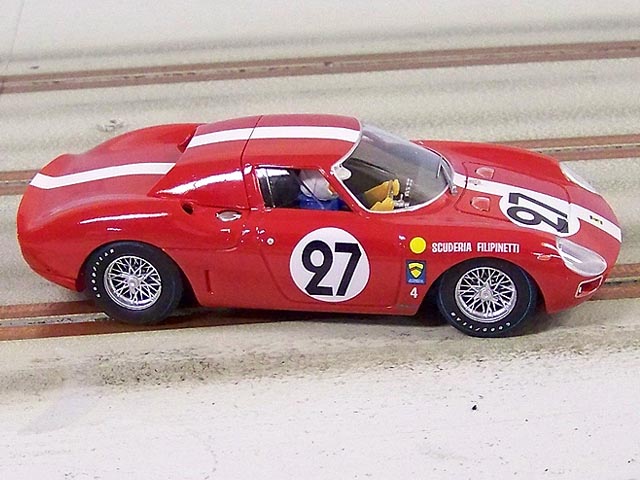
The paint work here is about as nice as you can ask for. I did notice a few very small dust particles but I had to put the car under my magnifier to really notice them. And that brings up the clear coat. The Fly models of old seemed to always have the Tampo markings over the top of the clear coat and you had to re-coat them if you wanted then to truly last. Not so here. These markings are all sealed and it really looks good.
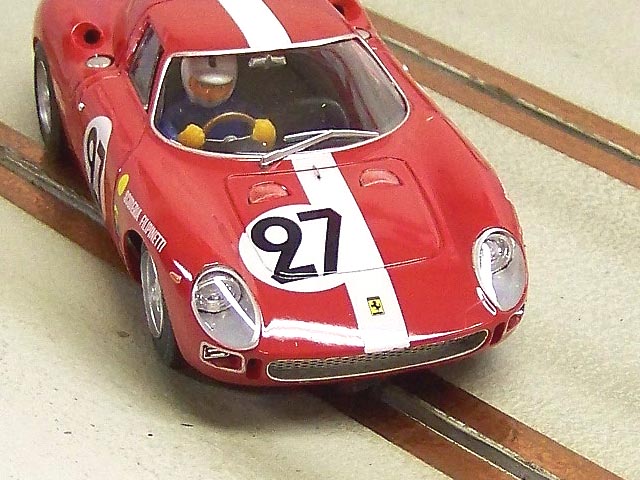
I also liked how opaque and crisp the white markings are. There is simply no bleed through I can notice and this is what really gives the car a finished look. Our driver and interior are also well done although the pupils in the eyes of our driver do seem a little odd. The flesh tone is also a little on the orange side, or at least that is how my old eyes see it.
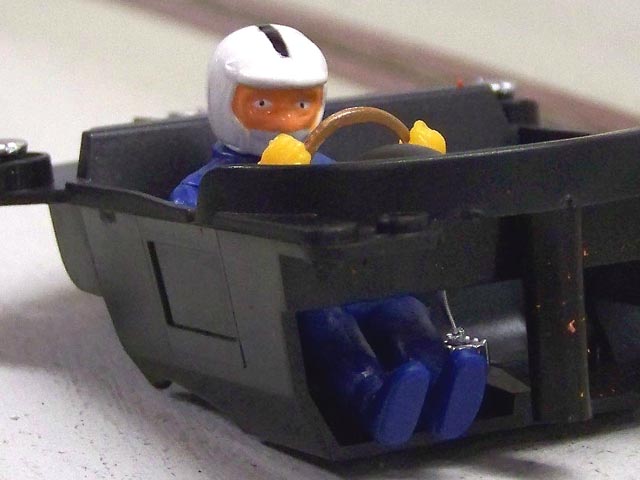
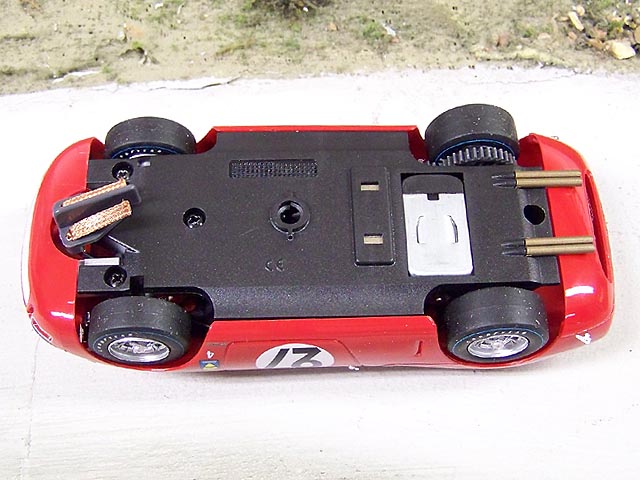
Wheels and tires seem to be done well enough but we have not tested it yet. Just by turning them by hand I do see that either the tire or the wheel on the left rear has some wobble to it. Rubber also appears to be the same compound they have used for years. No matter really as they will be changed to better match our track surface.
It also looks like we have some slight front wheel rubbing up front against the body. Ah yes, good old Fly. That is okay though, I expected a few things like this and it will be an easy fix.
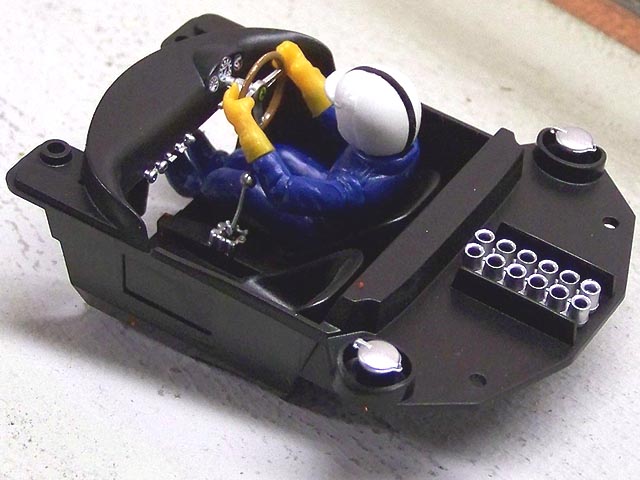
Looking underneath we see the motor in the sidewinder configuration with a bar magnet right in front of the motor. I also noticed that the motor shaft was not protruding past the pinion like older classics and that the pinion appears to be plastic and not brass. I was looking forward to trying this car and now my interest was increased.
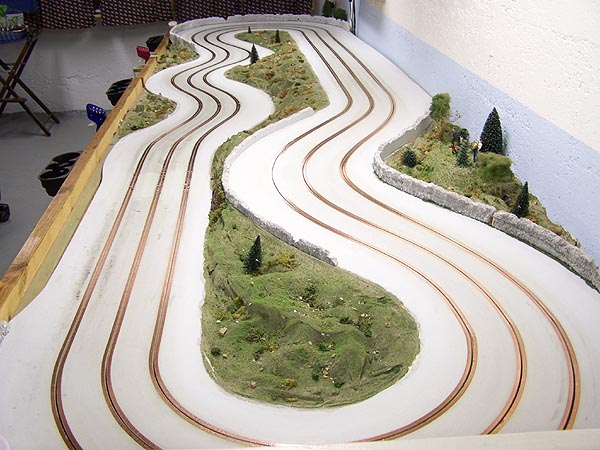
Box Stock Track
Testing
MidMo International
Speedway
4 x 16 - 3 Lane MDF Routed Wood - Flat Latex Surface
Copper Tape Conductivity - Aftermarket Power @ 12 Volts PARMA 25 OHM Control
I never would have guessed this car would run as well as it does. We do have a slight wheel wobble and a touch of tire to body rub up front. Still, this car ran pretty smooth on our wood surface. Now this car was not setting any speed records with a 5.2 second average, but it was fun to drive. The smoothness it had really motivated me as it let me know we had a decent model to start with. A little tire and wheel tuning along with some lead placed in the right areas might be all this classic needs to start hauling the mail.
And with that said I want to be very clear about my opinion of Fly models. I knew full well what I was getting into with this car. Or at least I thought. Most all models we get need a little fine tuning here and there to get them right. Fly models usually need a little more. Sometimes they end up being completely rebuilt. But as a rule it seems most of us do not care. We love the model choices they make and we are willing to spend the extra money and/or time to make them right. As it is out of the box though I would give it a thumbs up. It has great looks and should run well on most plastic tracks with the magnet working its magic.
Under The Hood
After removing the 4 screws that mounts the body we see a very basic chassis that is very straight and flat. Over time I have had a few Fly models that the chassis has a slight "tweak" or warping to it. Not so here.
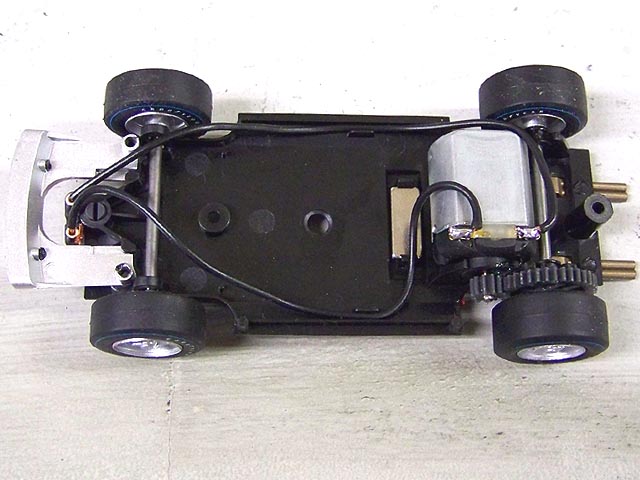
As I stated the gear mesh was pretty smooth and the gears are plastic. We still have the standard ratio with a 11 tooth pinion turning a 36 tooth spur gear. However it is here at the motor where we can make our first improvement.
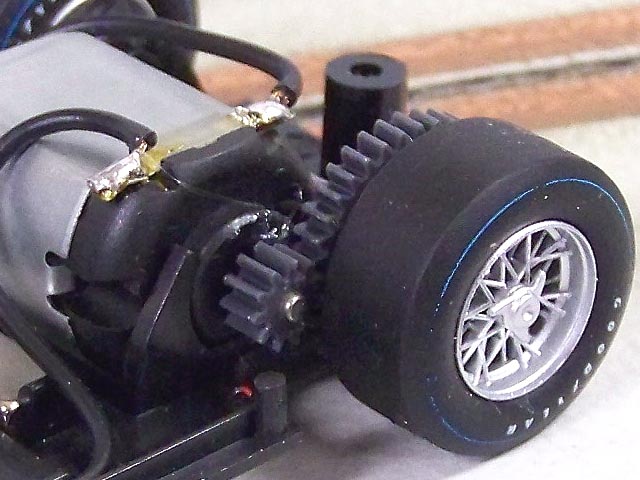
This motor sits rather loosely in the chassis mount causing it to have a rocking motion when you apply and release the power. This was simple enough to fix with just a light bead of hot glue. There are other methods of course but this always worked well enough for me.
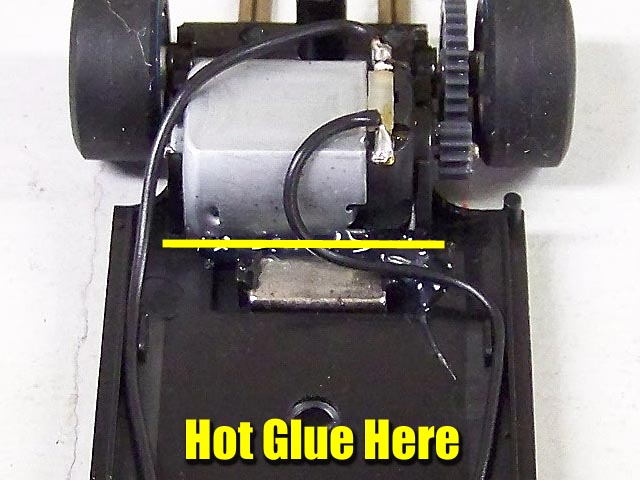
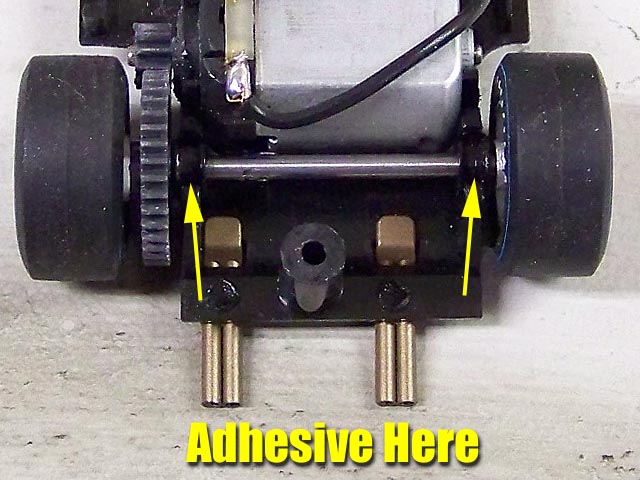
While we are back here and you have your glue gun go ahead and add a drop to each of the rear bushings. I noticed one of them spinning in the mount under power. Again this is a common issue found on many cars so I cannot fault Fly much here.
Now let us direct our attention up front. I noticed there is a good amount of vertical free-play in the front axle. I want to eliminate most of this but I need to get the front tires to stop rubbing the body. Solution? Sanding them of course.
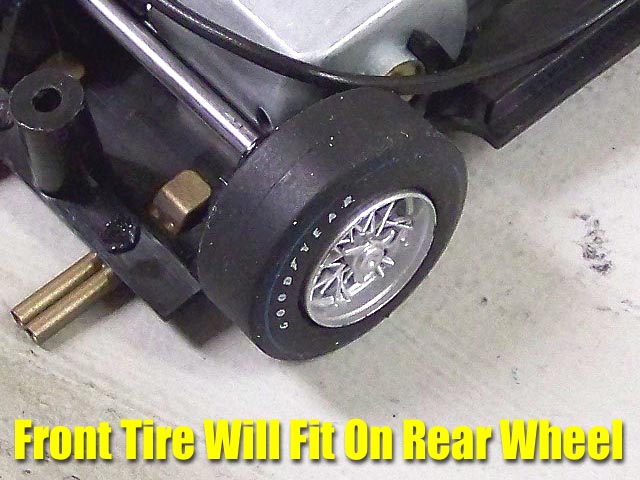
Although the wheels are slightly different in size, the front tires can fit on the rear for sanding. Now, is this an exact fit? No. Did it work? Yes. This is all up to you of course but sometimes we have methods that seem a little odd, but they get the job done and that is all that counts to me. Once you have sanded them and cleaned the edges up re-install them up front and we can check for clearance.
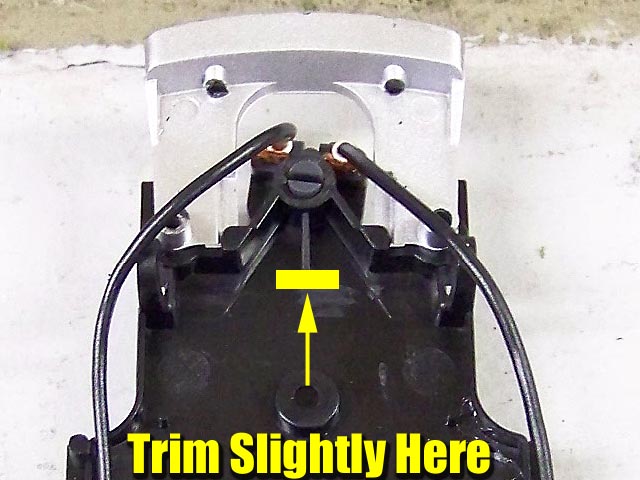
To reduce the vertical free-play I am going to try and kill 2 birds with one stone. Or rather lead. The car could use a little weight up front in my opinion so I am going to use sheet lead in strips stacked under the front axle. The only modification you will need to do is slightly trim the guide reinforcing center rib. Not very mush, just enough to allow the lead to sit under the axle.
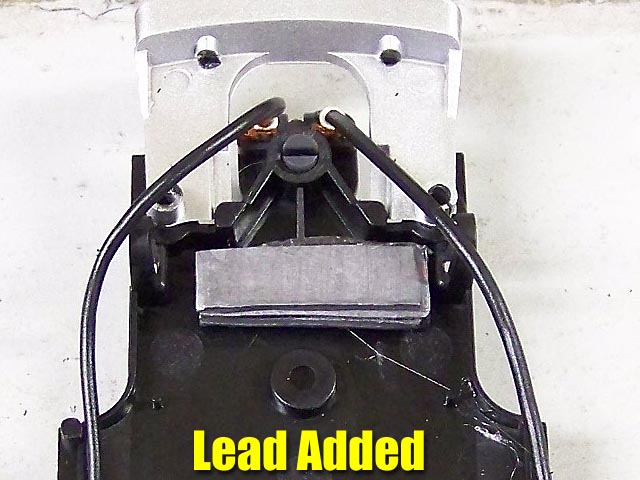
Once that is accomplished, install the lead and check for the amount of play you have reduced. I am not getting rid of all of it though. This free-play is here for a reason and that is to allow the car to run on some uneven track surfaces. Since we like to travel and visit other tracks I want to leave a little free-play here for just that reason. I did remove about 80 percent of it and this will help minimize the body roll.
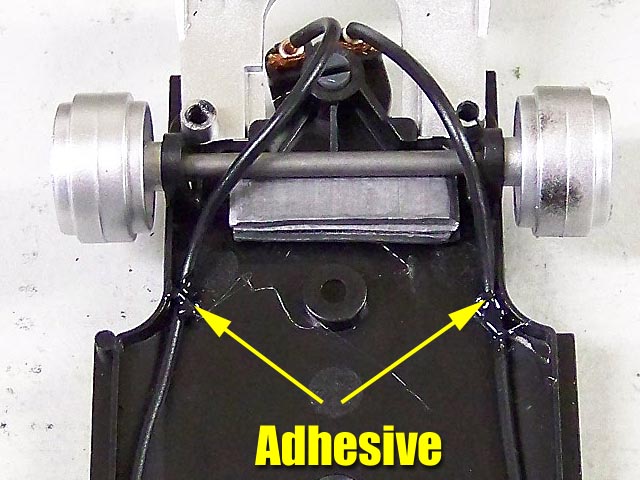
Our last step up front is a very simple and easy one. You can see where the guide wires are supposed to be held in place against the chassis. I noticed the wires rubbing the tires when I inspected for body rub. Well, the tabs for this are a little too far away and need a little help holding the wire. A quick shot of good old hot glue cleaned that up nicely.
Our final task is wheel and tire sanding. I noticed a fair amount of flashing on the wheel so it took a couple good bursts to get them cleaned up. After that we re-installed the tires and gave them the same treatment. I made sure the model was lubricated in the right places and it was time for more action on the track.
This was a much improved classic. The lead up front helped keep it pinned and the tire rub was all gone. Sanding those wheels really helped too and now this car was really hooking up. I lowered our times to 4.9 seconds but I know that will get even better with more trigger time. Of course a tire change will come in the future, but for now these tires are actually doing well. Like Fly models of old, keeping those tires clean is priority one.
Overall I am pleased with this choice. I think most of you who enjoy the tuning aspect of the hobby should also be. Any racer that loves classics like this one should take a close look at adding this to the stable.
- Harry
As always feel free to contact me about this article or just the hobby in general at harry@homeracingworld.com, or better yet drop into our Message Forum and share your thoughts with other enthusiasts!
Check Out Our Sponsor CincySlots For All Your Slot Car Needs

Copyright © 2010 HomeRacingWorld.com All Rights Reserved