
Thursday May 27, 2004
Artin 2 Lane Layout In An Afternoon
Big Fun on a Small Budget!
 You might think that beginning in this hobby is
expensive or that you do not have enough space to have a fun layout. Well as far
as we are concerned, nothing could be further from the truth. This layout
project is one that we have been wanting to do for quite awhile to show just how
easy and inexpensive it is to not only get started, but to construct a layout
that will bring you and your family hours of racing fun.
You might think that beginning in this hobby is
expensive or that you do not have enough space to have a fun layout. Well as far
as we are concerned, nothing could be further from the truth. This layout
project is one that we have been wanting to do for quite awhile to show just how
easy and inexpensive it is to not only get started, but to construct a layout
that will bring you and your family hours of racing fun.
Since we are on a budget and restricted for space, we will be utilizing the least expensive items we can find. This does NOT mean any of them are of low quality. In fact, some of the items listed in this article are optional or can be substituted for even less expensive items, so the price we list could be even lower.
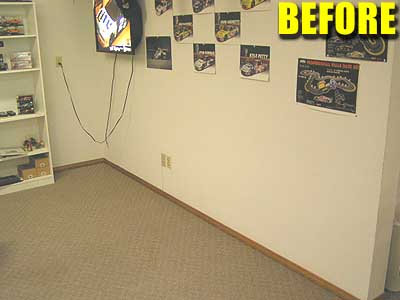
One thing about our table size choice: The 4 x 8 sheet of plywood has helped many people over the years in not only our hobby but others as well. It is the first obvious choice when most people decide to move their track from the floor to a table given its popularity. This is why we chose the 4 x 8 and we have nick-named the layout "The 48er".
__________________________________________________________________________
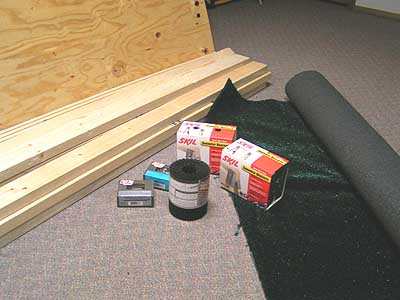
You Will Need The Following:
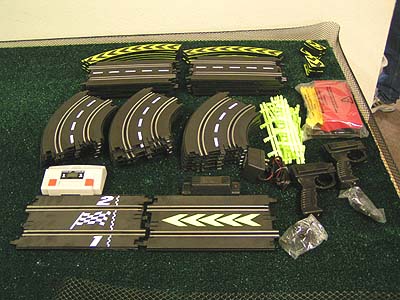
1 each Artin 2 Lane Set With Cars
1 each 4 x 8 Sheet of Plywood (You may substitute this with particle or pressboard)
6 each 2 x 4 x 8 Boards
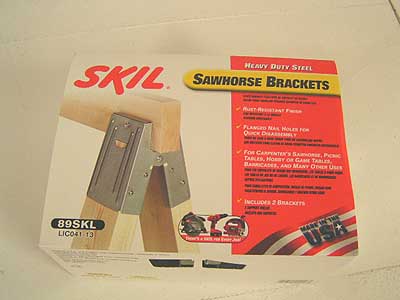
4 each Sawhorse Clamps
1 each box of 3 inch Wood Screws
1 each box of 1 1/2" Roofing Nails (You can use any nail you have available)
Circular Saw or Jigsaw (hand saw can work as well)
Electric Drill For Mounting 3' Screws
Hammer For Roofing Nails
The Following Items Are Optional:
1 each roll of Olefin Outdoor Plastic Carpet cut to 4 x 8
3 each 1 x 4 x 8 Trim Boards
1 each roll of Plastic 6" by 20' Gutter Guard Material
__________________________________________________________________________
 Now
that we have all our construction materials, let's build a slot car track!
Now
that we have all our construction materials, let's build a slot car track!
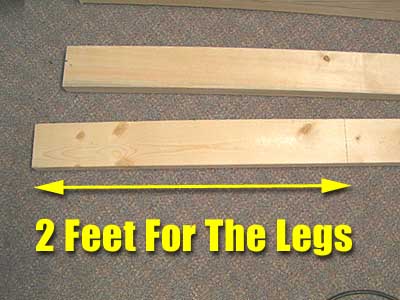
The first step is to construct your sawhorses. Using a circular saw, we cut the legs at 24 inches a piece which will make your layout height right at 27 inches high. Not only is this height perfect for the younger racers, but it allows much easier turn marshalling in the event this layout is tucked into a corner. Once you place the legs inside the sawhorse brackets, secure them with roofing nails from the sides of the bracket and set them aside. We will attach them to the table once it is completed.
Next it is time to construct our 4 x 8 table frame. We have built many slot car tables in our time using this method and all we can say is that it works very well. We utilize the least expensive 2 x 4 studs we can find at our local lumber yard and this helps keep the overall price of the layout low. You can use larger or higher grade lumber for this frame if you feel the need to, but these will last you for years.
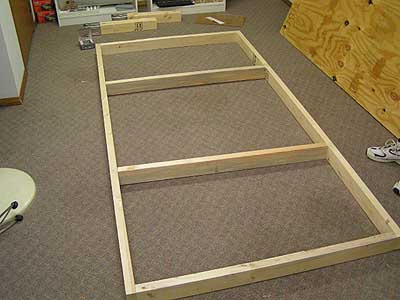
We place 2 of them uncut on each side and then it is time for the center supports. Using our circular saw we cut 4 each 45 inch long centers and placed them inside the 2 side 4 x 8 studs. We measure from the outside of the table and place the 2 inner supports 27 inches from each end. Once we have these in place, we use our drill with a cross-tip bit and secure the frame with 2 screws per joint. Once the frame is completed we simply slip the 4 x 8 sheet of plywood over it and secure it using the 3 inch screws. This makes a VERY strong and durable table that will stand up to being moved from room to room for years to come.
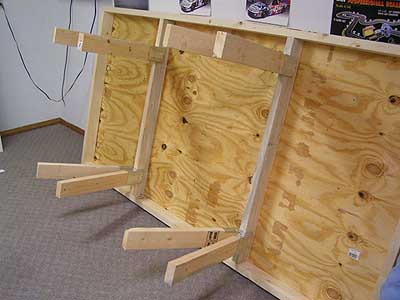
Now it is time to mount our sawhorse legs. Flip the table over on its surface and place the legs approximately 3 to 6 inches away from the inside of the frame as shown. The photo shows the placement difference between 3 and 6 inches. You can of course place these virtually anywhere you need to, these measurements are simply given for a guide. Once you have them placed where you want them, secure the clamps to the centers with a 3 inch screw. Again, we use screws as it makes for a much stronger base.

Now simply flip the table over on it's legs and you are finished. This is where you can stop and paint the tabletop if you want to, set up your track and start racing. However, we feel the next additions make for a much more finished layout and just add to the overall enjoyment of it.
The next step is to place the carpet on the table top and secure it using roofing or any other nail you may have laying around. The carpet is easily trimmed to fit with either a carpet blade or scissors. Now it is time to set up the "fence" that will surround 3/4 of the table to help keep the cars from falling off and hitting the floor in the event of a de-slot. We like to use PLASTIC 6 inch tall gutter guard material. You can find this at either your home center or hardware store and Wal-Mart/K-Mart. Do not use the metal version of this as the tops are very sharp and could cut you. The plastic is very flexible and since using this type for years on other layouts, we have never had anyone hurt themselves by reaching across it or pushing it down by hand.
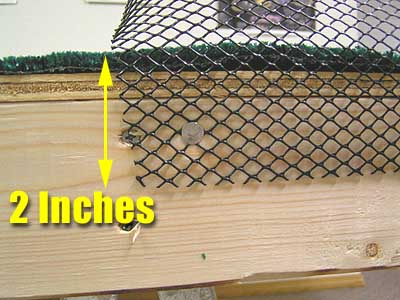
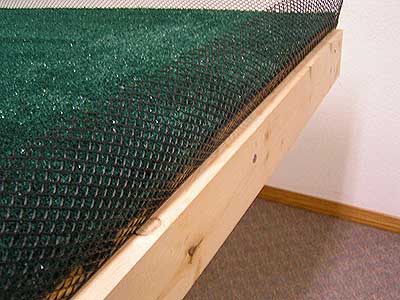
We place ours about 2 inches deep on the table sides to allow enough on top to do the job it is intended for. We like using roofing nails to secure it as they have a larger head and grip the plastic well. We place about every 2 feet and once this is completed it is time for the trim boards to finish it off. Using standard 1 x 4 boards cut to fit, we place them on the sides on top of the fence and nail them with roofing nails. You can also use screws for a stronger bond of you choose.
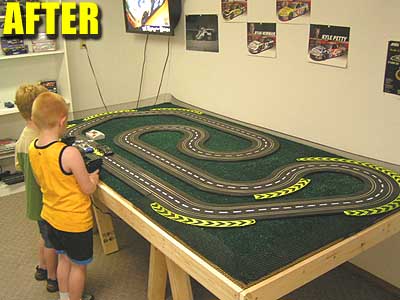
Now you are finished and ready for track! How long did it take to build it? It took us less than 1 hour to fully construct the table, and remember...that is with me stopping progress and taking photos. Laying the track was completed in only 10 minutes.
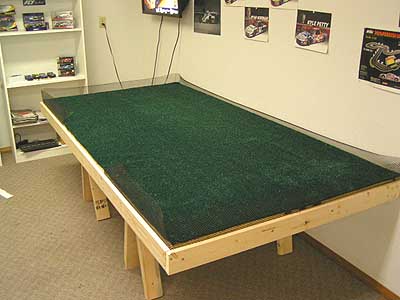
The Artin 2 Lane System fits this table perfectly using ONLY and ALL of the track sections in the set.
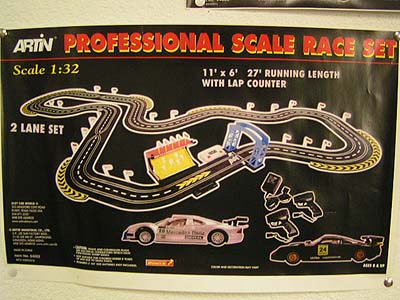
Track construction is as simple as it gets and within minutes you are ready for action. For more on the Artin 2 Lane System read our review here. The image below shows the track plan we used.
![]()
Now the big question? HOW MUCH?
Well hold on to your wallet because this complete layout AS SHOWN from the nails to the track set is under $200.00!
1 each Artin 2 Lane Set With Cars - $115.00
1 each 4 x 8 Sheet of Plywood - $17.98
6 each 2 x 4 x 8 Studs - $16.14
4 each Sawhorse Clamps (Come in 2 per pack) - $7.94
1 each box of 3 inch Wood Screws - $2.67
1 each box of 1 1/2" Roofing Nails - $2.28
1 each roll of Olefin Outdoor Plastic Carpet - $14.74
3 each 1 x 4 x 8 Trim Boards - $8.88
1 each roll of Plastic 6" by 20' Gutter Guard Material - $2.65
GRAND TOTAL - $188.28
Now the prices above of course reflect my local home center here in Mid-Missouri. Prices on these items will vary due to your location, but even if the items are higher, there is a good chance it will still be under $200.00.
Considering that there are 2 lane sets available today costing MORE than this by themselves, makes this layout even more appealing to those on tight budgets. You can transform just about any corner of a basement, garage or bedroom into a fun and challenging slot car track using the venerable 4 x 8 sheet of plywood without breaking the bank.
- Harry