
Clear Coated Capri!
November 22, 2002
![]()
 Since Fly released this
car it has become quite popular, selling out soon after it’s released. A lot of
good things can be said about this car, and have been by many enthusiasts. But
some Capri’s came from the factory with less than stellar clear coat over the
Tamp stampings, causing the markings to flake off or peel from use. A lot of
racers have made note of this and went about looking for a way to seal these
markings for longer life and keep the beautiful appearance of the car. There are
methods used today, such as Future floor polish, which is quick and easy to use,
but I wanted something more permanent, plus look good as the original or better.
This meant of course testing different methods. I tested on several cars that
were long in the “bone yard” and found a surprising answer.
Since Fly released this
car it has become quite popular, selling out soon after it’s released. A lot of
good things can be said about this car, and have been by many enthusiasts. But
some Capri’s came from the factory with less than stellar clear coat over the
Tamp stampings, causing the markings to flake off or peel from use. A lot of
racers have made note of this and went about looking for a way to seal these
markings for longer life and keep the beautiful appearance of the car. There are
methods used today, such as Future floor polish, which is quick and easy to use,
but I wanted something more permanent, plus look good as the original or better.
This meant of course testing different methods. I tested on several cars that
were long in the “bone yard” and found a surprising answer.
I just happened to be in Wal-Mart and was looking for sealants for this project, when I thought about spray paint. Now at first, I thought perhaps the paint would cause the Tampo markings to smear or run. However, I picked up a can of #20014 Clear Gloss paint. At $.097 a can, if it did not work, I was not out of pocket a lot of money!
But it DID work and work well. Careful application is the key here as too much will produce a “cloudy” effect over the paint. Practicing this application is not hard, and in just a few minutes, you have a sealed, beautiful car that can take more abuse than before.

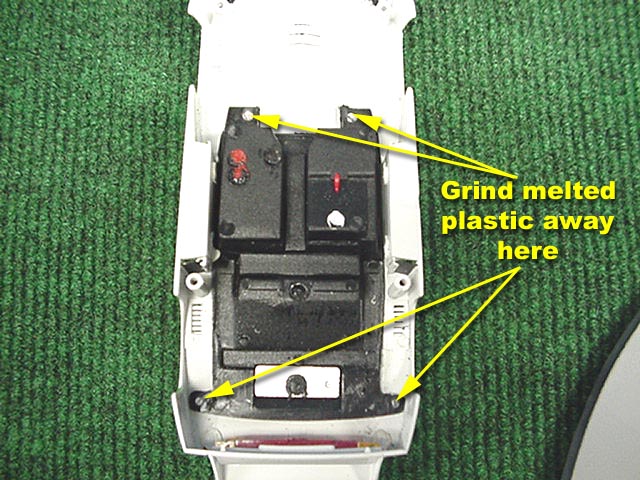
First thing is removal of the interior and glass. This paint will ruin the glass, so removal is mandatory. Masking the glass off with tape is more work than it’s worth. Standard Fly practice is to melt the plastic holding the interior in. But removing this without damaging the parts is quite easy.
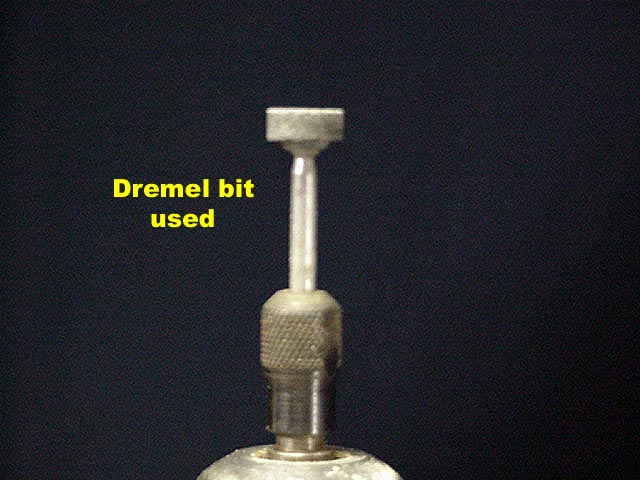
Using a Dremel or any Moto-Tool with a similar bit shown in the photo attached will do the trick quickly and easily. Placing the bit directly over the melted plastic, it grinds it away very flush, leaving the remaining mounting posts intact for easy installation.
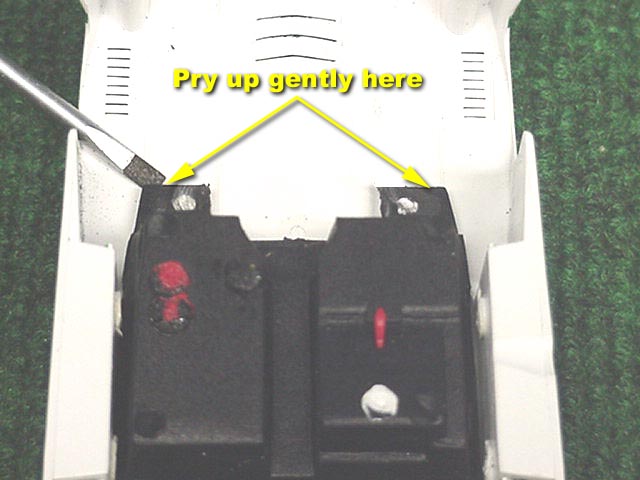
Once removed, use a small flat tip screwdriver as shown and gently pop the tray up and out of the body.
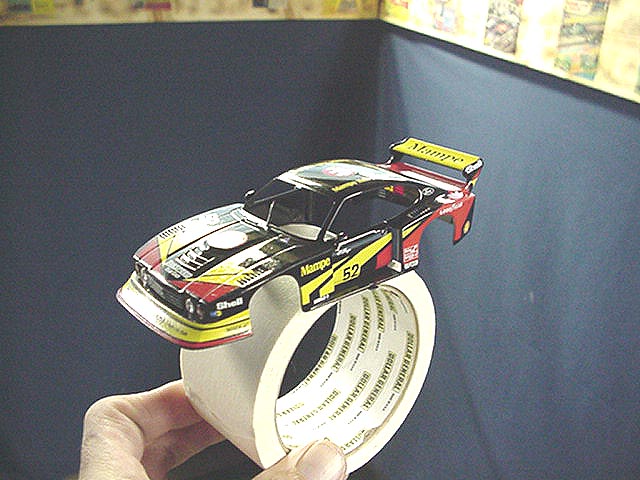
Now it’s time for the paint. Making sure your body is dust free and clean is important here; so extra time to check the surface is worth it. For my use here, I simply mounted the body on a large roll of masking tape to hold it firmly and allow me to turn the body during application.
3 passes of the can was all it takes, you do not need a lot here to seal the markings. And that is it. I allowed the body to dry an hour before handling it and installing the interior. When you install the interior, snap the tray into the existing posts snugly, and add a drop of super glue or similar adhesive in each corner where you originally ground the plastic away.
This bit of preventive maintenance will provide you with a more bulletproof finish and help keep your prize cars looking great, even in the rare event you should ever crash.
As always, feel free to contact me about this article or slot cars in general at wiseone@yhti.net
Harry
