
Monday December 15, 2008
Monday December 15, 2008
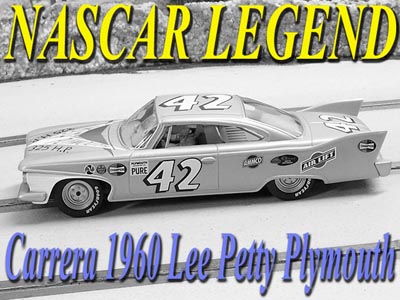
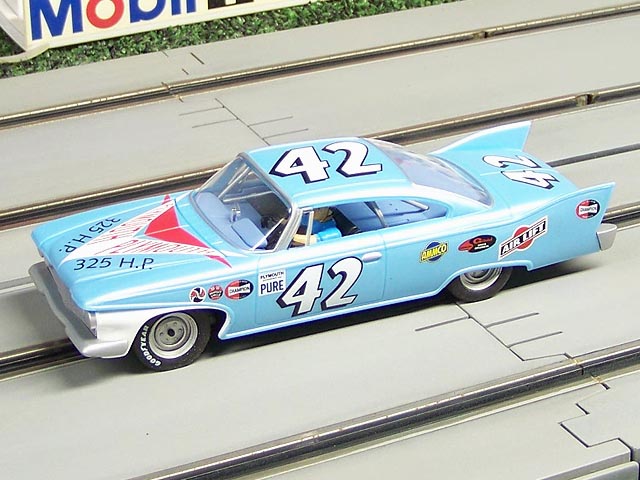
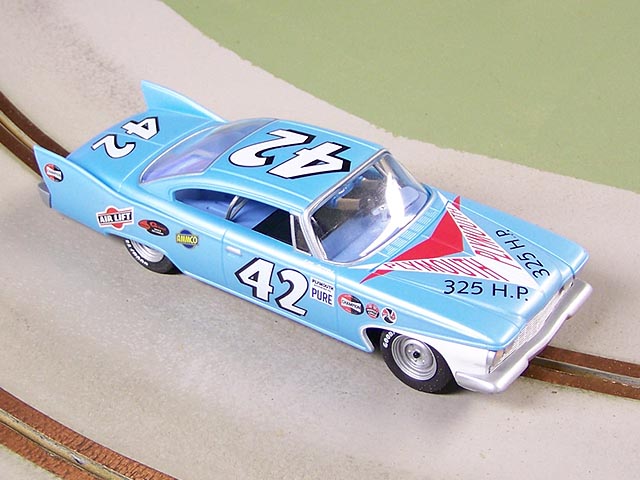
This latest release by Carrera has taken many enthusiasts by surprise. Although an odd choice to some, the same can be said for other models I see being produced. Like it or not the 1960 Petty Fury is finally in my hands and I cannot wait to see what this new classic NASCAR has to offer.

In 1960 both Lee and his young son Richard (along with a few more) took delivery of this car for the 1960 season. It was painted in what would become a trademark of NASCAR racing. Our model here looks very well done although it is on the light side to my eyes. However, this is depending on what prototype photos you look at. In any event I think it should have been slightly darker. Comparing it to previous models released by Carrera, there is a big difference in the shades of blue.
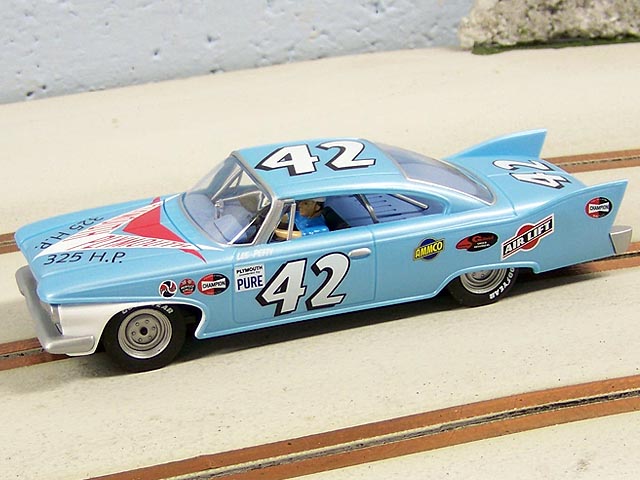
I feel they have captured the overall look and feel of this tailfin (sorry...stabilizers) goliath well enough. I have heard other enthusiasts comparing them with the 1969 releases Carrera produced with mixed opinions. For my eyes it is done well enough and quite frankly how it compares to these other cars is of little concern to me. They did not race together in the 1:1 world so many clubs may not allow it in that series. Of course, not everyone is this particular. I am sure many enthusiasts will try and run them together. To put it nicely this model is certainly a one of a kind. In any case we always let you make the final call.
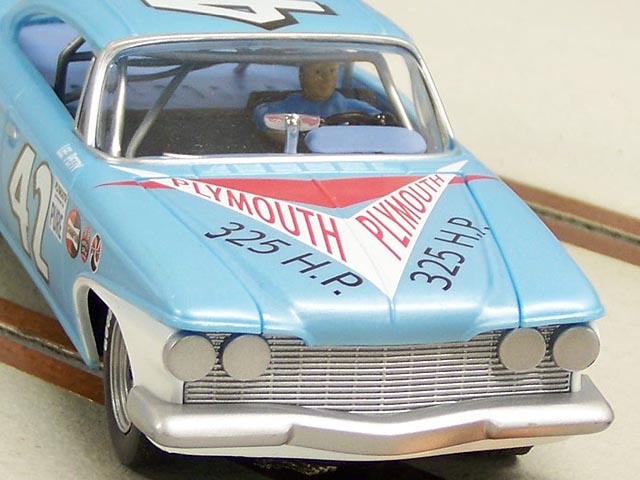
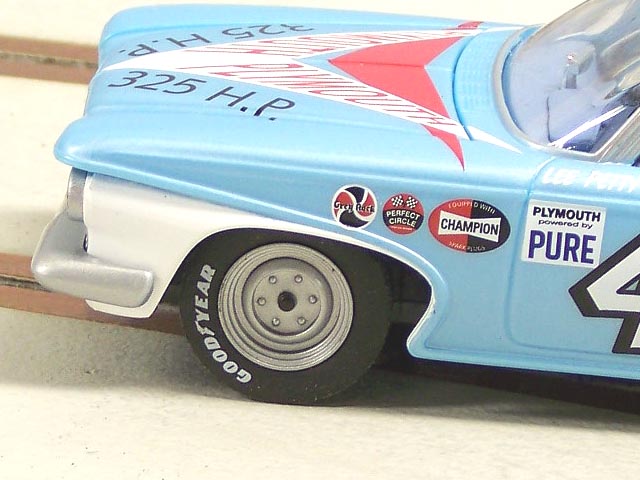
The paint work and Tampo stamped markings are very clean and I found no runs or fades. The odd thing is that it appears there is no clear coat. Or rather a gloss clear coat we can see. It appears they have chosen to give this model an "old" look to it but in truth it should have been clear coated using gloss. For starters it simply would help protect the decals which is priority one for many of us. If there is a matte protective clear protecting these decals then we will see how durable it is over time.
Our interior is basic enough but does have some light detail. Clearly a half tray design utilizing a "head and shoulders" driver figure gripping steering wheel. We also see some roll bar detail which gives it a more finished look.
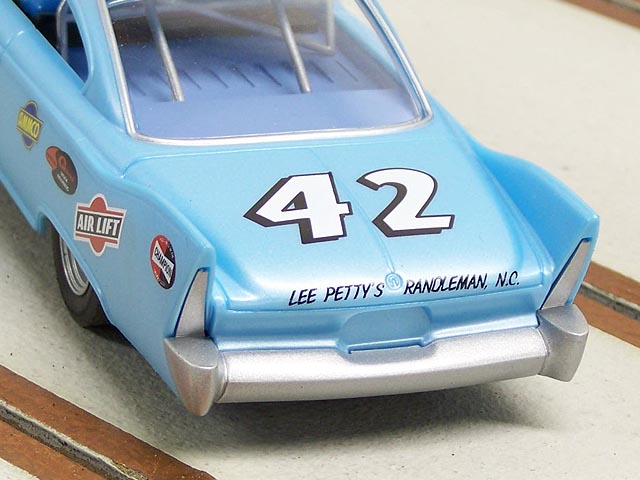
The other oddity is the silver paint in place of chrome. Personally I think it gives a decent overall look but it should have been chrome. But since I am just guessing here, the approach taken not to clear coat it to give it that "old" effect is most likely why this was done. Scale enthusiasts will most likely not appreciate this approach and I cannot say I blame them. Again, only you can make the call.
When looking at the wheels and tires one other item caught my attention. The car is low. Prototype photos I have seen do not show the rear of this car this low. Especially on the NASCAR versions.
Although the front is a little on the low side it is much closer than the rear. Not that it matters for many enthusiasts who will race them. Many have taken to lowering the early Carrera Classics to make it perform better regardless if they truly looked that way.
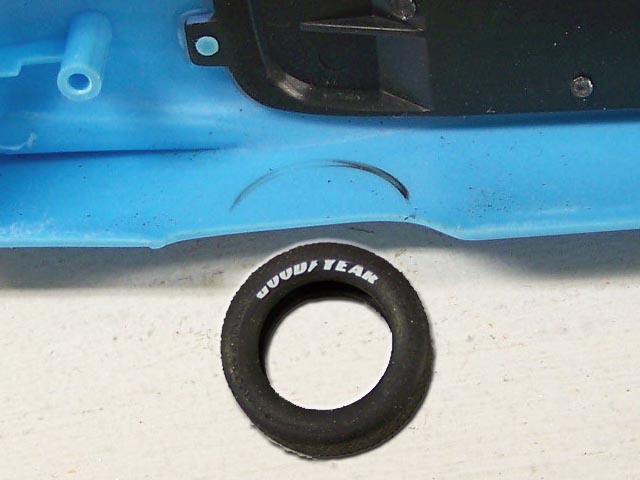
Back to the wheels and tires. No, they are not the old blue line tire raced back then but they still look the part. What I was happy to see was the compound of tire used. It is softer than previous classic NASCARS and really grips the track well. I first saw these on the 57 Chevy and hoped the new compound would be included here. The wheel itself struck me as odd though. The bolt pattern seemed a little large and I cannot be certain if this pattern is correct. In any event it portrays an old steel wheel which is certainly correct for the time period.
Box Stock Testing
Artin Plastic Track - Aftermarket Power @ 12 Volts - PARMA 25 OHM Control
I have to say that one thing about models from Carrera, they are usually very quiet and smooth out of the box. This car is no exception. In this box stock form I hope you enjoy magnets. This car is planted very well so it should please most who enjoy racing this way. It is also a good thing in some respects for younger racers as the model will be easier for them to dive. If you do not like magnets they removed easily enough.
As I stated, the gear mesh was very smooth. This I liked a great deal. I also like the grip of these tires. I will say they will need some work, primarily sanding the outer edges of them, but overall I was happy and that is what I think most of you will conclude.
I did notice that in some areas of our track the car seemed to hesitate. I first thought the braids needed adjusting but this did not fix it. Then I looked at the guide blade. These guides are deep and very long and on some tighter corners they may cause a bind. Since these guides are designed to be trimmed to fit your needs this is no real issue. However, this hesitation was in the straights as well so the guide was not the causing the hesitation.
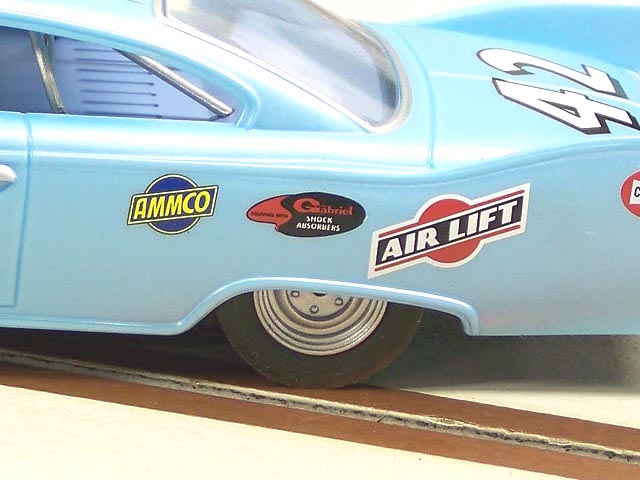
Upon further inspection I noticed some tire to body rub. It was easy to spot as the Goodyear decal was being worn away. The wheels seemed to be mounted as far on the axle as possible, but we will get inside and take a closer look.
Under The Hood
Looking underneath we see this model has the newer chassis design. It uses 2 larger bar magnets on each end of the motor and they are adjustable. Up front is the polarity switch that allows you direction change. I cannot easily get to it by hand but a small screwdriver will do the trick. 4 screws mount the body to the chassis and were easily removed.
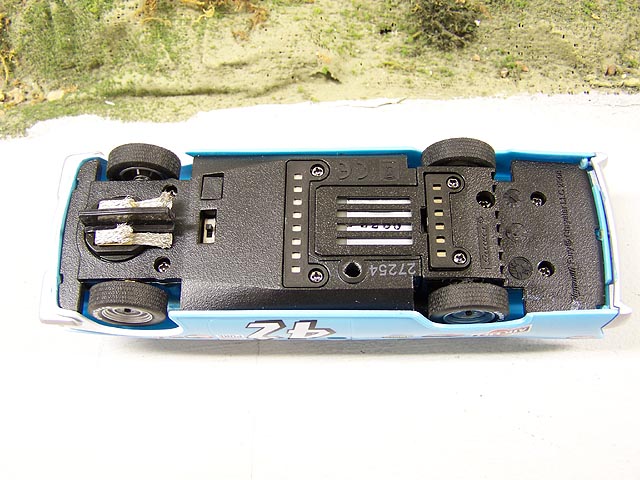
Once inside things get busy. There is plenty going on here with multiple quick disconnects for the motor and power. 2 extra plugs are also present that are used for lighting the model if it was the street version.
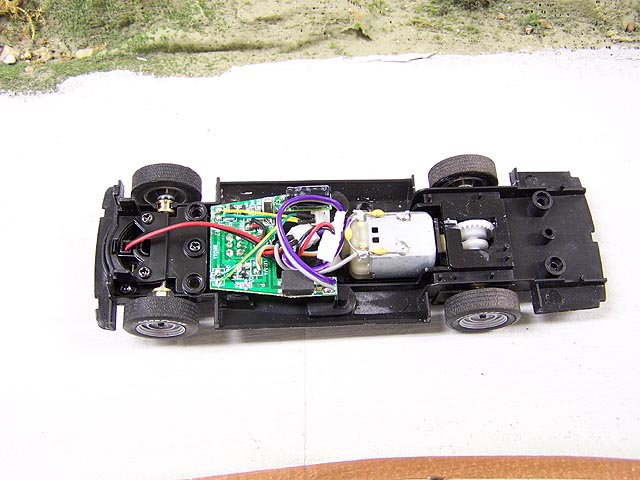
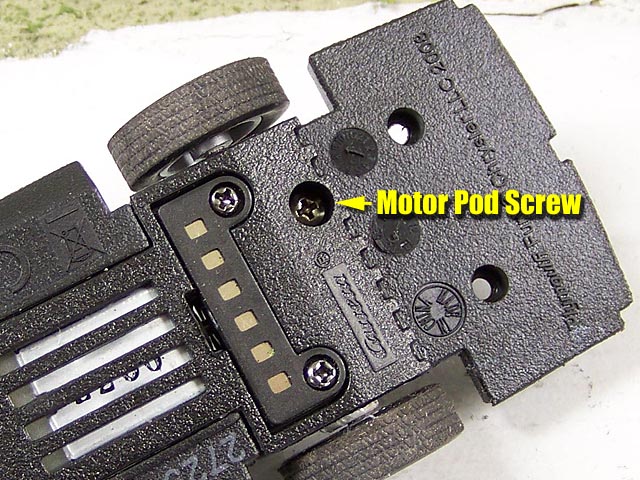
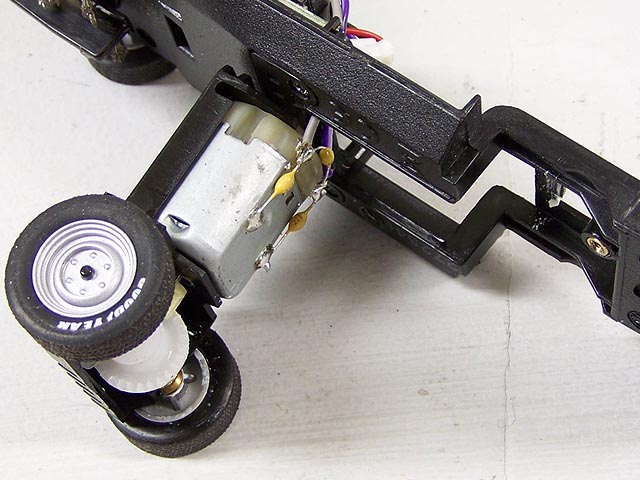
One screw at the bottom holds the rear motor pod in place. I like this design as it also allows you to loosen it a little to add some float. Gearing and motor is Carrera standard with a 9 tooth pinion driving a 27 tooth crown gear.
Up front is the self-centering guide system. I must say the tension on this is more than I prefer. Needless to say it will self center upon de-slotting!
Modifications
WARNING! Performing The Following Will
Result In VOIDING The Warranty
Remember, you do NOT have to perform any of these. You can simply leave the model alone and simply enjoy it as is. I almost buttoned her up and did just that...but I could not help myself. There are some things we can do to clean things up a little and perhaps get this model to run even better.
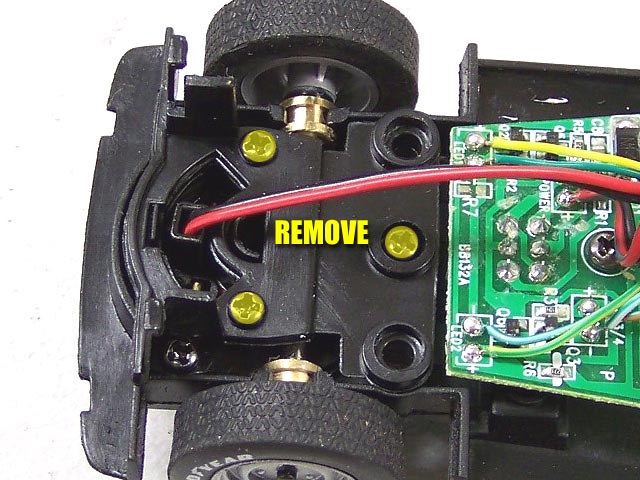
First, since we are up front let us remove the guide spring. Remove the 3 screws that mounts the front axle and guide cover and pull it back through the lead wires. Next, simply pop the spring out with a small screwdriver. When I say pop, I mean pop! Cover the front with your hand or your spring will travel a great distance across your workbench. Then just re-install the cover and you are finished.

Since the spring was now removed I decided to trim the guide. As stated earlier this guide was designed to be trimmed/adjusted to fit your brand or style of track. If you are running some very tight inner corners you may need to perform this. It is easily enough done by popping the guide out by hand. Just grab the blade and pull, that is all there is to it.
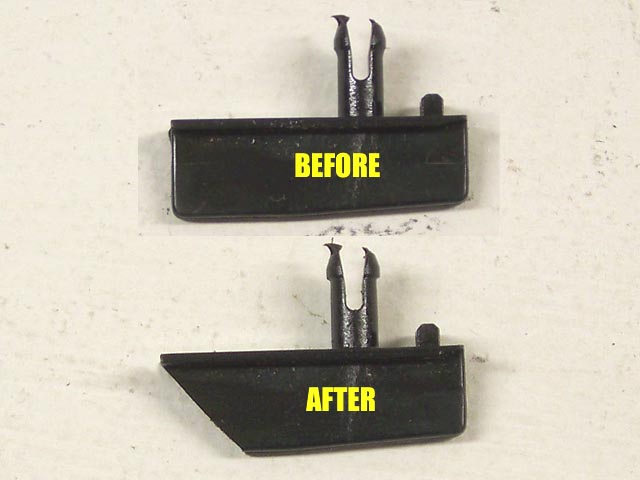
Next I measured and trimmed the rear of the guide to 3/4 of an inch. This is just about the same as a Slot.it guide. I did this as I never know what type of layout I will visit in the future. Reducing the length is not going to hurt performance so might as well plan ahead right?
Now for all these wires and electronics. Since this model will not need lights or change in direction we are going to rid the chassis of all this added electronics.
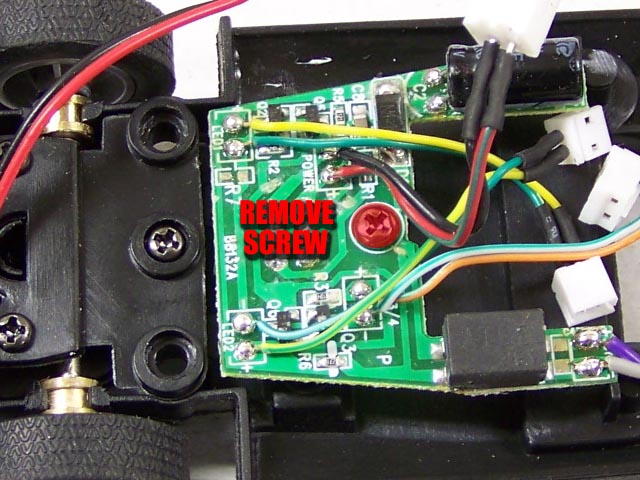
And it is very simple. Unplug the motor and the main power plugs. Then remove the one screw that holds the circuit board in place. That is all there is to it.
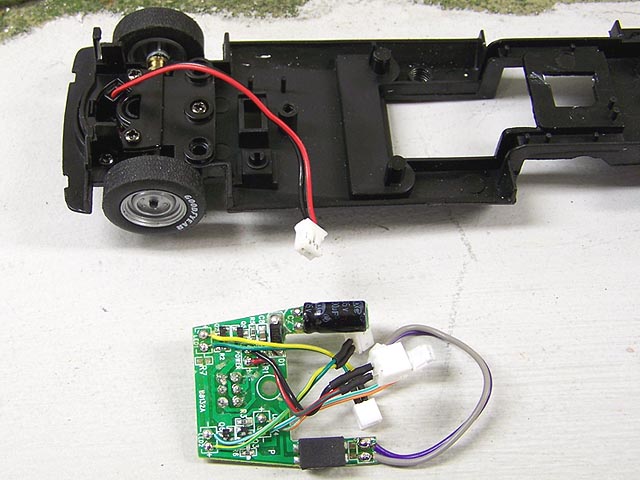
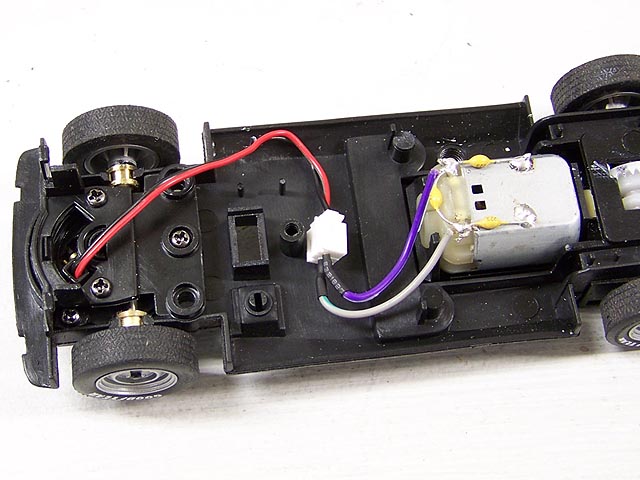
Now comes the neat part. The main power from the guide will plug directly with the motor. No need for any soldering. On our track it is wired correctly and goes left to right as it should (for NASCAR oval racing).
More Tuning
Let us now focus on the wheels and tires. The first thing I want to address is the tire to body rub. As you can see the tire (and body) are letting us know where it was making contact.
I inspected the wheel and although it looked fully seated on the axle, it was not seated true. In other words it had a wobble to it that caused the tire rub. I twisted the wheel with my hands and re-seated the best I could. This did the trick. Now the wheel was spinning true and the body rub was eliminated.
While working with the wheels and tires I noticed one thing. The tires fit the wheels rather loosely. You can easily turn the tire around the wheel by hand. To fix this we are simply going to glue them in place.
BEFORE you do this next step sand the rear tires as they are on the model. Sand them thoroughly and then swap them to the front. This will help smooth out the model even more as the front tires do support the model.
First we will sand the wheels to remove any excess flash molding and mold lines to allow the tire to sit on the wheel as true as possible. Next we used black automotive silicone sealant on the inner rib. Why this adhesive and not super glue or other adhesive? Well, this holds the tires in place very well and also is easy to remove the tire in the event you want to change in the future. The silicone will just peel away with the tire. Sometimes super glue and other adhesives make it very difficult to perform this.
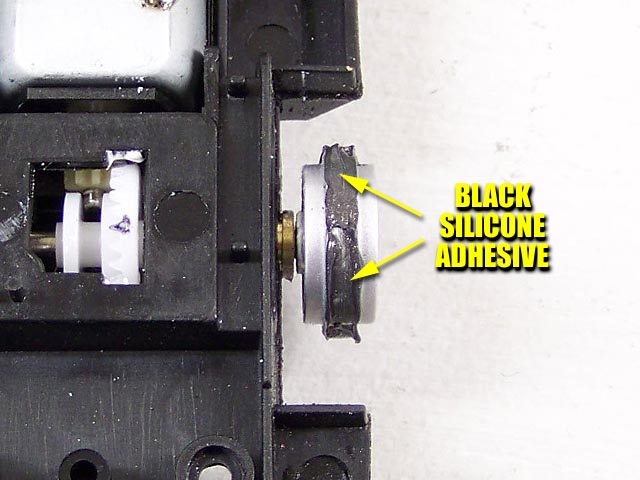
I apply the adhesive with a toothpick on the inner rib as shown. Then slip the tire on the wheel and roll it a little in your fingers to get it fully seated. Yes, when installing the tire some adhesive will leak out on the inside. It is easy to clean up. Take the same toothpick and swap it around and place against the inside edge of the tire. Turn the other wheel and the toothpick will scrape away the excess adhesive.

I let this dry for about an hour and then sanded the tires.
Wood Track Testing
Routed MDF 5 x 16 Foot Oval - Flat Latex Surface - Copper Tape/Non-Magnet
Aftermarket Power @ 12 Volts - Parma 25 OHM Controllers
Well all I can say is we have a much improved model on our hands. Much smoother than before yet still very smooth. Although the braking action is weaker than I expected, we settled down to some great racing soon enough. Acceleration is very good and the stock tires provide decent grip. Of course after-market tires will certainly be the key to most wood track/non-magnet racers.
By itself it is a nice car but what about a race partner? Well, Carrera released the 57 Chevrolet the same time as this model and they are put together in a set to race against each other. How close are they? Closer than I expected. Although the Fury is a little longer, the wheelbase is identical. The 57 is also higher than the Fury. It seems these traits offset each other as lap times were so close I would call the difference in driver error (me). 3.4 was the average for the 57 with 3.5 on the Fury. Not bad!
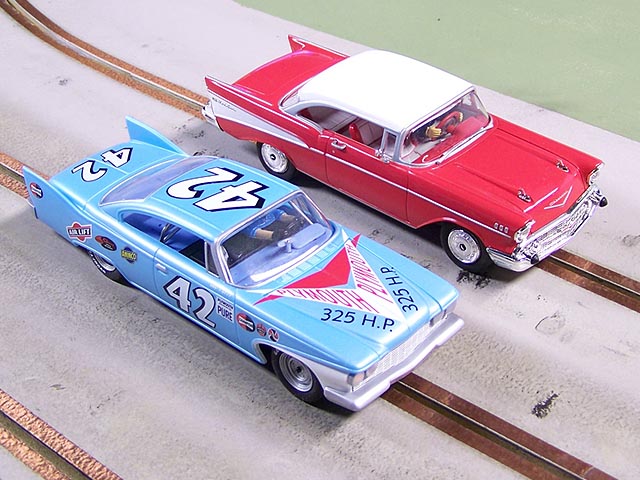
And another plus to BOTH these models is the price. $34.99 is a fantastic price point for models like these. The 57 shown here is the street version and is fully lighted. The street versions of the Fury are as well. In these tougher economic times it is refreshing to see prices like these in our hobby. It sort of makes you less inclined to be critical on minor scale issues when your wallet still has something left inside. Having models like these at this price really helps those on tight budgets enjoy our hobby.
Bottom Line
Is it perfect? Of course not. But it only needs some basic tuning to improve it. Is it for everyone? Of course not. As I stated early in the review, it may be an odd choice for Carrera to produce, but then again I have seen other companies release items that truly leave me scratching my head. At least here I knew a couple good reasons why. They have a solid license with Petty Enterprises and chose to do a unique model that honored Lee Petty. I think they accomplished that on both counts. What more can I say? I am a fan of American racing and certainly respect the Petty name.
I like this model due to the period, price, and series it represents. It does run well on a variety of surfaces with little tuning required. I think if you are a fan of this era and of Classic NASCAR you might as well grab one or two. They deliver a different kind of fun and in the end that is what this hobby is all about:) In fact, a pair of these would make a great "stocking stuffers" for the slot racers in your home.
- Harry
As always feel free to contact me about this article or just the hobby in general at harry@homeracingworld.com, or better yet drop into our Message Forum and share your thoughts with other enthusiasts!
Thanks Go To CincySlots.Com For Providing Us With This Model!
![]()
Copyright © 2008 HomeRacingWorld.com All Rights Reserved