01/16/2011
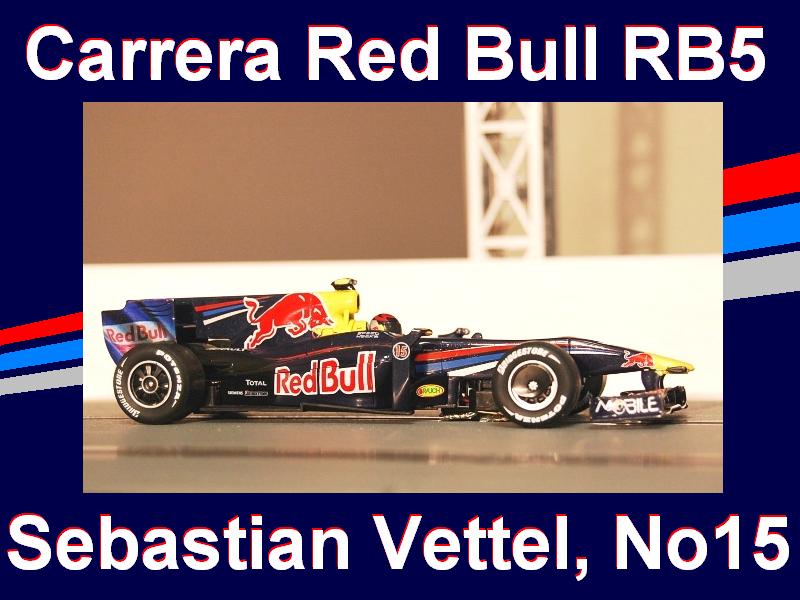 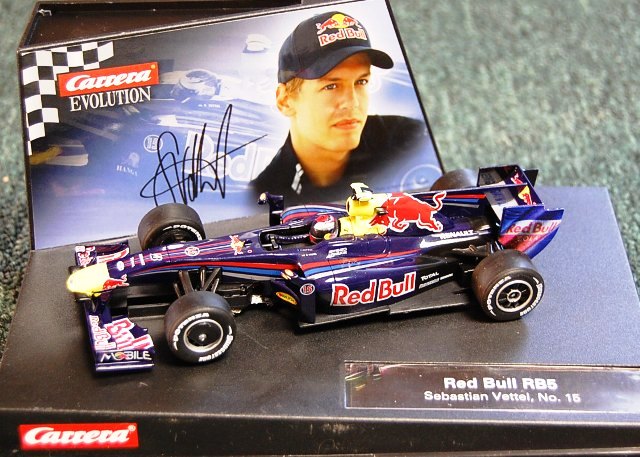  Okay… before we get to the ‘actual’ car let me just say that Carrera’s use of Vettel’s image (below), as well as his signature, is a very nice touch. Personal opinion on this; Sebastian always seems a little boyish-awkward to me but this image actually manages to flatter him very well. 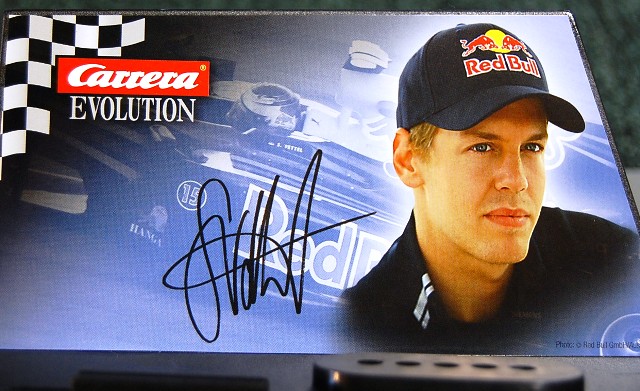 On the track for the first time the first thing that drew my eyes are the small and subtle details. The wheels, the stalk-mirrors and the ‘texture’ used to make this car help pull off a very nice presentation. 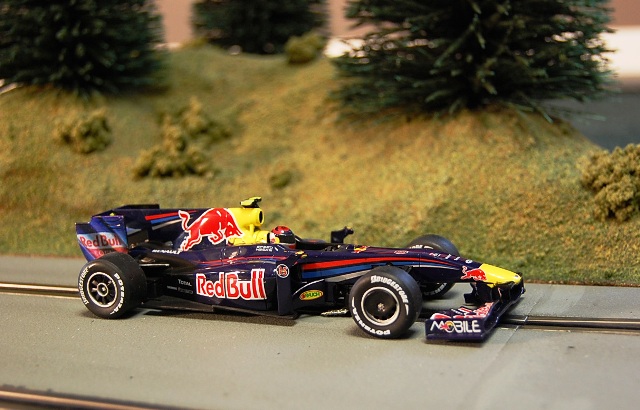 If you’re like me you hear F1, or even think about most open-wheel racers in slot car form, and you immediately think about broken front wings and missing parts. I know I haven’t had the best of luck with certain F1 models in the past, I’m all lead-fingered and no finesse, so delicate cars don’t fair well in my hands. With other F1 car’s I’ve owned if the wing didn’t break during a hard crash the body cracked as a good hit knocked the wing from body. This has made me a little stand-offish as I’ve considered previous purchases but I think Carrera has me rethinking that a little bit. 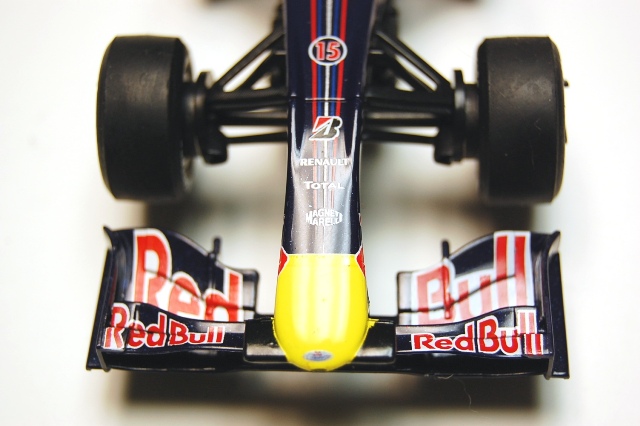 I mean take a look at this wing! What would be the first thing you would expect to snap off with a poorly executed corner sending this car slamming nose first in to a retaining wall? I thought I knew what was going to happen and yet I was pleasantly surprised at what actually ‘did’ happen. 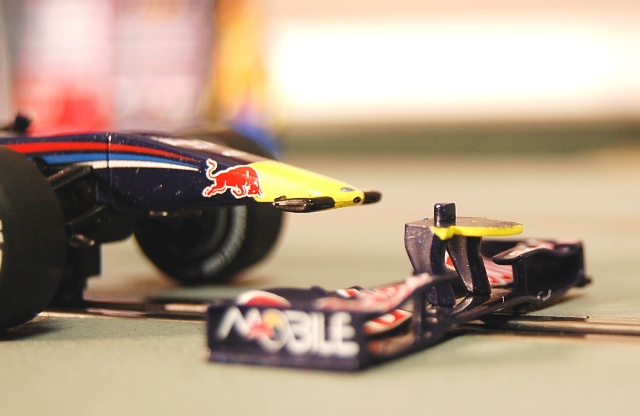 See Carrera has fitted the nose of this Renault RB5 with a ‘press-fit’ wing. It’s almost as if they built this car with me, or maybe my 11-year old son (he drives just like me), in mind by creating a durable front wing construction that simply drops off in the event of a hard hit (more on that later). When I first held the car and took a look at the nose I didn’t even notice how the front wing was attached… I was just fearful of what I might end up doing to it and thankfully Carrera is smarter than I drive. 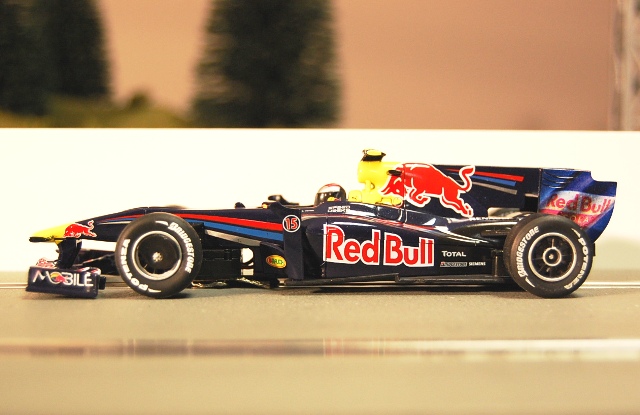 I did, however, have one small issue with the wing itself although it was easily correctable. Notice in the image above how the horizontal bottom of the wing itself is, well… less than horizontal. With the bottom edge of the wing (closest to the wheel) close enough to drag the track this was the first thing that caused me to get a closer look at the wing design. It’s actually not a single piece wing. The horizontal section is heat welded to the vertical uprights that secure the wing to the body and on this model those heat welds were a little loose. The wing jiggles back and forth with little to no hand pressure so to fix it (below) all I had to do was to break out the modeler’s glue and drop two very small drops, one to each heat weld, and hold the wing in place as I allowed it to dry. 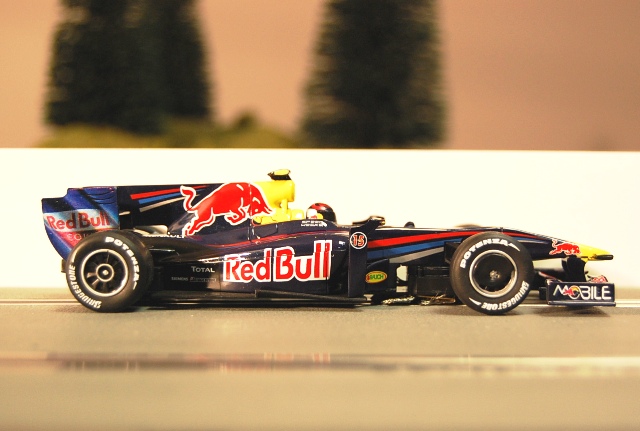 With the front wing now secured and evenly up off the track surface I then turned my attention to other aspects of the detailing. If you can make it out in my image the suspension pieces are textured giving the parts a ‘carbon-fiber’- look to them. Also notice the brake-duct detail and what I assume is meant to be the rotor, although its too far inside of the rim but it serves a purpose and really isn’t as noticeable as my Nikkon’s macro camera function makes it out to be. 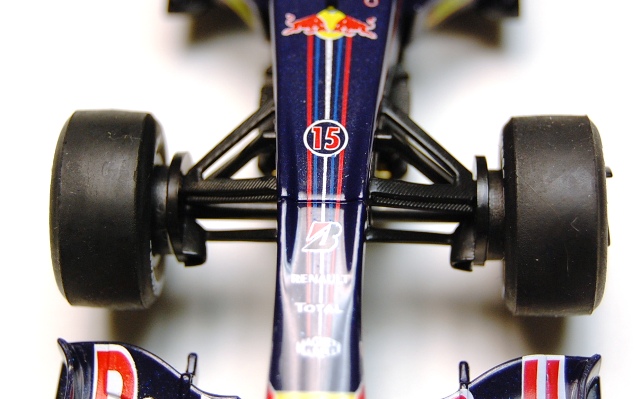 The carbon-fiber detailing continues on the back suspension details of the car and the horizontal aero-feature on the RB5’s engine cover replicates the 1:1 really well splitting the Red Bull graphic perfectly down the center on the car’s rear wing.  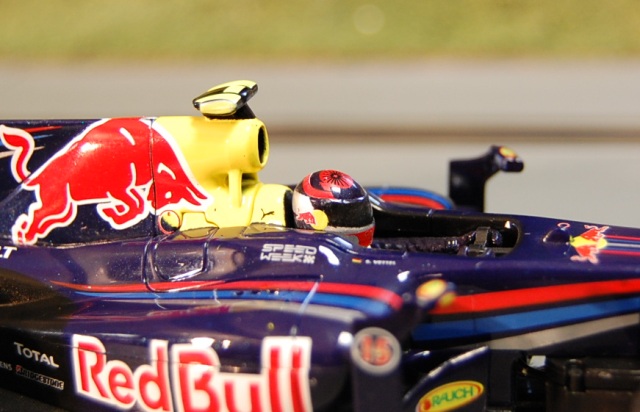 In the image above you get to appreciate Carrera’s efforts on detailing. Sebastian’s helmet has some tiny, tiny art work on it and that blurry little writing in front of the tiny German flag is legible to the naked eye even if it messed with my camera’s focus. Yes you can se some instances of less-than opaque paint, such as the yellow on the top mounted camera pod detail but overall I think Carrera pulled off a very well detailed car. 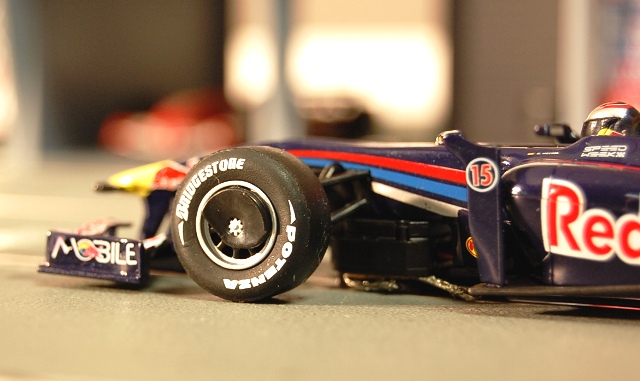 Looking at the rims and tires this is another feature I really like about this model. In the front especially check out the wheel detailing and what I love most about this is that it does not spin as the wheel spins. Nope those brake-duct details are secured in place as a pin-style method of securing the wheel to the car. While you will see a solid front axle in this RB5 the axle itself does not spin at all so the wheels rotate separately on the hubs. 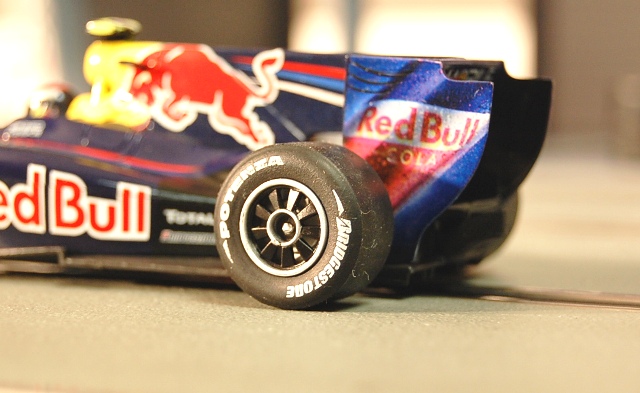 In the back the rims are modeled with the RB5’s fan like wheel face, on the rear car obviously used to suck air in to the car’s massively hot brakes and what I also appreciate is Carrera printing the white tire letting on both sides of the rubber, a feature that is accurate on the 1:1 Bridgestone racing tires but is an area that Carrera could have easily saved a little cost on. This also means, that if the tire lettering starts getting rubs off by your walls and guard rails that you can, if you chose, can take the tires off and reverse them and have a fresh looking set of lettered tires on your car. 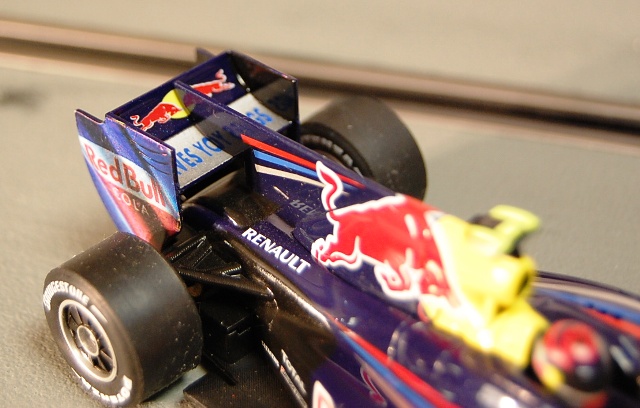 I touched just briefly on the car’s rear wing and at this stage I think it needs to be looked at even closer. Why you might ask? Well… it too is a separate detail that is designed to be taken off and if you don’t familiarize yourself with how its attached, or comes off, before splitting the body from the chassis you will find it flying off during the disassembly process as I did. Let me show you what I mean… 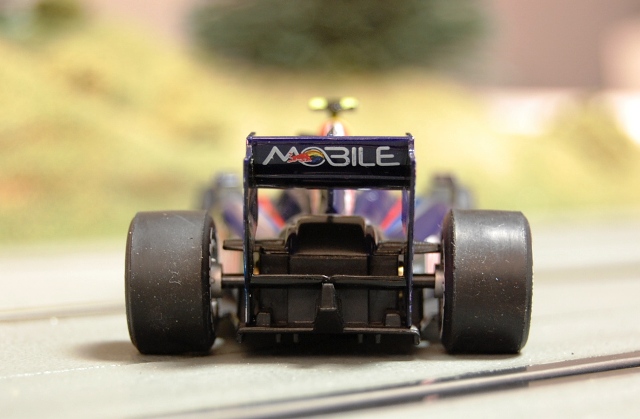 If you look closely, just to the inside and at the bottom of the rear wing you will see two little black box-like features molded in to the car’s chassis. The wing has tiny little tabs molded on that press fit in to these little boxes and coupled with the engine covers vertical aero-wing the does stay nice and secure on the car. It might feel a little tricky to remove or reinstall this wing but there is a little trick. In the image below pay attention to the stalk like appendage jutting off the back of the car. On that you will notice a small indentation that another tab on the wing slides in to. If you angle the wing with the bottom trying to attach first then rotate the wing so the upper part is pushing towards the rest of the car, the design almost pops the wing perfectly in to place for you.  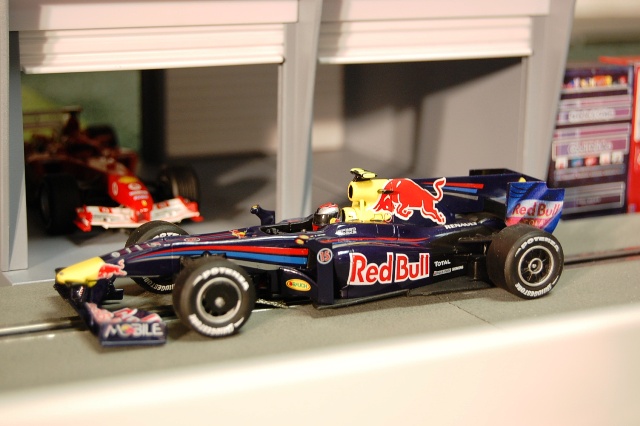 With the major points about the car’s exterior covered it’s time to call our driver in to the pits for a little work! I’m very happy with the car’s detailing and I like some of the basic features of the model so it’s time to open it up and have a look at the go-fast parts. 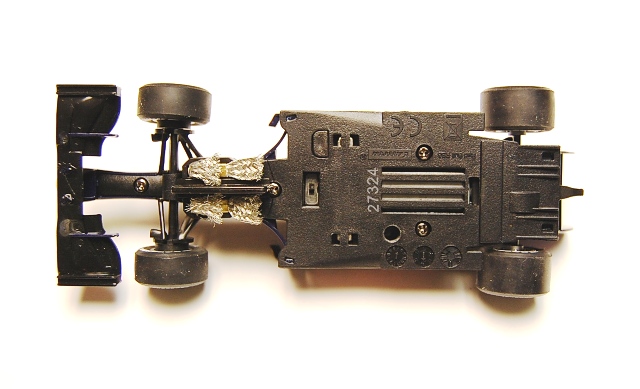 To remove the body from the chassis, with my recommendation to pull the rear wing off in advance, next turn your attention to the four screws on the bottom of the car. The first is a short little screw placed right in front of the car’s front axle assembly, another single screw is slightly hidden by the cars guide blade, leaving two more screws installed on both sides of the motor. 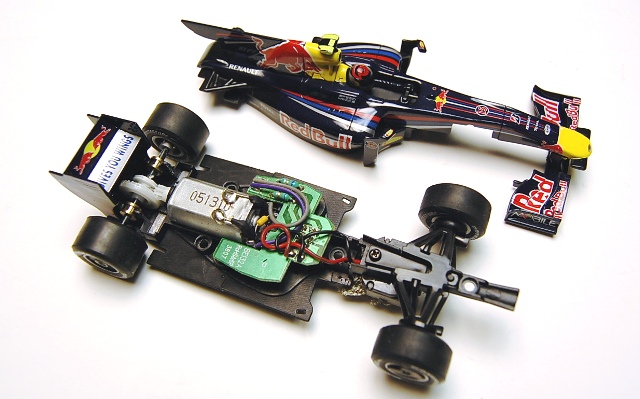 With the main part of the body off we get our first look at the inside workings of this Carrera RB5. Carrera fans will already expect the circuit board feature, which according to the case makes this car ‘digitally upgradable’, but what drew my eyes first was the guide area of the car. 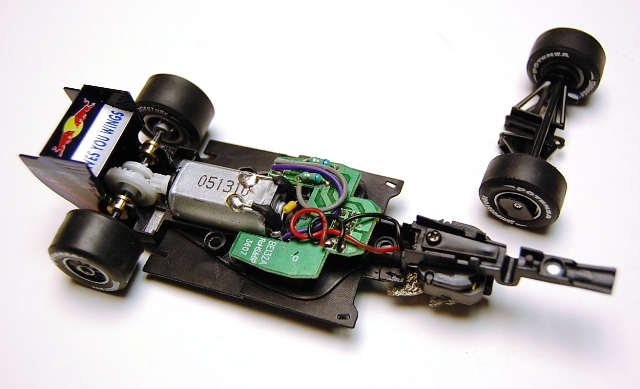 That front axle assemble we’ve spoken of? Well that lifts right out without unscrewing or unclipping anything and can be set aside. That does leave one screw here though and I was curious as to it’s function. 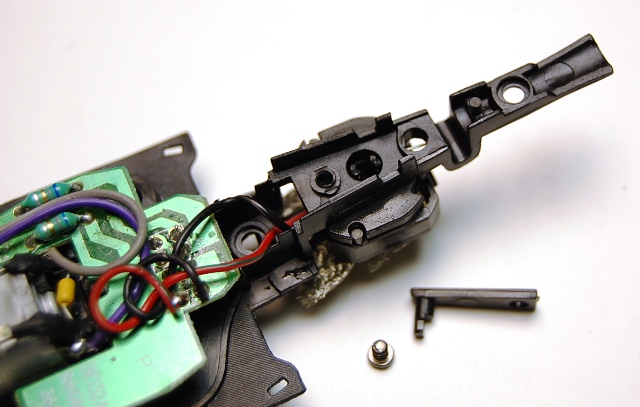 Removing the screw and taking out the little black plastic piece it secured I stared at the guide housing wondering what the point was. The guide still felt secure in the car although I did pop the guide out to have a look and then it made sense to me. If you look at the open hole, the one ‘just’ behind the front axle cradle, you should be able to make out a little silver wire-like line there… which turns out to be the guides self centering spring. 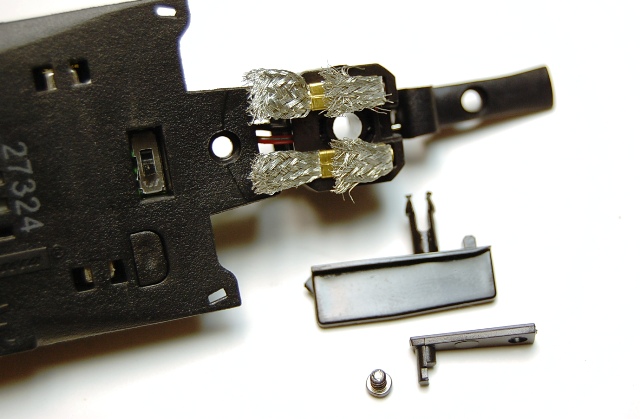 What that top little plastic piece on the housing is for is it has that little downward molded ‘stick’ that slide in to that open hole and fits between the ends of the self centering spring. If you take that off… no more self centering. No need to remove the spring itself, just the top part that was secured by the screw. 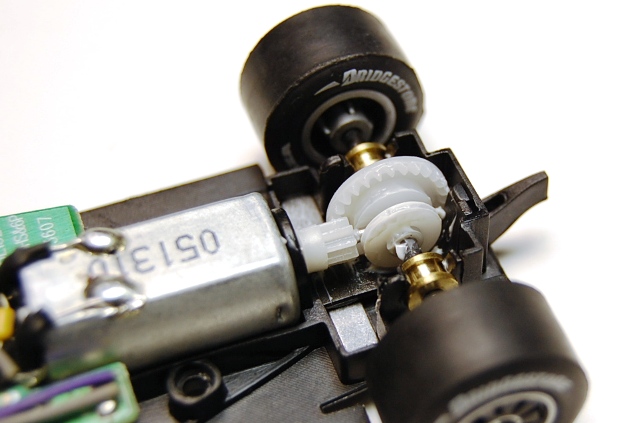 So, with the guide more or less figured out I then wondered how in the world a non-magnet racer takes the magnets out of this chassis. There are two, yes two magnets in this car one you can see right under the pinion and a second we’ll get to momentarily. Looking beyond the white plastic crown I noticed that a piece of chassis looked to be holding the magnet in place. Popping the brass bushings carefully out of their mounts I stared at the magnet for a second and couldn’t quite see how to get it out. 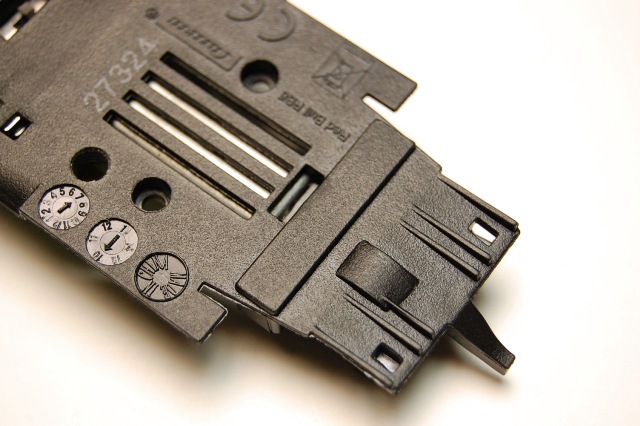 Turning the chassis over I quickly figured out that it’s not coming out of the bottom. Some manufacturers use a clip in, or screw in magnet holder but this was not the case here. It wasn’t until I gave the inside a much closer look that I figured out what it was I was looking at.  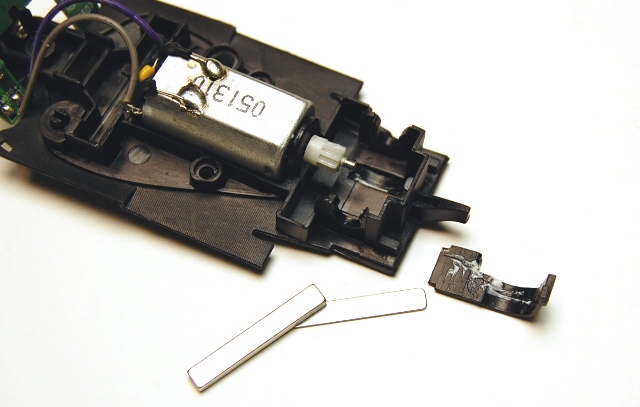 Cleverly hidden in the chassis is a little clip molded in the same color as the chassis itself. It’s also pressure fit in to place so using a tiny flat-tip screw driver I popped it free and access to the magnet was now simple. Also notice above that the magnet has a thin shim of metal on top of it. This helps to direct the magnetic force more downward toward the track rails giving the car improved traction over an unshielded magnet alone. 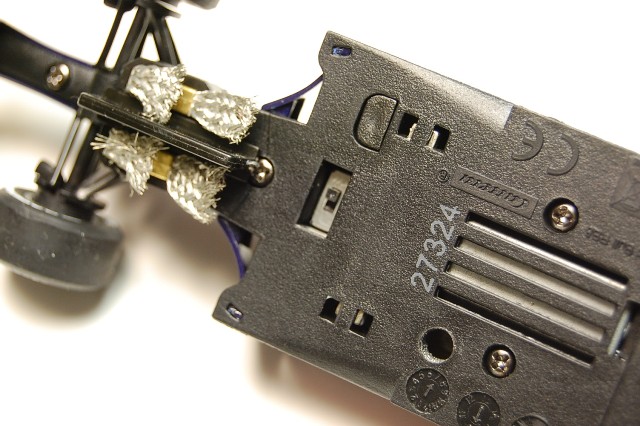 The front magnet also made me use my thinking cap a little, in the image above you can see the tips of it on either side of the chassis with the magnet being in a pocket right between the directional switch and the motor.  Thinking the circuit board would be glued or heat-welded in the car I carefully looked for ways to remove it and to my surprise it was not fastened in the car at all. It too, like other features of this car is press fit and held in place by its own pressure in its mount. Simply lifting the board by the ends on either side of the motor the board lifted right up exposing the magnet pocket below it. 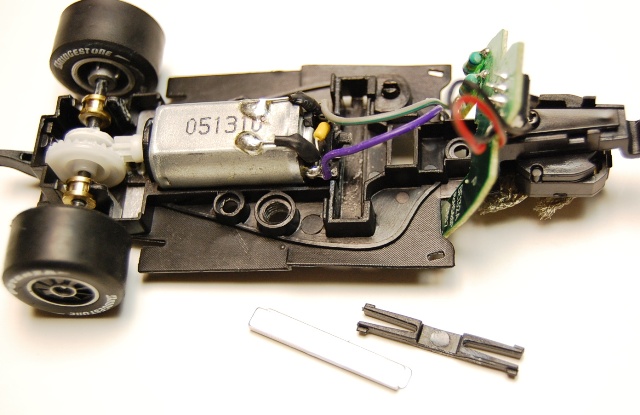 Here again the magnet is held in the chassis by a little clip, in this case an odd little H-shaped clip and as we saw with the rear magnet the front also has that tiny piece of metal on top of it helping the cars traction. 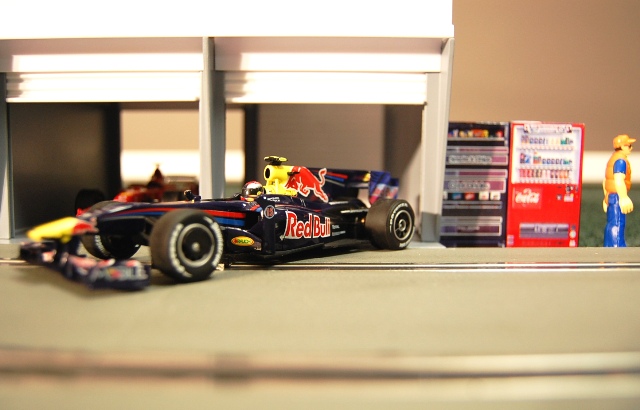 Having put everything back together, be mindful of the wiring if you have moved the chip, we fastened everything back down and pulled out of the pits for its first high speed test runs. Our little plastic 1/32 Vettel figure was more than eager to get in some laps, perhaps a little too eager on cold tires. 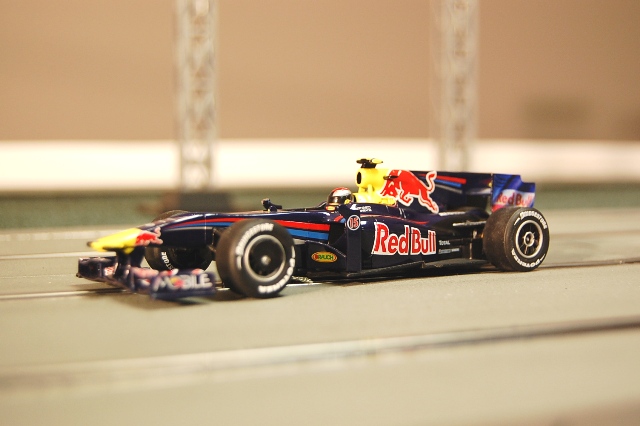 Remember that front wing I was worried about breaking earlier in the review? Well it didn’t take a lap before I had my fears quieted! Here is how it went; I sanded the tires a little to make sure there were no contact issues, cleaned them on tape and set the car down on the track. Figuring ‘ok, this car weights a whole 74 grams, and having two magnets this thing should be able to run upside down on the ceiling right?’ Yeah… um… wrong!! 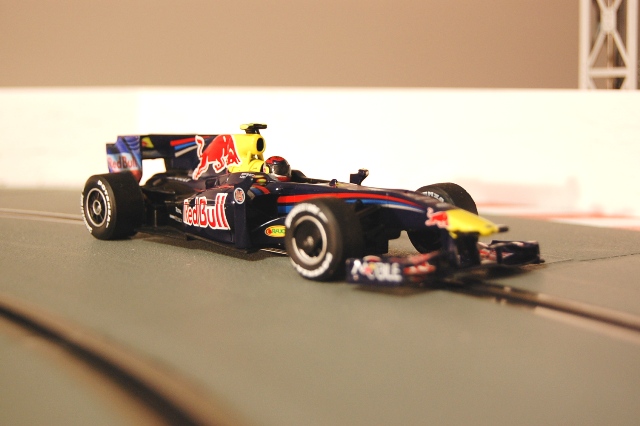 From dead stop I juiced the car in to turn one, about 75% throttle in to turn two and punched it 100% out of turn two towards turn three. ‘I can dive in deep I bet’ was what flashed through my head right before the car left the slot, tagged my retaining wall and I saw the wing go flying! Of course the cringe that no doubt graced my face had to be priceless… as was the ensuing smile that I got upon seeing the fall away wing had done its job and was unhurt. Carefully press fitting the wing back under the nose and I was on my way, although this time I little more cautiously. 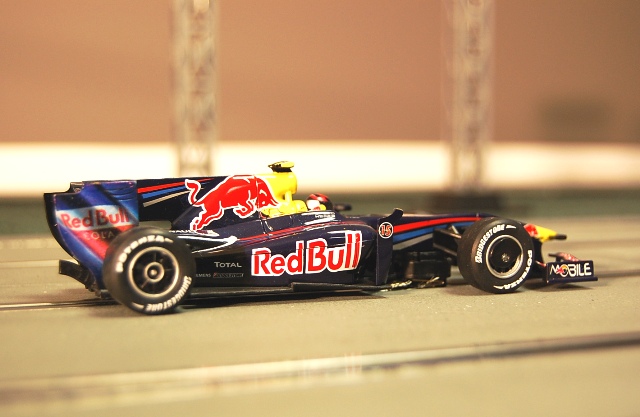 And truthfully those two magnets and 74 grams of car do still need to be driven! With newly sanded and clean tires the car had more than ample grip but get any bit of dirt on that stock rubber and it will slide and pitch the back end out forcing a little more trigger manipulation than you might expect. The slim line motor provides ample go, I’ve always thought on my power supply that the slim motors lack a bit of mid-range RPM’s however. I always get the impression, with many of these slimmer motors, that they have a decent up-to-50% throttle range then a near nothing in the 51% to 90% range before it leaps to the near 100% PRM range. 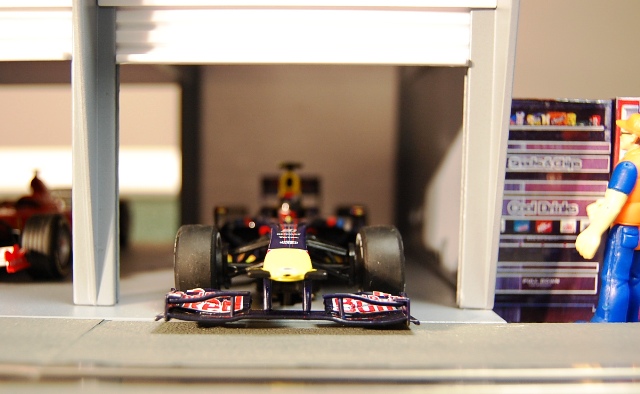 Be that your findings or not I still found the Carrera Red Bull RB5 to be quite drivable and very likable. If you are an F1 racing fan this Red Bull car is a no brainer. Matched with other F1 cars from Carrera should provide hours of reasonably durable and exciting racing, even with magnets needing throttle control instead of mindless trigger holding at full throttle. It looks great, it ran great and putting it back in the garage it remains unbroken! What more can you ask for in a toy slot car? Thanks to American Slot Car World for providing the new Carrera Red BUll RB5 F1 for review. Please stop by the HomeRacingWorld.com Message Board to talk about this and all other models of slot cars. Happy Slotting! Shawn Smith - SJSlots Shawn@HomeRacingWorld.com Special Thanks to American Slot Car World For Sponsoring This Review!
|