
February 10, 2010
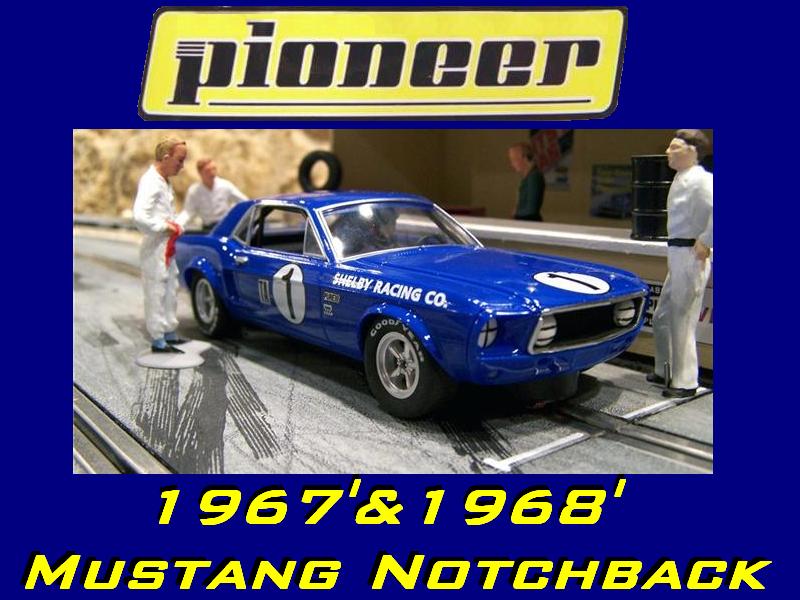 Pioneer 1967 & 1968 Mustang Notchback Review By David Reinecke Fast-forward to the Fall of 2009 when Pioneer announced their lineup, including the 1967 Mustangs of the T/A era. That move made me sit up and take notice! What was even more interesting is that they planned on offering kits of the same cars that were pre-painted for those enthusiasts that enjoy building their own cars. I pre-ordered both of the notchback cars and waited. Keeping up with the forums, I learned that Jules, the owner of Pioneer, was in China at the factory supervising the production of the cars. That fact convinced me that he was concerned that their first T/A releases be good ones! Right before Christmas he contacted me and asked if I'd be interested in testing a few of his kits. He explained that these were not kits as they would be sold, but were pre-production parts that he pulled randomly from the line. No matter - send the cars! Upon getting my box, I opened it up and was surprised to find it packed to the brim. It contained one 1967 notchback molded in blue, unpainted, and some painted and some unpainted parts. The 1968 was molded and painted in blue and detailed with the window glass trim painted. The car was mostly assembled, and probably close to what will be offered in the final kit form. Also included were four distinct decal sheets of real liveries. My guess was that both cars were destined to be the completed RTR cars due to their colors. 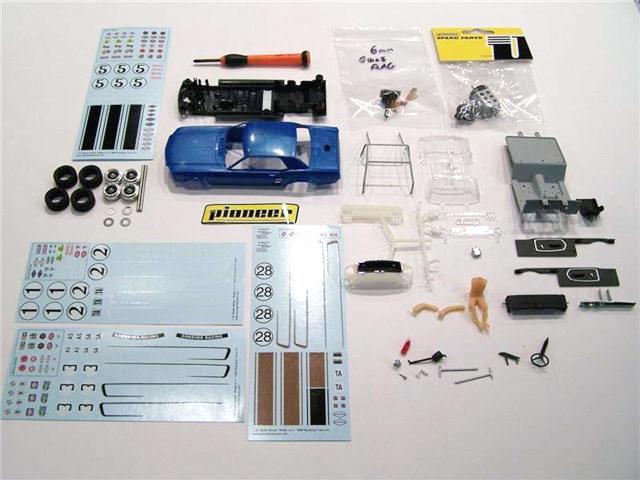 One thing that impressed me right out of the box was that the 1967 and 1968 cars use different body molds! Unlike some companies that attempt to pass off a different model car simply by covering up the headlights, Pioneer has actually molded 3 DISTINCT bodies for their cars: a ‘67 with a flat hood, a ‘68 with the hood turn signal indents and another ‘68 with the smooth hood. The 1968 with the smooth hood was used by multiple teams during the 1968 Trans-Am season due to the lighter weight of it as well as the ease to paint a flat hood over one with the indents. That is an nice piece of detail most companies would simply not offer. Even the side coves of the different years are correctly offered with vents in the 1967 model and a smooth cove in the 1968. 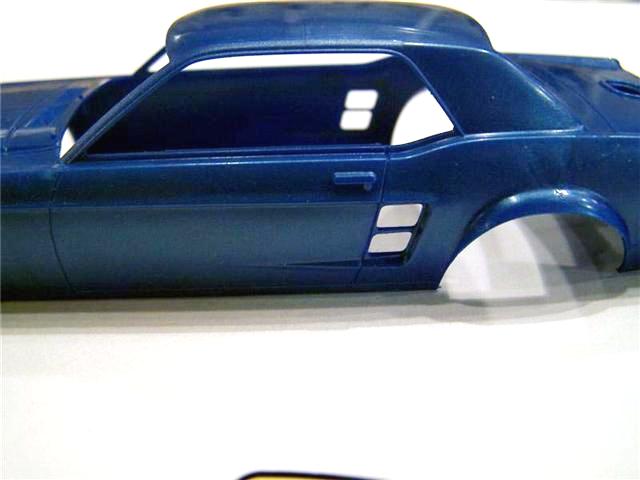 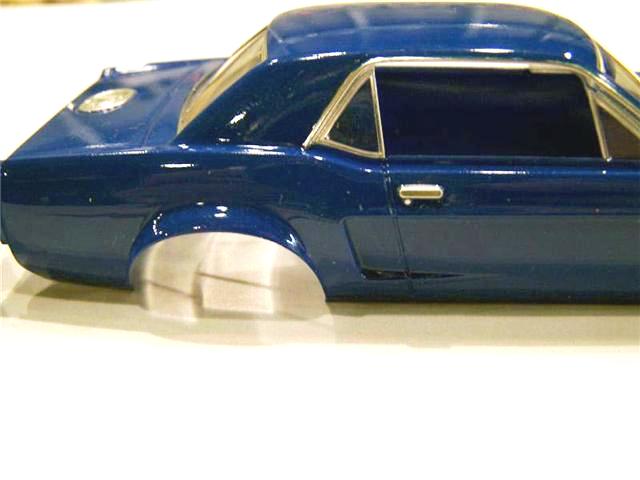 The interior is a very well executed piece of this car. It is very well detailed with a great gauge cluster, a very nice 4-speed shifter (Hurst Equipped no doubt!), a great looking roll cage, and a full driver figure. The door panels and dash are actually decent replicas of the real Mustangs, not a generic offering. 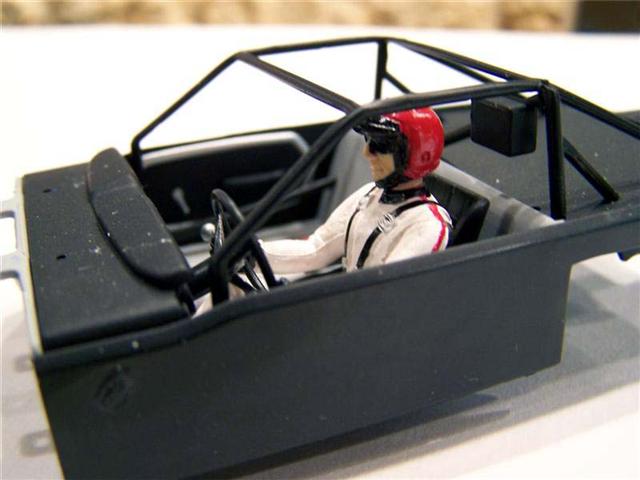 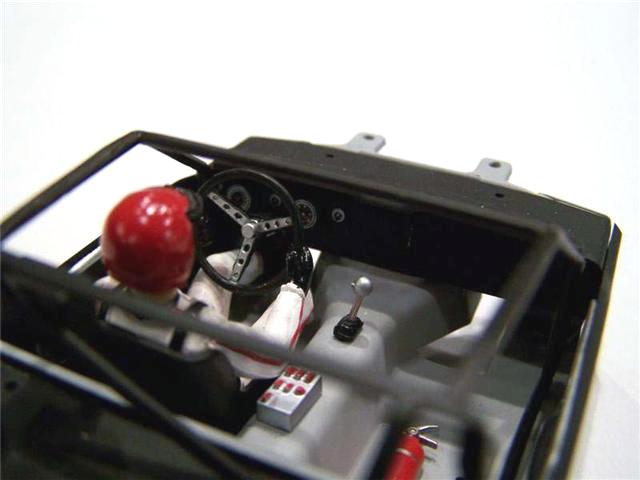 In only a few minutes, I assembled the 1968 version and took it for a drive. With no break in and after only adding some oil in the normal places, the car drove very well out of the box. Smooth, no chatter, no guide issues, and very good response. I was very pleased and spent a good chunk of the evening just running laps on the PDR in stock form. I then disassembled the car and selected the decals from the car that ran the 1968 24 Hours of Daytona. The real Daytona car was an reddish-orange car with a black hood, but I left mine blue as I figured most enthusiasts getting the upcoming red/black kit wouldn't have to paint one, so I'd try to replicate their experience here. I also liked the blue color and thought the livery would look sharp on it. The decals were easy to use, and required no finesse to transfer to the body. After allowing it to dry for 24 hours, I shot 4 coats of Duplicolor Clear over it in gradually heavier coats. The only issue I had was that the last and heaviest coat slightly wrinkled just under the body line. It could be that I didn't have the decals tight enough under that area, but either way, it is not noticeable. I added some driving lights from my spares box to resemble the Daytona car and reassembled it. 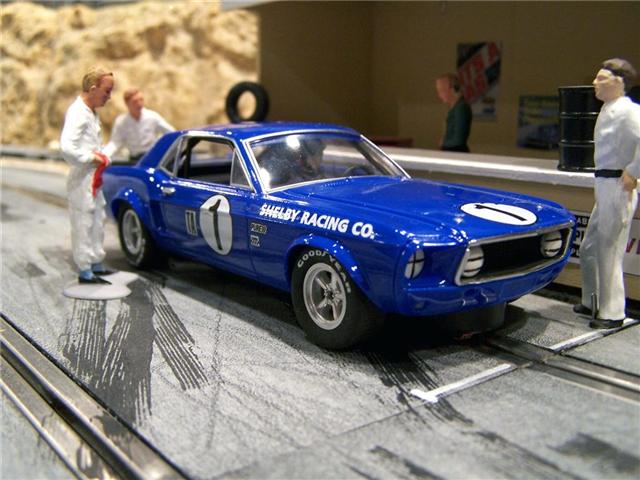 I decided to paint the 1967 as it was completely undecorated. One of my favorite cars of this era was the Terrilingua car of the 1967 campaign. I decided to do a fantasy car loosely based on this car as I felt a person buying the kit might just have fun doing something different. Boy am I glad I did as it turned out great! I began by washing the body and drying it before shooting it with Duplicolor Primer in gray. I wet sanded that and then hit it with a pale yellow of the Duplicolor line. After applying the decals I used Bare Metal Foil (BMF) around the windows and the tail lights. As the tail lights were clear plastic, (remember, pre-production!) I gave them a quick coat of Tamiya clear red and set those aside. I gave it four good coats of Duplicolor clear and then painted the driver and assembled the interior and chassis. This car I chose to use without a magnet. In addition I added a set of tires that came in a bag marked "oversized". The finished product turned out great for my minimal amount of work, and looks very close to how it might have back in the day. 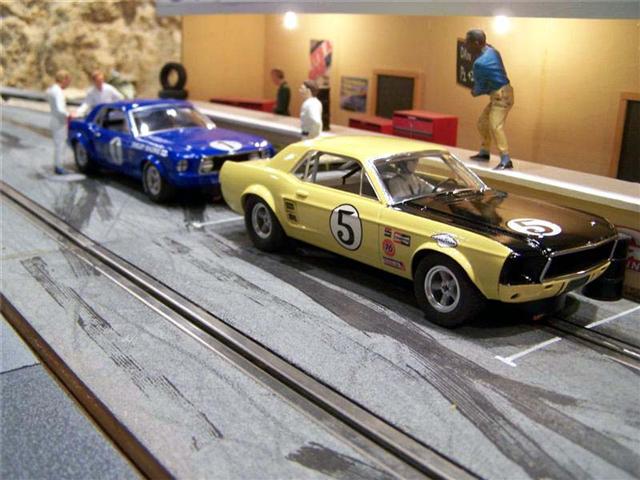 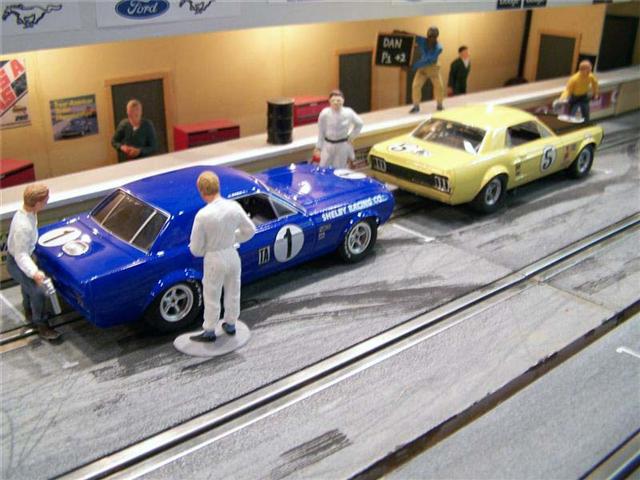 The chassis is very similar to those folks that have lived in the Scalextric Camaros and Mustangs. It has one less magnet position, but this is due to the digital chip location Pioneer provides to make it Scalextric digital compatible. The guide is connected to a plug that the motor leads are then connected to. This configuration makes the installation of a Scalextric digital chip a snap. The motor is an 18k Typhoon that is extremely smooth and has good braking. Without a break-in period, both cars exhibited more than enough power to spin the wheels most of the way down my 15 foot straight if you hammered it from a dead start. Both of the chassis were perfectly straight and had no flashing anywhere in the bushing locations. The guide system is a bit odd when you first look at it, but once you understand how it works, you'll like it. The braids are easy to replace and are some of the more secure that I've seen on a slot car. I don't believe they will ever fall out unless you want them to. I had to actually test this with a pair of pliers to get them out.  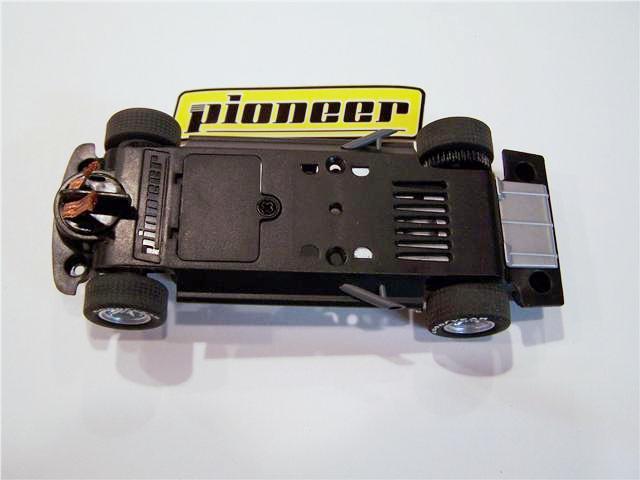 The axles are polished aluminum and perfect. My kits had two types of bushings - white plastic for the front axle and brass ones for the rear. Most impressive in my mind is the fact that the bushings are drilled to accept oiling the axle from the bushing! How long have enthusiasts been asking for that feature? 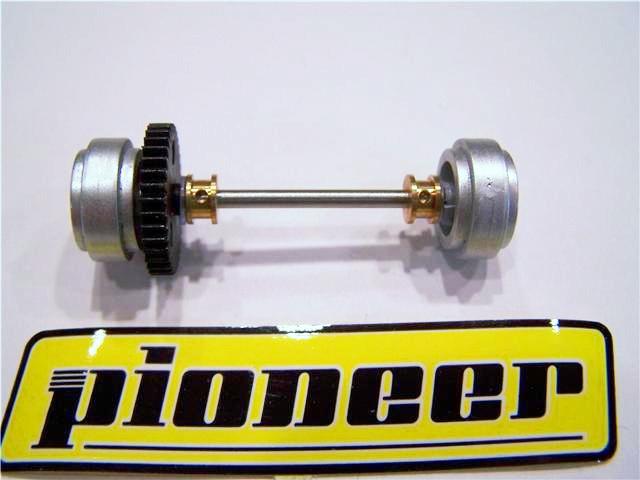 The wheels are beautiful reproductions of American Racing rims and have disc brake calipers that fit in behind them. One eye toward detail that Pioneer took on these is that the front disc brakes are a larger diameter than the rear ones. Taking the easy way out here and providing them in the same diameter would be simpler no doubt, but Pioneer again chooses authenticity over standard operating procedure. The tires look similar to the Scalextric ones in pattern and size. The tampos read Goodyear and are very crisp. One thing I noticed is that they don't seem to rub off as quickly as the Scalextric ones I'm accustomed to. The oversized tires are wider and taller than the normal tires on the kit. They really fill out the wheel wells but I am not sure at this time if these are strictly a test exercise or a production tire, but I like them!   After taking a few gratuitous pictures, I put them to the test. The test format consisted of two brackets - magnet and non-magnet, both running at 11.5 volts. I utilized the Pioneer car, a Scalextric Camaro, and an RMS body on a Scalextric Camaro chassis for each test. I began with a weighing of each car. In stock form, the Pioneer cars are slightly heavier than the Scalextric offerings, and significantly lighter than the resin-bodied cars. I ran each car for a 20-lap session. The times posted here are the fastest laps turned for the session. The Mustang with the magnets drives eerily similar to the Scalextric cars, and it should with the similar chassis. The car was extremely controllable and very quick. The gears meshed very well, the braking was very good, and the car was fun to drive with it feeling faster to me than the Scalextric cars out of the box. It would swing the tail out when really pushed, but the bar magnet is pretty stuck down, making this a bit tough to do on purpose. I found the car really took quite a bit to over-extend its ability to turn before popping out of the slot. It ended up spinning off the track rather than rolling when pushed to the limit. After the testing was completed, the results were as I felt they were while driving - the Pioneer was quicker than the rest of the field. Changing to the non-magnetic cars, the same test format was run. The Pioneer Mustang with no magnet was slightly slower than the Scalextric Camaro. To further test this, I also took a Scalextric Mustang with no magnet and ran it to the same results. Upon further inspection at the end of the evening however, I realized this pool was tainted. Both the Scalextric Camaro and Mustang had lead sheeting added inside that I'd forgotten I'd added some time before test. In addition, both had at some point had their tires sanded, while the Pioneer's were dead stock. While the weight obviously helped with their smoothness and speed as did the sanded tires, the Pioneer was closer than I thought it would have been. The car ran well in this configuration, but I noted that it needed a bit of weight and sanded tires if it were to be perfect. All-in-all, I was very pleased with this test and proved at least that in both configurations the cars are very competitive with any Scalextric offering to date. The cars used for the magnet test: 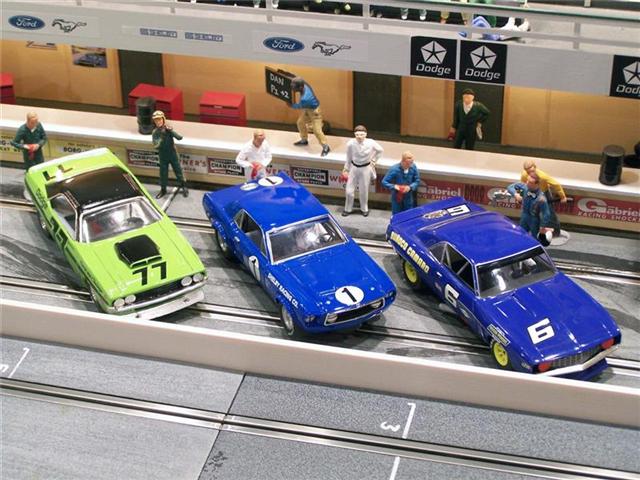 The cars used for the non-magnet test: 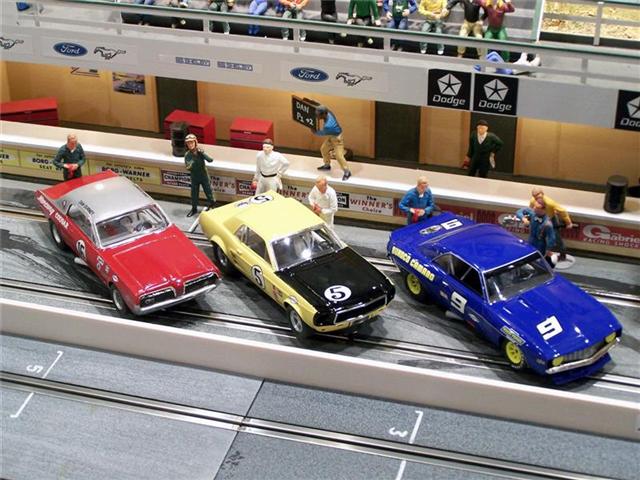 The test results: 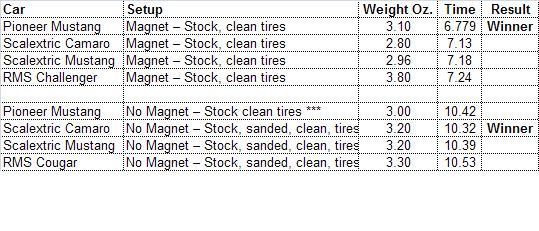 My verdict on these cars is that they are a wonderful addition to the already existing Trans-Am field from Scalextric as well as resin cars offered for this class. As a second effort from an upstart company, I am amazed at the level of performance, detail, and workmanship that is offered. I think Pioneer has definitely made their presence known with these cars and it is heartening to see them taking such care in working with customers and focus groups to ensure that they are on-target with their products. It is also exciting to see that the Trans-Am series is being revived with these offerings as well as the newest offerings by SCX and Scalextric. It appears that this once popular, but stagnant series just received a major boost, and I for one think it is about time! I eagerly look forward to the other releases Pioneer have planned as well as the two RTR notchbacks that are due in early February in the USA. Special thanks to David Reinecke of RMS Resins for reviewing the new Pioneer Mustang Notchback. Please stop by our HRW Forums to talk about this and all other models of slot cars. 
|