

Modifying the Carrera Power Base
14 November, 2002
One thing is certain: The Carrera Power Base is simple. Consisting only of wires and no circuit boards, this power base, is a scratch-builders dream. Already wired for brakes and independent power to each lane, there isn't much you need to do with it except use it as it comes right out of the box. In fact it provides you with a great starting point for scratch-building your own, but I chose to use it with some slight modifications.
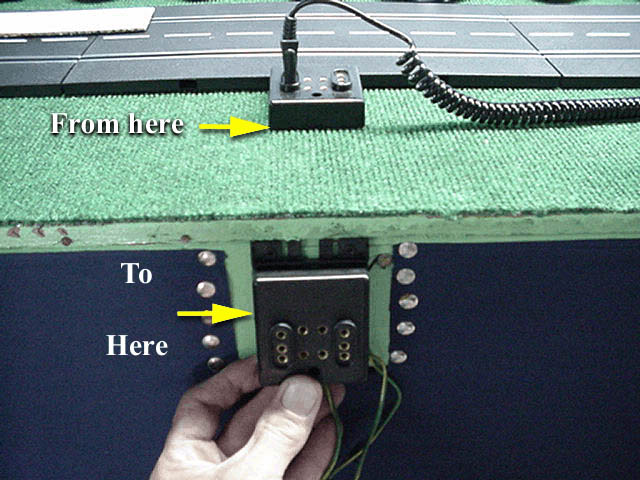
However, there are some of you who (like me) that are attempting a scale detailed layout, and the last thing you want on your table-top is a black box with wires sticking out of it. In addition, you might be wanting to add a aftermarket power supply, and you may want to bolster the electrical wiring. Well, this power base can be removed from the track it is connected to and relocated anywhere you would like, plus can be re-wired rather easily, with a minimal amount of time and effort.
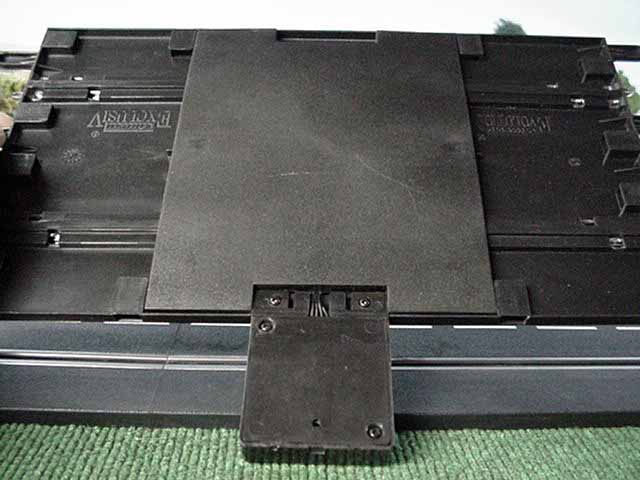
Turning over the track that the base is connected to, you can see where the base is attached to the track. You also see a plastic backing plate covering the wires that run to the pick-up rails. You will notice that there are no screws on this backing plate, that's because this plate is pressed into the track and adhesive is used to secure the posts from the power base cover into the bottom of the track.
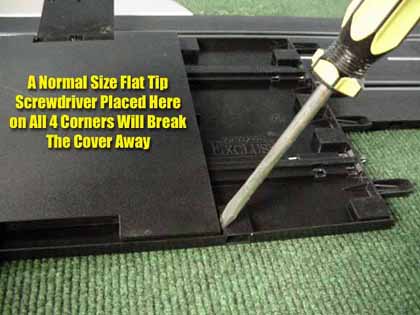
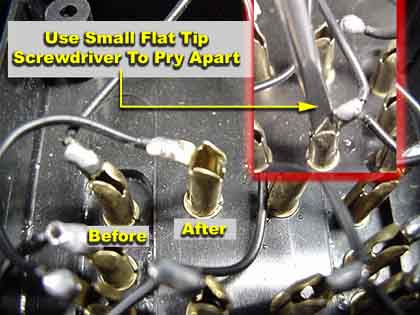
Here is where things are going to get slightly messy. 9 out of 10 times, you will break this backing plate when you attempt to remove it. However, if your going to permanently mount this track, there really isn't a need for this plate, so don't worry about it too much. Taking a standard sized flat tip screwdriver, begin to pry upwards as the photo shows. You should see the backing plate either splitting at the post base, or the post will snap loudly out of the track base. You will have to use some elbow grease to get this plate removed, but have no fear, you will not harm the track. On 4 Carrera power bases that I have performed this on, not one time has the track been harmed.

You could also use a moto-tool (Dremel) with a grinding bit, and grind straight down on these posts, but for myself, I found that a good old screwdriver works just fine. Knowing where these posts are is the key to using a moto-tool successfully, so take a good look at the photos to help guide you, if in the event you choose to do it this way.
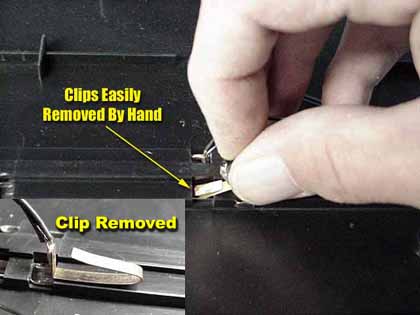
Now you can see the wiring coming from the power base to the rails. The wires are held inside the rail by use of a metal spring clip. Now here you might to mark your wires so you don't forget which rail they belong to. Removal of this clip is easily accomplished by just pulling on it by hand until it snaps out.
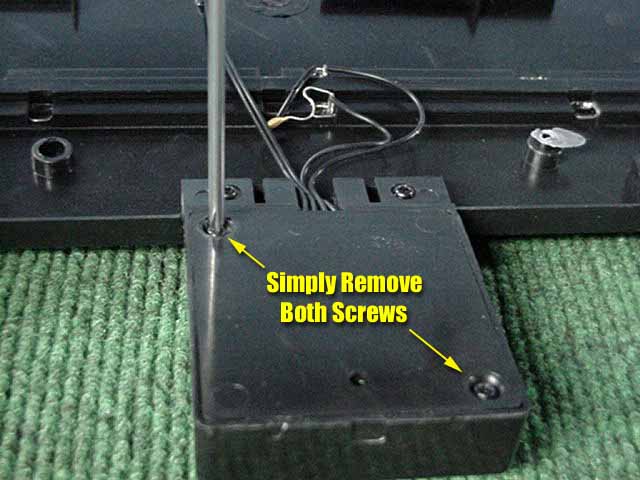
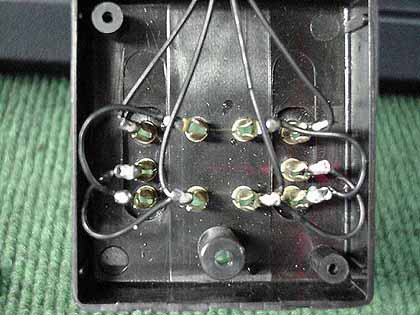
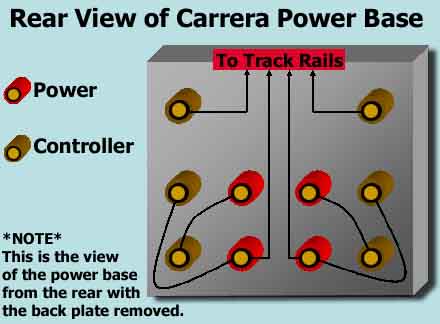
Now lets move on to the power base itself. Using a smaller Phillips screwdriver, remove the 2 screws holding the plate in place. The plate will come off easily, exposing the simple wiring inside and you can see that the wires are all soldered in place. It is here that I decided to strengthen the wiring. Again, it isn't required, but I wanted make sure I had strong, clean connections for my future (now installed) aftermarket power supply. The pictures below show the base as it looks with the backing plate removed.
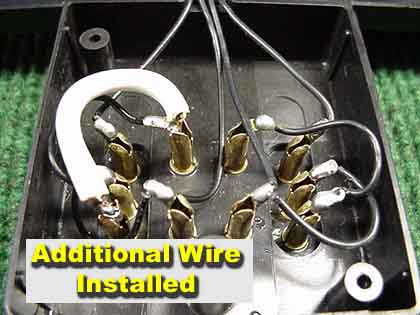
The wire I chose for the power hook and controllers hook up modification is standard household extension cord wire. You could go out and purchase heavier, or more expensive wire, but I don't see the need for it, and for my home racing (and most likely yours) uses, this is more than enough. Also, I am not removing the existing wire from the base, so this extension cord wire, coupled with the original wiring and makes a very reliable and rugged power base.
Now, you don't have an abundance of room inside the power base, but taking your time, you can have this re-wired in around 20-30 minutes if not sooner. I measured the length of the wires by hand, by placing the wire end on one post, and looped it to the post it was connected to. Then using wire cutters, trim it to this length and strip the ends about a 1/4 inch from the end.
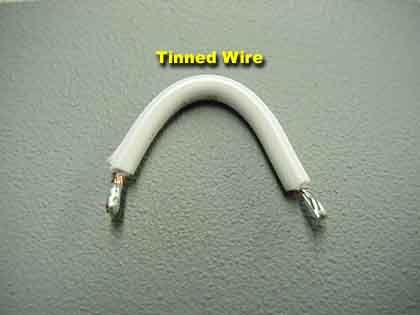
Now, you are going to tin (add solder) to the wires before you solder them to the base as this makes it a great deal easier to install. You don't want to heat up the post very long, as the plastic of the base may warp or melt all the way through. So tinning these wires means you only need a second or 2 to install the new wire.
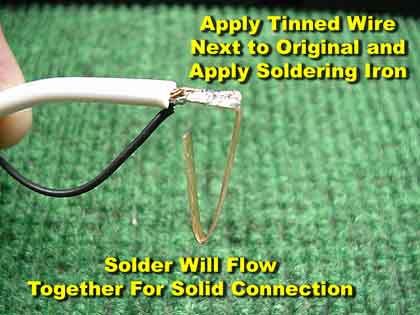
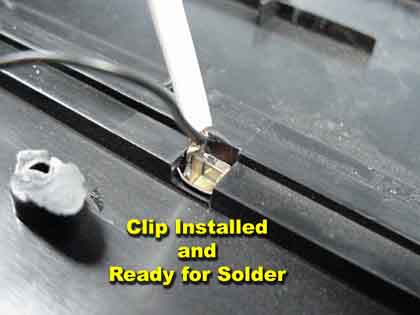
Now, follow these steps for all the wires inside the power base. The same method is used to replace the main power leads running from the posts to the track rails. An easy and reliable way to solder the track wires to the rails is to solder them to the existing track clips and then re-install them. Again, tin your wire end first, then place it right on top of the existing wire on the clip. Then apply your soldering iron tip to this new wire, and allow the solder to flow together.
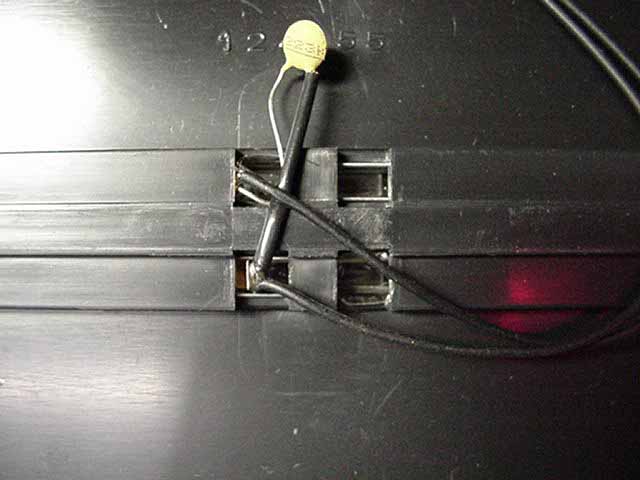
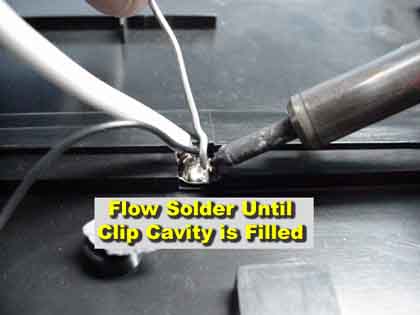
Once this is complete, re-install track clip into the track rail. You could stop right here, and your track is ready for racing. However, because some people want an even stronger connection, I went one step further. Once the clip is installed, I take additional solder and flow it inside this track clip until it is full. Why even use the track clip? Well, since the rails are of a stainless composite, instead of trying to score or roughen the inside of the rails to get the solder to hold, and take the chance on melting the track groove and surface, I have found using these clips to be a great deal easier.
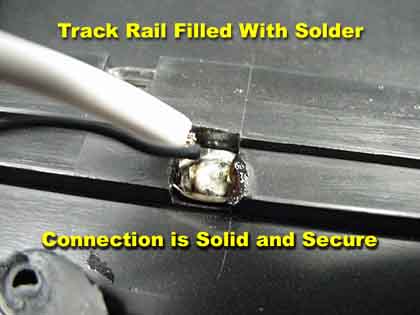
Yes, you might melt a little of the plastic UNDERNEATH as shown, but it will not harm the important track surface or groove.
Well that's it, you are finally finished! Hopefully, you have gained a small amount of knowledge about your Carrera power base. I have made these same modifications to my own power base, and can safely say we have had zero problems over the years. This is not intended to convince you that you HAVE to upgrade your stock system, it is only intended for those looking to perform the modifications shown. If you are thinking of performing this, and still want further assistance, feel free to contact me, and I will gladly help in any way I can.
And as always, feel free to contact me at wiseone@yhti.net about this article, or just the hobby in general. In addition, drop into our Message Forum and let us hear from you.
![]()